

Photoshop CS5 introduced the Puppet Warp tool. This useful new tool lets you set “pins” that act like joints. Moving one pin moves the pixels around it in relation to the other placed pins — imagine lifting the hand of a marionette with a string attached to the hand at one end and a bar at the other.
While clever people are exploring Puppet Warp’s effect on photos, few are using it on text. With Puppet Warp, you can take letters and entire words in amazing new directions.
Step 1
Let’s begin with a quick how-to on using Puppet Warp to move the arm of someone in a photo. If you’re already familiar with this, skip to the text part of the tutorial in Step 6.
A shot like the photo below works well:
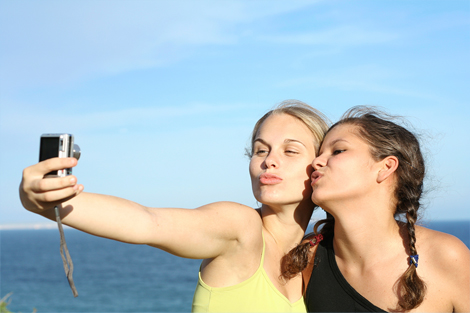
By mandygodbehear, iStockPhoto.
Puppet Warp affects one layer at a time, so you need to isolate the affected area and put it on its own layer. I selected the two women by using the Quick Selection tool, and I added the camera strap to the selection by holding Shift and using the Polygonal Lasso tool. Press Cmd-J (PC: Ctrl-J) to make the selected area a new layer. Click the Eye icon of the original Background layer on the Layers palette so that just this new layer is visible.

Step 2
Click the new layer in the Layers palette and go to Edit > Puppet Warp to automatically create a mesh.
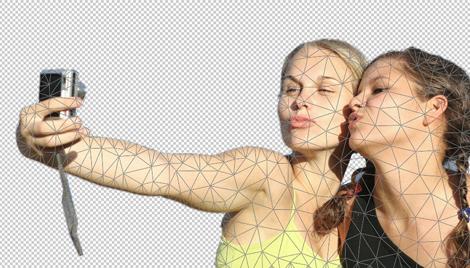
The Options palette gives you are a few options to consider, such as Density, which refers to the spacing in between the mesh points. The “more points” setting is more precise but requires more processor memory. I left it to the default for this example.
Step 3
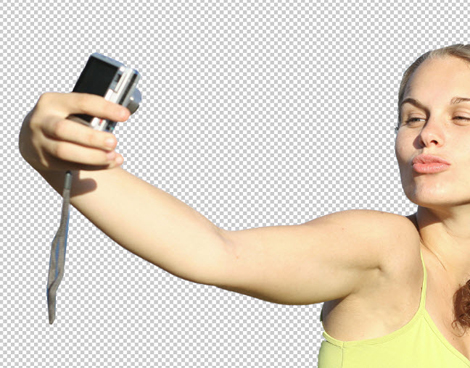
Next, click on the joint areas to add pins. Since I’ll be bending her arm only slightly at the elbow, I added just four pins, which are represented by the small yellow dots.

Step 4
Click and drag on one or more pins to adjust the placement of the parts of the photo. Press Return (PC: Enter) or click the checkmark on the Options palette to apply changes.
Step 5
Now that you’ve had a crash course on Puppet Warp, let’s use it to adjust text. Choose the text tool and type out a word or two. Set the font size to a high number, or after typing, select the Move tool, click Show Transform Controls on the Options palette, then click-and-drag a corner (holding Shift to maintain proportion) and press Return (PC: Enter) to make the text larger.

Step 6
With the text layer selected, go to Edit > Puppet Warp. A dialog will appear asking if you want to rasterize the layer; click OK. Once the grid appears, set the Density to Fewer Points.

Step 7
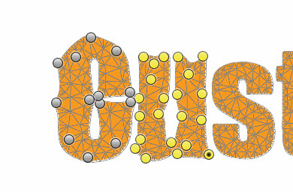
Add pins by clicking on the various parts of each letter. Note: Add all of the pins for one letter and adjust them before going onto the next letter.

The more pins you add, the more areas you can adjust. Make sure you add all the pins needed to a letter before adjusting any of them.
To apply the changes to the first word, press Return (PC: Enter).

Step 8
I want the next word, “Surfboards,” to mimic the shape of a surfboard. To do something similar with your word, press the Create New Layer icon on the bottom of the Layers palette. In this new layer, either draw a surfboard shape using the Custom Shape tool or place a surfboard photo or drawing. You’ll be adjusting the word to echo this guide shape. Move the layer below the layer with the word “Surfboards.”

Step 9
Click the text layer on the Layers palette and go to Edit > Puppet Warp. Click to add the pins one letter at a time, adjusting each letter before moving onto the next. Notice that I adjusted the pins so that the shape of the letters begin to resemble the shape behind the word.

Step 10
Press Return (PC: Enter) to apply adjustments.

You can use the shape as part of the design, or you can click the Eye icon next to the shape layer and use only the text.

This article was last modified on January 6, 2023
This article was first published on August 19, 2010
Commenting is easier and faster when you're logged in!

Recommended for you

Design How-To: Using Ghosted Backgrounds
A beautiful technique that's unusually easy to design: ghost and repeat a foregr...

Free Lightroom 5 QuickStart Guide
For anyone looking to get a solid grasp on how to use Adobe Photoshop Lightroom,...

Photoshop Blur Gallery: Path Blur
Editor’s Note: Don’t miss the first article in the Photoshop Blur Ga...