

The technique of “unwinding” a face was first explored by the Dutch artist M.C. Escher, who specialized in unlikely and impossible drawings. In this tutorial, you’ll start there and add a twist (pun intended) by including a ghosted version of the original face inside the winding helix, so you can see even those parts of the face that are missing.
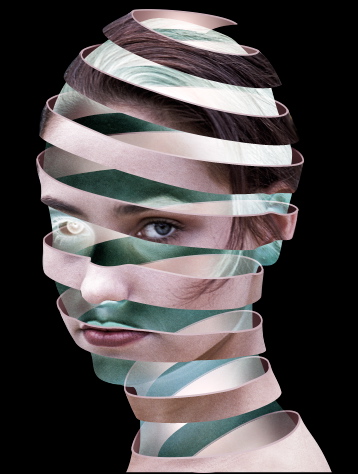
Here’s the final image. Click on it to see a larger version.

You can use just about any version of Adobe Photoshop to follow along with the steps below — from Photoshop 3 on up!
Step 1
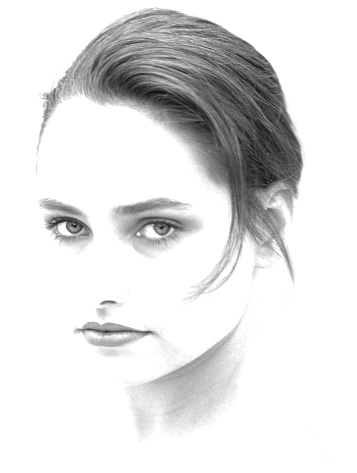
You can begin with just about any head. It helps if the model doesn’t have long, flowing hair, as this makes the process more difficult. Even with a figure whose hair is tied back, such as the one below, you need to treat it to better suit your purpose.

Step 2
Use your favorite masking technique to select and cut out the background. (For pointers, see “Easy Yet Advanced Masking Selections in Photoshop,” “Mask a Glass & Blend It with a New Background,” and “Master Masking with Photoshop’s Alpha Channels.”) The rest of this tutorial will go more smoothly if you completely remove any long hair. Here, I’ve taken out the hair at the back of the head and used the Patch tool to remove any loose strands from the shoulder. Make a new layer from the head.

Step 3
You need to make the head more stark and graphic in appearance. The quickest and most controllable way to do this is to duplicate the head layer and desaturate it to knock all the color out (Image > Adjustments > Desaturate). When youthen change the mode of the layer from Normal to Hard Light, the mid-tone disappears, leaving a stark version of the head.
Step 4
Changing the mode of the version on top of the original head strengthens the contrast without affecting the hue. Vary the opacity of the Hard Light layer until you get a result you like, then merge the two layers together.

Step 5
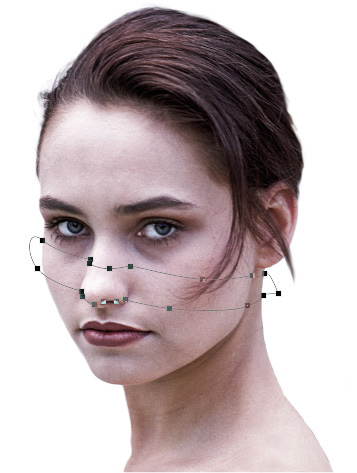
Draw a Pen path to make the first loop of the ribbon, following the curve of the head, and higher on one side than on the other. (Not familiar with Photoshop’s Pen tool? Check out ” Draw Paths with Photoshop’s Pen Tool .”) If you draw the path so it bends over the nose, it will accentuate the feature and will look more like a three-dimensional object when you’re finished.
Step 6
Keep drawing more paths as closed loops on the front of the head. The gaps between them should be more or less the same size as the ribbons themselves. Don’t worry about the precise shape too much: you can always adjust this later.

Step 7
Select all the paths, and choose Layer > Vector Mask > Current Path. This hides the layer outside the path, and gives us the opportunity to see exactly which parts are visible and which are hidden. You could have drawn the paths as a Vector Mask right from the start, but after you’d drawn the first path, you wouldn’t be able to see the rest of the image you were working on.

Step 8
Now that you can see the ribbon in full, you can adjust the path to make it look its best. If the path goes up to a corner point on the extreme right and left, it will look more as if the ribbon is curving around the shape of the head.

Step 9
Make a new layer behind the front ribbon, and fill it with a tone sampled from the head. Draw the back half of the ribbons with the Pen tool, joining the left side of each front ribbon to the right side of the ribbon directly above it. Make a smooth, flowing series of curves, to accentuate the roundness of the head. Then choose Layer > Vector Mask > Current Path again, and the new layer will be visible only inside the drawn path.

Step 10
Use the Burn tool, set to Midtones, to shade the sides of the interior ribbon (if you set it to Highlights, you’d get a dull, gray result from the shading). To add some bright spots, switch to the Dodge tool — or hold Alt with the Burn tool to temporarily access the Dodge.

Step 11
You now need to add some thickness to that ribbon. Hide the back ribbon layer, and make a new layer behind the head. Load the path for the front ribbon as a selection by holding Command (Mac)/Ctrl (Windows) and clicking on the Vector Mask icon in the Layers panel. Then, on the new layer, select Edit > Stroke and choose a value that’s an appropriate size for your image. (You can experiment with different sizes.) With black as the foreground color, the stroke will come out black, which makes it easier to see what you’re doing.

Step 12
You only want the stroke to be visible on the upper edge of each section of the ribbon, as you’re looking down on it from above. Use a hard-edged Eraser to erase the left, right, and bottom of each stroke.

Step 13
Make another new layer, and repeat the process to add a stroke that matches the Vector Mask for the back ribbon layer. Again, the back ribbon is hidden so you can see what’s going on more clearly.

Step 14
Erase the bottom part of the new stroke, so that once again, only the tops are visible. You’ll notice that the top and bottom strokes may not align perfectly, but this is easy to correct.

Step 15
To fill both strokes with the model’s skin color, use the Eyedropper tool to sample the color, and make sure it’s the foreground color. On each of the stroke layers, you could simply press alt-delete to fill with the foreground color, but this would fill the whole canvas area; pressing Alt-shift-delete instead fills the current pixels on that layer, but doesn’t affect the transparent areas. Now, using a combination of hard-edged Eraser and small hard-edged Brush, adjust the back stroke so it lines up with the front one.

Step 16
Show the back ribbon layer once more, so you can see the whole image. Using the Burn tool set to Midtones again, darken the back stroke to make shadows where it disappears behind the front ribbon. This adds a lot of realism and makes the lighting look much more convincing. Be careful not to shade too close to the ends, though, as they have to remain the same color as the front stroke.

Step 17
Make another copy of the original face, and move it behind the front ribbon and stroke. Draw a new path that follows the outline of the head, but which is somewhat smaller. Then choose Layer > Vector Mask > Current Path once more, to constrain the visibility of the layer to just that seen within the path. I’ve also changed the background color from white to black, to make the image stand out better.

Step 18
Use Image > Adjustments > Invert to invert the smaller face, turning white to black and the flesh tone to a ghostly blue. Being able to see the second eye adds a lot of power to the image, even if it is inverted.

Step 19
When you change the mode of the inverted layer from Normal to Screen, it only brightens up the layers beneath it — which means those areas that are already brighter than this layer will show through beneath it, letting you see the back of the ribbon.
Step 20
Finally, use the Burn tool to paint dark shadows on both sides of the front ribbon. This adds to the sense of roundness, and helps the image to blend in well with the dark background.

This article was last modified on July 11, 2023
This article was first published on May 24, 2010
Commenting is easier and faster when you're logged in!

Recommended for you

CreativePro Tip of the Week: Creating Dotted Lines in Photoshop
This CreativePro Tip of the Week on creating dotted lines in Photoshop was sent...
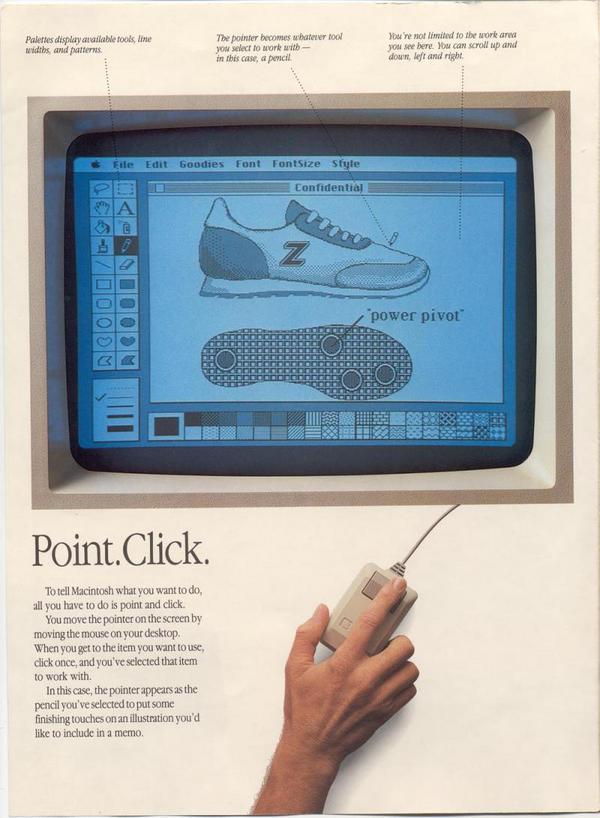
MacPaint in the Cloud
If you were around for the debut of the Macintosh in the 1980s, you might have a...

Photoshop Blur Gallery: Spin Blur
Learn a non-destructive, highly controllable way to apply selective blurs to ima...