
When you post a photo online — for example, on a portfolio site — you’re taking the risk that unscrupulous people will steal the file and use it without your permission, and maybe even claim the photo as their own. Watermarks are one way to protect or at least brand your online images. While adding a watermark doesn’t prevent anyone from downloading the image, it can deter some from taking credit for the photo and may be an opportunity for publicizing your work, as well.
You could just slap a copyright symbol and your name in huge type on the middle of the image:

But the less-intrusive option is a gradually transparent watermark that doesn’t detract from the photo. Place it somewhat close to the photo’s edge, and use the same watermark on all of your online images.
Step 1
In Adobe Photoshop, open an image and change its dimensions to the largest possible size you would post online. Double-click the Background layer; Photoshop will then rename the layer “Layer 0.”

Step 2
Click the Create New Layer icon on the bottom of the Layers palette. This will create a new layer called Layer 1.

Step 3
Select the Rectangular Marquee tool and draw out a selection across the image just big enough to hold your text.

Step 4
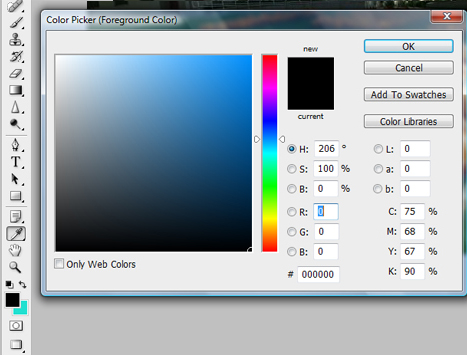
Click the Foreground color on the bottom of the Toolbar and set it to black.
Step 5
Press Option-Delete (PC: Alt-Backspace) to fill the selected area with black, then deselect the area by pressing Cmmnd-D (PC: Ctrl-D). Select Layer 1 in the Layers palette and click the palette’s Add Layer Mask icon.

Step 6
It’s time to add a gradient to the black area that blends from black to transparency.
Make sure the white box (the mask) of Layer 1 is selected in the Layers palette. Click the Gradient tool in the toolbar, then go up to the Options palette on the top of the screen and choose the black to white gradient from the Gradient picker’s drop-down list. Click-and-drag a gradient out over the black area. Hold shift to maintain a straight line. Depending on how far the gradient was drawn, it should look something like this:

Note that while you could skip the mask creation, you’d give up some flexibility. With a mask, you can adjust the mask or the gradient amount and angle at any time.
Step 7
Select the Move tool and position the gradient bar so it’s closer to the edge of the photo. Now select the Text tool, choose a text color other than black and a font, and click once over the black area to create a new text layer. Type some text: your name, your Web site or e-mail address, copyright information, etc.
If the box behind the text looks too obvious, try adjusting the Opacity setting of the gradient layer in the Layers palette. I set mine to 60%.

Step 8
Now you have a watermark on one image. To apply it to any photo, delete Layer 0 in the Layers palette to remove the original photo and save the file as a PSD with an appropriate name, such as “watermark.psd.” The checkerboard pattern behind the text and masked gradient layers indicates transparency.

Step 9
Open another photo, go to File > Place, and choose the PSD watermark file you just made. Click Place to apply the watermark to a different image.

Step 10
You can also apply your saved watermark to a photo with a dark background. Depending on the image, you may want to adjust the Opacity setting in the Layers palette of the placed watermark. I set the Opacity setting of this watermark to 50%.

Step 11
You don’t have to limit yourself to watermarks. You can also use this technique to add captions. Just make the gradient a little less transparent, and try using the Eyedropper tool to sample a color from the photo that you can then apply to the text.

Beyond Watermarks
Watermarks are only one step in protecting your images. I’m no lawyer, so don’t take my advice as the final word on the subject, but I’ve been told that if you have the only copy of the high-resolution version of the file, you can prove that the image is yours, even if someone tries to pass off a low-resolution copy of your image as their own.
According to United States copyright law, whenever you take a photo, you automatically own the copyright to it, although you can also register works with the Copyright Office. You can also add copyright information to an image’s metadata, although that’s easily changed.
This article was last modified on January 5, 2023
This article was first published on September 14, 2009
Commenting is easier and faster when you're logged in!

Recommended for you

Heavy Metal Madness: Men Live In a Vacuum… Tube
My last column, which addressed the gender gap in housework duties, drew a numbe...

How to Extract Images with Hair Using Photoshop’s Refine Mask
The following is an excerpt from Speaking Photoshop CS6 by Dave Bate. You can al...

10 Essential Tips for Working with Selections in Photoshop
Classic tips for making good selections in Photoshop