
Create a PDF Portfolio Using Illustrator
This article was provided courtesy of Peachpit.com. Read more about xtine burrough‘s book, Digital Foundations: Intro to Media Design with the Adobe
Creative Suite.
Every semester, my students assemble a PDF version of their portfolio to print or email potential employers. I used to teach the basic features of QuarkXPress, then InDesign, just for this purpose. However, Adobe Illustrator’s relatively new capacity for multiple Artboards provides a much–appreciated alternative to learning a new application in order to accomplish this single, important task.
Taking Stock of Your Resources
Before starting, you should take stock of your resources. Resize and save all of your portfolio images into one folder. Maintaining consistent image sizes results in a continuous portfolio layout design. I recommend using a separate set of dimensions for horizontal and vertical images. Sometimes the smallest image size limits the dimensions within your portfolio. You can also stack images next to each other in order to use a larger amount of space on one page.
Figure out how many pages you want to include in your portfolio and draw a general plan on paper. Some people recommend that portfolios only include your top ten pieces, while others encourage up to 20 images showing a diversity of samples. Most designers and employers will agree that you should put your best work and your second-best work on the first and last pages of your portfolio (though some reverse this order, where the second-best work is on page one, and the best piece is saved for last).
Organize Your Layout Using Illustrator
When you have a plan and a single folder containing all of your images, follow these steps using Adobe Illustrator:
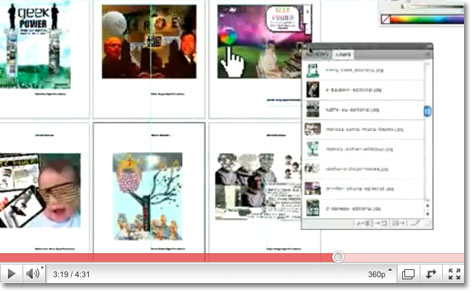
Click the image below to launch a video demonstrating my process, then follow the steps below to try it yourself.

1. Create a new Illustrator document.
2. Assign the number of Artboards you will need (don’t forget a title or contact page) and the paper size, then modify the Units settings and name the document.
3. You will see all of the Artboards in the new document. You can activate an Artboard by clicking on it with the Selection tool.
4. Use the Type tool to add a title to the first Artboard. This will be the first page of your PDF portfolio.
5. Activate the second Artboard, then choose File > Place to insert one of your portfolio images. Always use the Shift key while scaling images in order to maintain their proportions.
6. Set the type on your title and/or first portfolio image page.
7. Use guides to create repetition within the layout. Pull guides from the rulers located on the top and left side of the document. If your rulers are not displayed, choose View > Show Rulers or press Cmd+R (Ctrl+R on a PC).
8. Use the Rectangle Shape tool to draw a box in the negative space of one layout to comparing similar areas on separate Artboards. Negative space is the background or white area of the page. It is the opposite of positive space, usually defined by content that fills the layout. Simply draw a rectangle in the negative space on the first page, then move it to the second page for a visual comparison. Adjust elements in the positive space accordingly, or use this method to help with determining locations for guides on multiple Artboards. While repetition can be achieved in a layout design by repeating similar elements in the foreground, it can also be achieved by repeating similar sized areas of negative space.
9. Once you create the layout on one Artboard, copy guides or repeating design elements to the others. Group objects together by marqueeing over multiple items (click and drag from an area outside one item to an area just outside another[md]you will notice the anchor points becoming active on selected items). Press Cmd+G to group objects (Ctrl+G on a PC). Press the Option key while dragging with the Selection tool to copy and paste objects. I copied all items on my first page to each of the following pages. Now you have one portfolio image repeated several times, on multiple Artboards.
10. Swap images for new portfolio images on each board by using the Links panel. You will need to use the Links panel, so if it is not showing, choose Window > Links.
11. Activate the first Artboard where you have a repeated image; in my case, it is the third Artboard. Use the Selection tool to activate the repeated portfolio image. Choose Relink from the pull-down menu in the top-right corner of the Links panel. A dialog box will display the folder where the current image is saved on your hard drive.
12. Select a different portfolio image, and click OK.
13. Repeat steps 11 and 12 to activate each of the repeating portfolio images, one at a time, then swap the image using the Relink command.
14. If you copied a text box displaying image descriptions, be sure to use the Type tool to modify the text on each Artboard.
15. Save the native document in Adobe Illustrator format using File > Save or Cmd+S.
16. Save the PDF version of the file using File > Save As. In the Save As dialog box, choose Adobe PDF from the Format menu. Click the Save button and look for compression settings in the following PDF dialog box.
17. In the General Options settings, check all five boxes. In the Compression settings, you may choose to downsample bitmap images. Downsampling will reduce the amount of pixels in bitmap image files. If you are making a PDF version of your portfolio to send as an email attachment or to upload to a website, you should downsample your images to 72 dpi (dots per inch). If you are making a PDF version of your portfolio for printing, you should not downsample, as you will want to print images in high resolution.
18. View your PDF file to determine if your layout is consistent on every page.
19. Also view the new PDF file on your hard drive. If you downsampled bitmap images, you should have a PDF portfolio that is relatively small in file size. The number of bitmap images you included and the dpi that you selected for downsampling will both affect the final PDF file size. File size is reported in List view when you are viewing files in your Finder (or on the PC Desktop). On both Mac and PC platforms, you can Ctrl-click (or right-click) to choose Get Info in order to view information about the file, such as file size.
Conclusion
In the past, I insisted that students use a multi-page layout program such as QuarkXPress or InDesign to create multi-page documents, because I noticed students would often create multiple files in Illustrator to avoid learning a new software program. While this lazy work-around was inefficient for many reasons–not to mention employers would expect multi-page documents to be created in a software application that supports the production and printing process–I was sympathetic to students who were not planning for a future in designing or creating multi-page documents. Illustrator’s multiple Artboards feature meets the needs of students and professionals who occasionally assemble multi-page layouts.
© 2010 Pearson Education, Inc. All rights reserved.
This article was last modified on January 6, 2023
This article was first published on November 8, 2010
Commenting is easier and faster when you're logged in!

Recommended for you

Making Page Numbers as Words Instead of Numbers
Recently, I came upon a script that is so awesome that I have to share it with y...

Making A Perfect Triangle
Drawing a triangle can be a hassle, unless you know a couple of tricks

Chalk One Up for Inspiration
Reading about the anonymous students—calling themselves Dangerdust—at Columbus C...