Creating a Pattern Brush in Illustrator CC Using a Raster Image

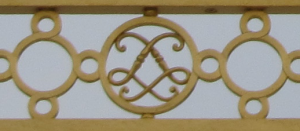
Making corners for Pattern brushes, once something so pesky and nearly impossible to figure out, can now be quite fun in Illustrator. You can create a Pattern brush from any vector or raster image, and for this example I chose a portion of a photograph of the golden gate from the palace of Versailles. This Pattern brush is fairly simple to make and apply to the path I’ve chosen. Some auto-generated corner tiles work well here, but for more complex images you may need to make adjustments to the image in Photoshop, as well as in Illustrator for the auto-generated corner tiles to work seamlessly.
1. Preparing the Image
To create a Pattern brush from a raster image, first prepare the image in Photoshop by isolating a section of the image you want. Then mask and crop it to a size close to what you think you’ll need in your final artwork to maintain the quality of your image. I was careful to make a selection that included the same design on each end to ensure a pretty good match later on. Since the design in the image is part of handmade physical object, I didn’t expect the pattern meet perfectly, just close enough that any misalignment wouldn’t be very obvious. If I needed it to be perfect, I would spend some time in Photoshop making adjustments to the selection.
The original photograph with the selection highlighted.
2. Importing the Image into Illustrator
To bring the small portion of the photo into Illustrator as an embedded image, I saved it as PNG (it’s smaller than PSD). You can open the PNG image directly in Illustrator or if you chose Edit > Place, you can disable the Link option.
Editor’s note: if you want all the details of linking and embedding images in Illustrator, check out Sandee Cohen’s article on that topic.
If you want to make a brush out of a linked image already in your file, you can select it and click Embed from the Control Panel. Once the image is opened in Illustrator, you’ll want to size it properly to be applied at 100% scale to the desired object (hold Shift while dragging a corner of the bounding box to maintain the original proportions or enable the Link icon to scale with the Free Transform tool).
The original image selection.
3. Making the Pattern brush
One way to make your pattern appear seamless is to start and end the pattern by reflecting the same portion of your image at both ends. This makes a pattern repeat without gaps in most of the variations (and saves you from having to tweak the image in Photoshop). To make it so my image would seamlessly repeat, I added a duplicate of the original image to either end (so there were three total), and reflecting one. Illustrator automatically groups the three images together when you make the brush.
The original selection with one copy added to each end to make the final image.
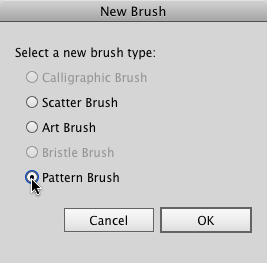
To make the Pattern brush, drag the image to the Brushes Panel, select Pattern Brush in the New Brush dialog box and click OK.
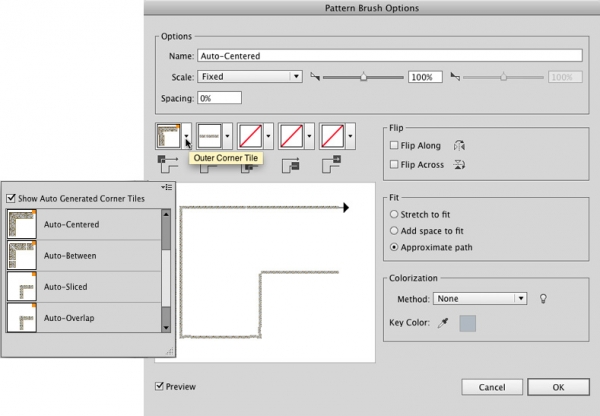
In Pattern Brush Options, I kept the Scale at the default 100%. I needed only Outer corner tiles for the frame, so I selected the Outer Corner Tile and for the first version of the brush I chose Auto-Centered, named the brush, then selected the Approximate Path option to maintain the proportion of the path. I made a rectangle with the Rectangle Tool and with it selected, clicked on the Pattern brush in the Brushes panel to apply the brush to the path.
Choose Pattern Brush in the New Brush dialog box and select the Auto-Centered Outer Corner Tile in Pattern Brush Options.
This article was last modified on October 25, 2013
This article was first published on October 25, 2013
Commenting is easier and faster when you're logged in!
Recommended for you

The Final Frontier of High Resolution Printing
When it comes to printing, what does the term "high resolution" mean t...

The Excuse Moose
Some creative blöks are easily side-stepped or avoided, such as the Perfection F...

Working with Illustrator’s Color Libraries
Illustrator has more options for adding colors to a document than just mixing co...


