

This tutorial will teach you how to turn any photo into a comic book style image very easily. You can use these skills to add some extra character to your photo albums, or to turn a sequence of photos into a comic book with little effort. The process is quite simple and fun, and even Photoshop beginners will have some lovely results to show at the end of this tutorial.

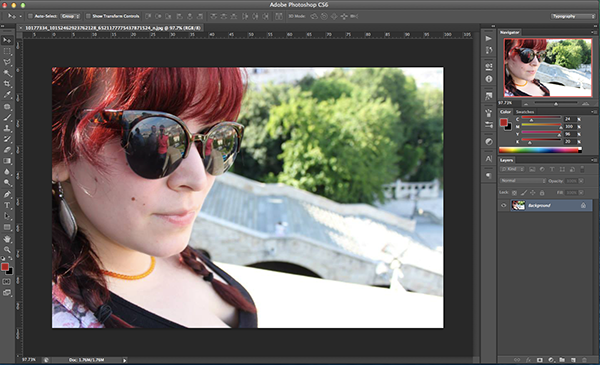
Start by opening the photo in Photoshop.
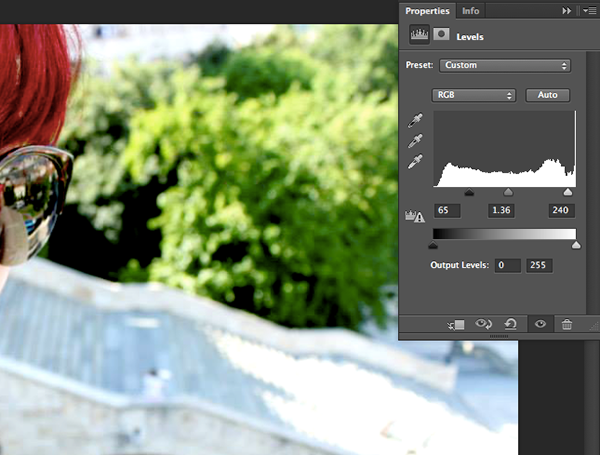
Add a new Levels Adjustments Layer on top of your photo by going to Layer > New Adjustment Layer > Levels, and make the contrast of your photo a bit higher. It usually works best if there are some parts that are completely black and some that are completely white, but feel free to experiment and see what works best with your photo.
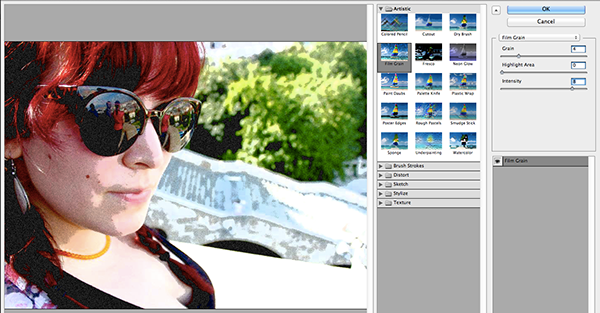
Flatten the image and open the Filter gallery by going to Filter > Filter Gallery… In the new window, select the Film Grain filter and adjust the settings. The default settings are usually just fine, but feel free to play around. This filter will add some more obvious shadows to your photo (which will help the final outcome look more realistic) and some general graininess (which will make the paper look somewhat old). Once you’re happy with the results, close the window by clicking OK.
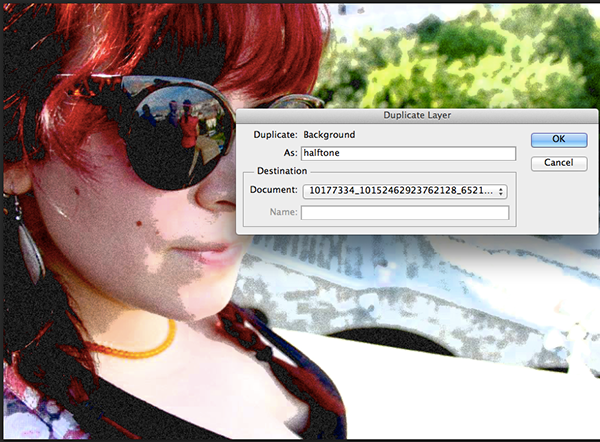
Duplicate the layer by right-clicking on it and selecting Duplicate Layer… Confirm by clicking OK.
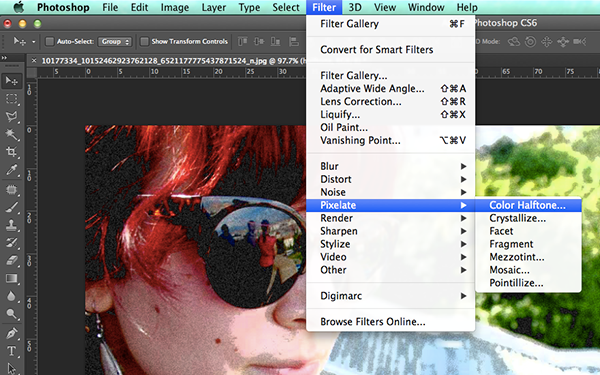
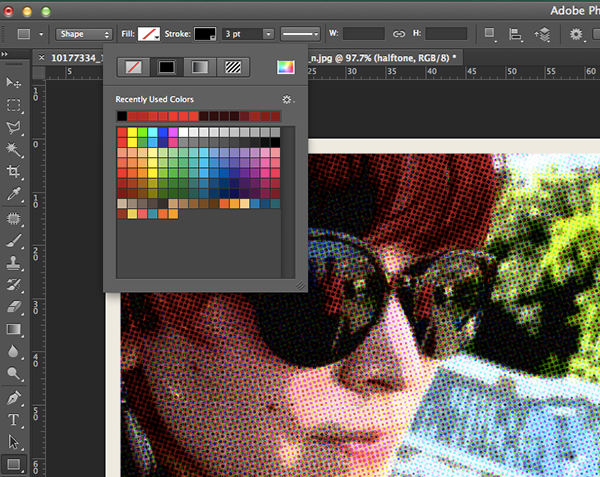
Select the top layer and go to Filter > Pixelate > Color Halftone… Once
the dialog window opens, change the Maximum Radius to 4, but leave all the other settings on Default, then click OK.
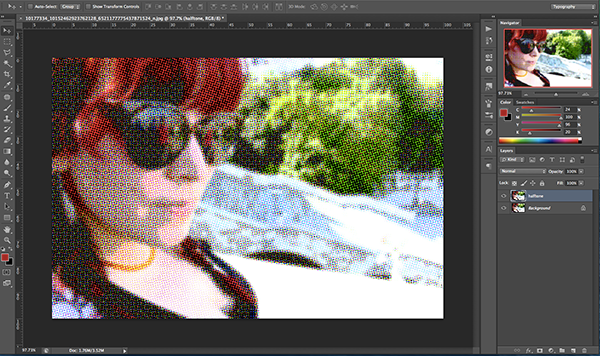
At this stage, your photo should look like the example below.
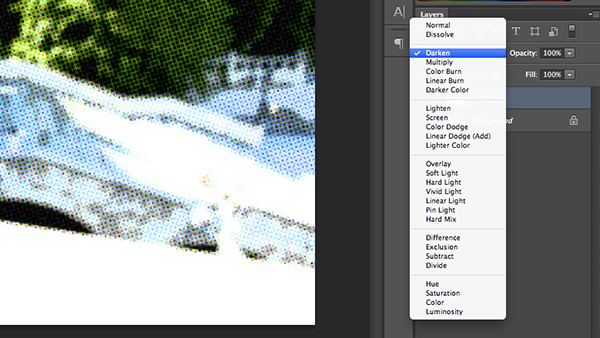
Now with the same (top) layer selected, set the layer’s blending mode to Darken in the Layers window. This will make the halftone blend with the layer underneath nicely, resulting in that retro comic style we’re after.
In order to make it look a bit more like a real comic book frame, we will add the stroke layer style to the top layer.
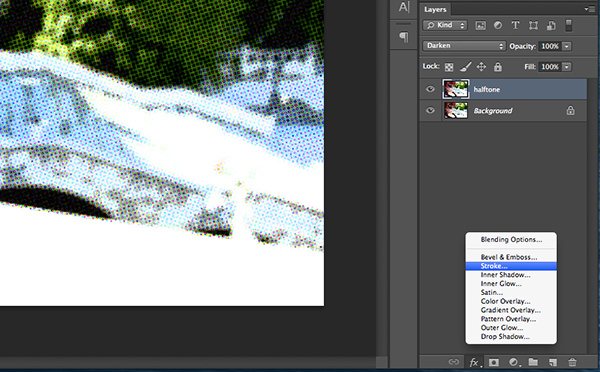
Set the stroke’s position to ‘Inside’, and make it about 13–20px thick, with a pale yellow or light grey as a color (anything that reminds you of old paper, really).

To complete the frame, select the rectangle drawing tool. Set the fill to invisible, the stroke to black, and the weight to 3 pt, then draw a rectangle on the inside border of the ‘old paper’ frame.
Change the rectangle tool’s fill option to a yellow gradient fill at 0 degrees, but keep all other settings the same. Now draw a long, small rectangle in the top left corner of the photo.
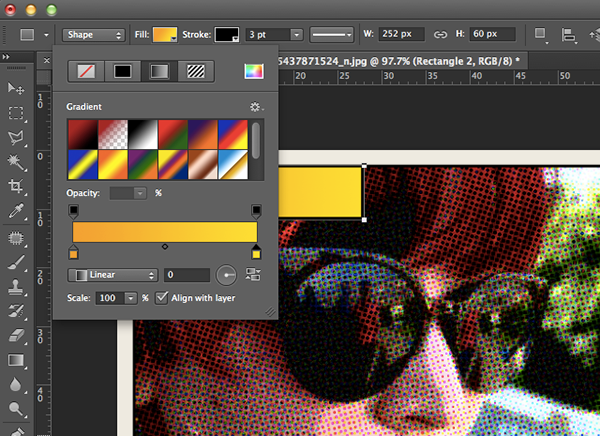
Draw another rectangle, a bit larger, in the bottom right corner of the photo, with a white fill color.
These 2 rectangles will act as your text fields.
Choose a comic-book style font (not Comic Sans, if possible!) and write something action related into the bottom rectangle. We used Caraban font here, but you can easily find many free, comic style fonts online.
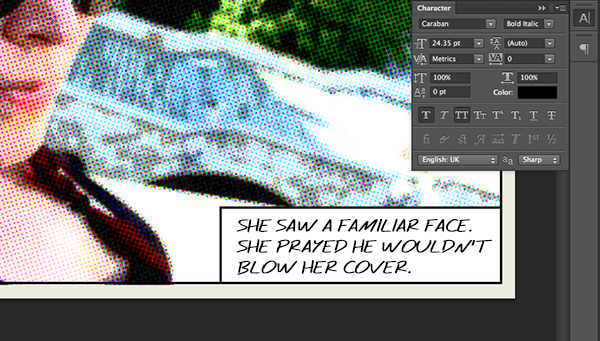
Write something time related in the top left rectangle. Make the capital letter significantly larger than the rest and, if there isn’t the bold version of the font you’re using (which often happens with free fonts you get online), add faux bold to it in the character menu. Make it red and add a black stroke to it (just a couple of pixels wide).
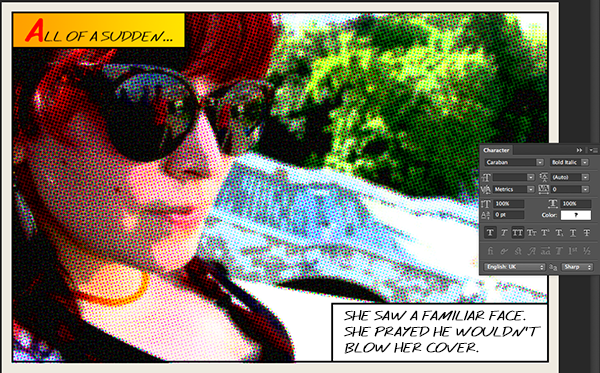
After you’ve made that capital letter really pop, resize the rectangle behind this line. The first letter should go just a little bit over the borders of the rectangle.
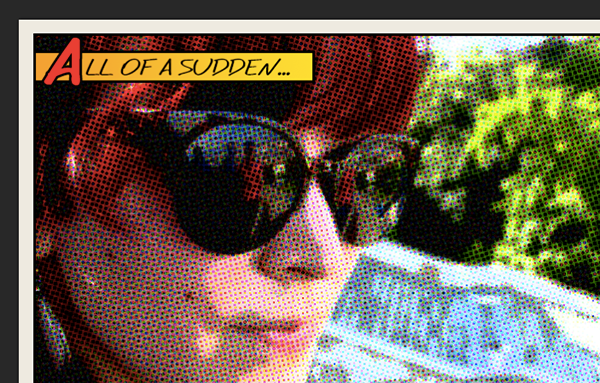
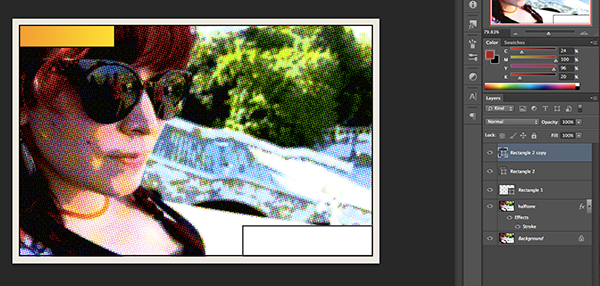
Your end result should look something like this.
There are many other ways in which you can further customize this. Instead of adding that black frame with the rectangle tool, for example, you can add extra dynamics by making it from individual lines, drawn slightly wonky, or you can add a hand-drawn frame you’ve scanned in yourself. Try playing with the typography a little bit as well, and put some words in bold to really emphasize them. There are many possibilities for further development, so feel free to explore them as you create comics with your friends and yourself as main characters.
Commenting is easier and faster when you're logged in!

Recommended for you
Using Adobe Stock in Photoshop
There’s no question that Adobe is putting a lot of resources into Adobe St...
Photoshop New Features Guide
For some time, InDesign users have enjoyed a great free resource that details wh...

Scanning Around With Gene: When Printers Went to War
Editor’s Note: We recognize that some of you will feel strongly about this...