Five Ways to Box a Paragraph in InDesign
This article was originally published in InDesign Magazine #66 (October 2014). Subscribe now!
Have you ever wanted to put a border around a paragraph in InDesign—or shading behind one? It’s a common need and after all these years, you’d think that accomplishing this simple task would be, well, simple. Unfortunately, you won’t find paragraph borders or shading among InDesign’s Paragraph Style options. But where there’s a will, there’s a way—or in this case, five ways to choose from.
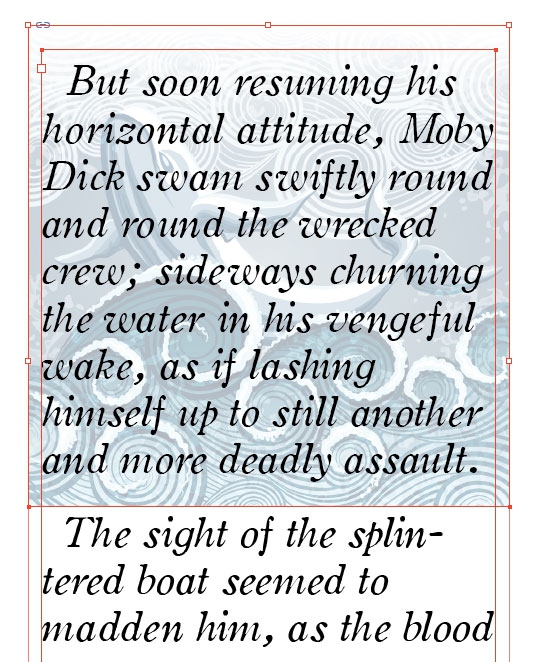
Draw a frame?The simplest and fastest solution is to just draw a frame over the paragraph, format it with the stroke, fill, and/or corner effects you want, and then move it behind the text. You can even use a pattern or photograph as a background (Figure 1). The downside is that if the text is edited or moves due to changes made elsewhere, you will have to manually resize and reposition the frame(s). And it won’t export to reflowable EPUB.
Figure 1: Sometimes the quickest solution is also the best. Just draw a frame, place it behind the paragraph, and go about your day.
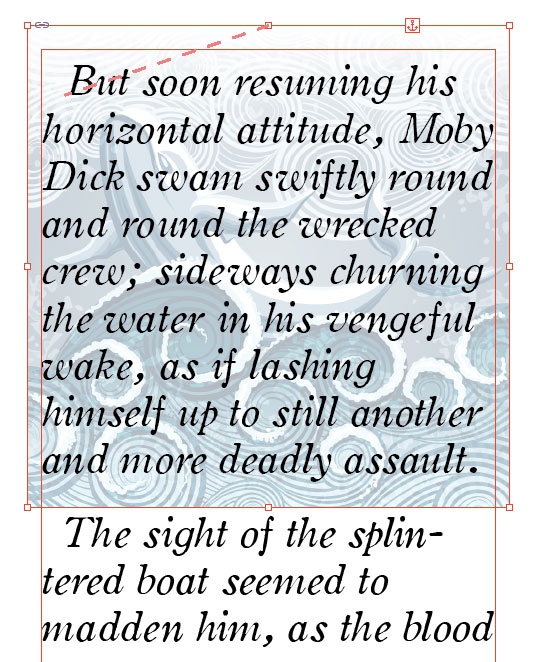
Draw and anchor a frame?Again, start by drawing a frame with the look you want over the paragraph. In the Control panel, set the blending mode to Multiply, and then anchor the frame in the text flow. The virtue of this method is that the border or shading flows along with the paragraph. But you’ll have to resize it manually if the paragraph is edited, and it won’t break across linked text frames. Also, the Multiply blend mode allows you to see black text as if it were in front of the frame. But this method won’t work with text that is colored anything other than black, or when other items are sitting behind the text frame (Figure 2). It works if you export to a fixed-layout EPUB, but not in a reflowable one (the image moves out of position).
Figure 2: Anchoring the frame makes it flow with the text, but also forces you to use a blending mode trick to make the text visible inside the background color or image.
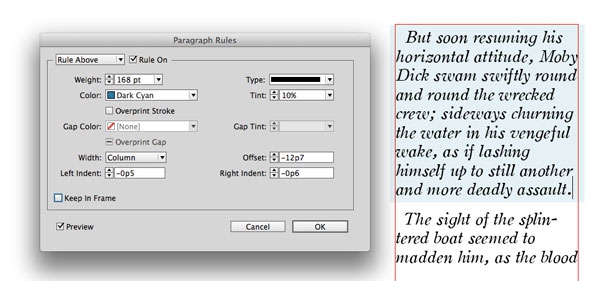
Use paragraph rules?Put your cursor in the paragraph, and choose Paragraph Rules from the Control panel menu. Make sure Preview is checked. Turn on either Rule Above or Rule Below. Set the width to Column, and use the Weight, Color, Offset, and Indent settings to fit the look you want for your paragraph (Figure 3).
Figure 3: Shading courtesy of a Paragraph Rule Above. It will move with the text, but any change in the length of the paragraph or text formatting will force you to adjust the weight and offset values.
This method only allows you to create a background, not a border. It will not break across linked text frames. You also need to create separate custom rules for each paragraph, and adjust them if the paragraph is edited. It will export OK to a fixed-layout EPUB. It will not export to a reflowable EPUB.
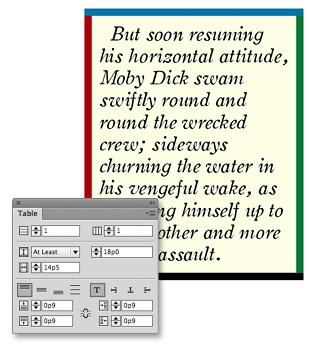
Use a single cell table?Select all the paragraph text, but not the paragraph return at the end. Choose Table > Convert Text to Table. In the dialog box, leave the settings at their defaults, and click OK. Select the table, and use the Control panel to format it with a stroke, fill, spacing, etc. This method allows the border/background to travel with the text if the paragraph is edited. It also allows you to have separate border formatting on each side (Figure 4). It will not break across linked frames. It will export to a fixed or reflowable EPUB. If you’re going to do this more than once, you should probably make table and cell styles to speed up the process and ensure consistent results.
Figure 4: Using a single-cell table means you can take advantage of all of InDesign’s table and cell options, including separate stroke styles for each side.
Use a plug-in?DTP Utils offers an add-on for InDesign (CS3–CC 2014) called Paragraph Border. It’s specifically dedicated to the task of making paragraph borders and shading. This is really for folks who need this feature on a regular basis, as part of their daily work. It’s the most powerful solution, and the most expensive, costing $49 for a license. With Paragraph Border installed, you get a new set of controls at the bottom of the Paragraph Style Options dialog box, called Border and Background (Figure 5). They allow you to apply separate borders to the top, bottom, left, and right sides of a paragraph, using any stroke styles. You can also apply backgrounds with solid colors or gradients, use corner effects, and control the offsets on each side. And there’s no problem when the paragraph spans or splits across columns, or is continued in another text frame—the borders and backgrounds always follow the text correctly.
Figure 5: The most powerful (and pricey) solution, DTP Utils’ Paragraph Border add-on.
While it is disappointing that more than ten years into its existence InDesign still lacks a simple solution for boxing a paragraph, you have plenty of alternatives to fit any situation, from quick-n-dirty (and free) to highly crafted and commercial.



I’ve used all of these methods, except the Paragraph Border add-on, at one time or another. But I did not know about the constraints for exporting to EPUB—good to know. Does a service provider who receives a document with Paragraph Border formatting have to have the add-on installed in order to work with the document? Thanks for this post!
Umm…Couldn’t you cut the text you want, paste it into a new frame with a text inset and stroke/fill applied to the text frame, then paste that frame back into your original text frame? So you would have an inline text frame-within-a- text frame. Might have some of the same drawbacks as above, but it’s another way of doing it.
Sure, if you didn’t care about keeping the paragraph in the main text flow, you could do that. And as you say it’d also have the same problems as other methods (not breaking across pages, not resizing automatically, etc). But sometimes that would work just fine.
I use Thomas G’s method all the time. Unless I’m misunderstanding, he’s talking about having the box described in your second option actually contain the text you want to box as well. Thus no need for the text to be set to multiply, either. It would be an anchored text box inside a text box.
This is also my main work habit, and it works fo rhte type of creations I make.
Hi Mike, wrong! Not 5! 2 other tips!https://expertsgraphiques.free.fr/index.php?po… keep a 3rd way for me: Javascript!
I have used a combination of paragraph rules, both above and below paragraph at the same time. By adjusting the values of the two you wind up having two rectangles stacked behind the text. I use rule above with larger values in the size of the rule and negative offsets for the outside of the border. Color can be the same as text or any color you choose. Rule below seems to be put in front of the rule above so I use smaller rule size and less of a negative offset. Color for this can be white or any color you choose the rectangle fill to be. It will move with the paragraph but, as mentioned in the article, if the paragraph is edited the values may have to be edited as well.
Thanks for the pointer to DTPUtils; ParagraphBorders, while it has a few loose ends, at least at the 5.5 release I needed, gets the job done a lot easier than handhacking, and well worth the money, which is, let’s face it, a lot less than Suite. :-)
ParagraphBorders utility does flow with the text for me but how did you get it to not ascend above the column when it is at the top of a column?
Also the plugin is 19.99USD now
Hi! This is a great article. Very helpful. I DTP Paragraph Border but the problem is I cannot get it to make ONE border around a text with several paragraphs. Any ideas? Thank you.
In case anyone comes to this in 2018, InDesign now has its own Paragraph Borders and Shading ability. Just click the drop down menu on the far right of the top menu bar (the hamburger icon). Or create a paragraph style.
Now we have an inbuilt feature for ‘Paragraph Border and Shading’ in Indesign CC 19. I am not sure about previous versions. It is very easy and hassle free.
Just put the insertion point in the required paragraph. Press Ctrl + M to get paragraph pan. Select ‘Paragraph Border and Shading’ from paragraph pannel and make necessary changes as one required.