

Have you ever tried to add more than one stroke to text using Photoshop’s Layer Styles panel? You can’t do it the traditional way. There is a workaround that involves making copies of your text, each with its own stroke of a different size, but it’s laborious, especially if you need to edit the text after you build up a couple copies.
If you use CS5 or earlier, Photoshop’s Smart Objects is the better choice. Once you know one simple trick—converting your text into a Smart Object—you can easily add multiple strokes, each with its own color and size. Your only limitation will be good taste. If you have Photoshop CS6, see the end of this tutorial for an even easier method.
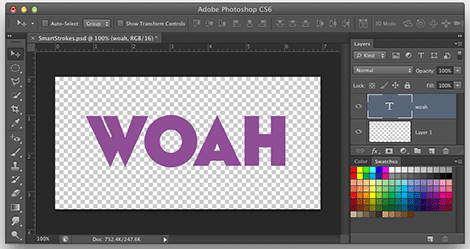
Step 1: Start with Text
Select Photoshop’s Type Tool (T) and type a word.
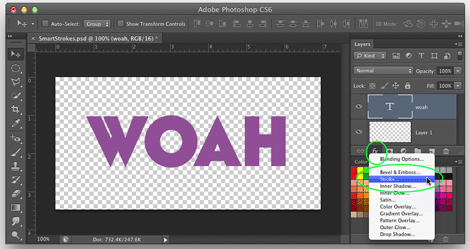
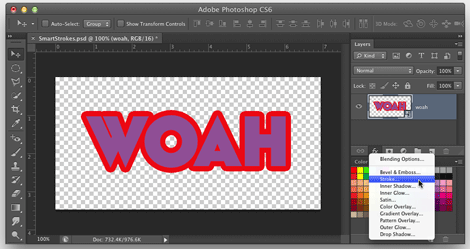
Step 2: Add an Old-Fashioned Stroke
In the Layers panel, click the fx icon and go down to the word Stroke.
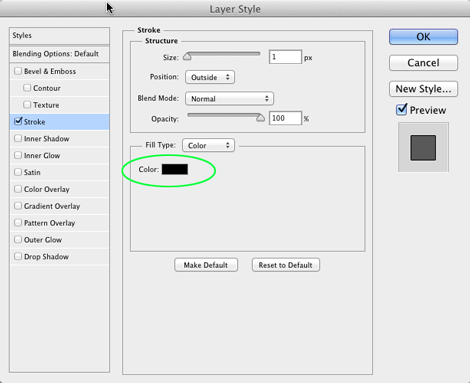
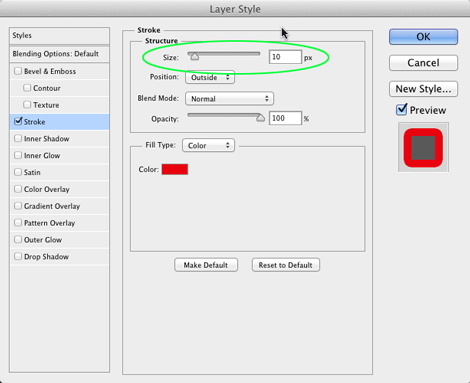
This opens the Layer Style dialog. In the Fill Type area, click on the Color swatch.
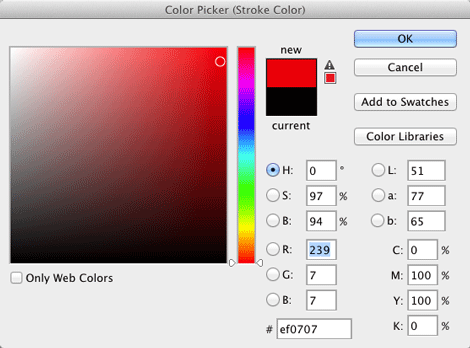
In the Color Picker dialog, choose a color for the stroke that will be next to the fill color in the type.
Back in the Layer Style dialog, select a stroke Size in the Structure area. Click OK.
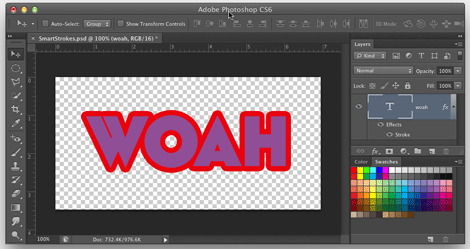
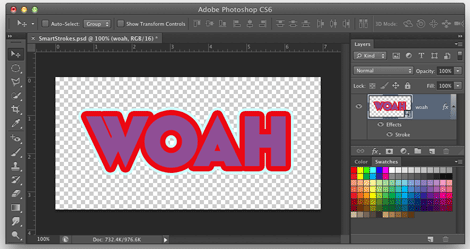
The result will look something like this:
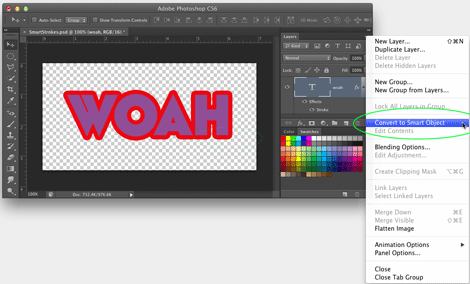
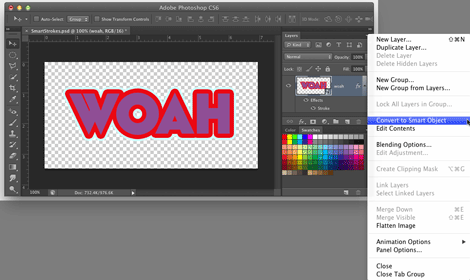
Step 3: Convert the Text to a Smart Object
In the Layers panel fly-out menu, choose Convert to Smart Object.
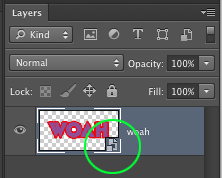
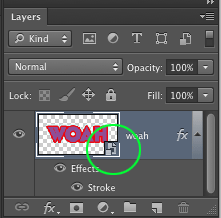
You’ll know it works when Photoshop changes the brackets around the Type layer and adds a funky icon to the lower-right corner of the layer.
Step 4: Add a Stroke to the Smart Object
Once again, go to the Layers panel, click the fx icon, and mouse down to the word Stroke.
In the Layer Style dialog, choose a new Stroke Color and, if you like, a new Stroke Size.

Click OK, and the results will look like this:
Step 5: Add More Strokes
Now you can add an infinite number of strokes by repeating steps 3 and 4.

But what if you realize you made a typo? No need to start from scratch—you’re too “Smart” for that.
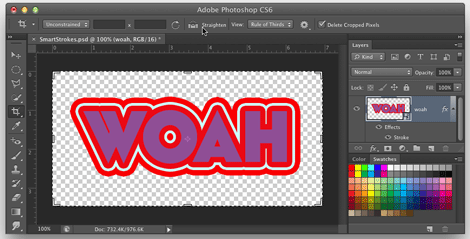
Step 6: Edit the Text
Double-click the Smart Object icon in the Layers panel:
Photoshop then displays a message that tells you to choose File > Save after you make your edits to the contents of the Smart Object, and to save the edited file in the same location.
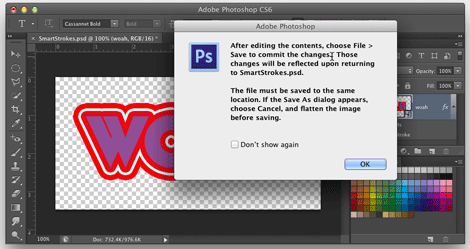
Once you click OK, Photoshop opens a new file. The contents will appear identical to your .psd, but look closely at the file name: It ends in .psb.
Depending on how many strokes you applied, you’ll have to double-click the Smart Object icon in the Layers panel and say OK to that File > Save message two, three, or more times. But finally, you’ll be able to make edits by choosing the Type tool and clicking inside the text.
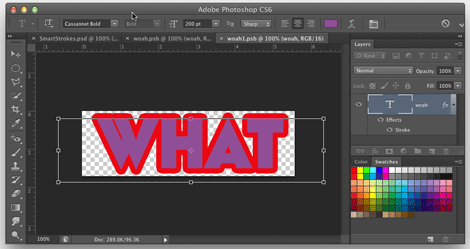
Be sure to close the .psb files in the order in which Photoshop opened them.
The results will look like this:
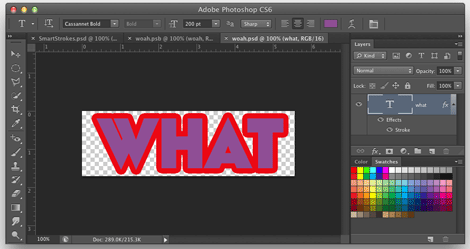
You can now add more strokes, if you wish. You can also edit the text later in your project by repeating this step.
Only for Photoshop CS6 Users
Those of you with Photoshop CS6 can take advantage of a new feature: the ability to apply layer styles to a group. Begin with steps 1 and 2 above, but then, instead of converting the text to a Smart Object, choose New Group from Layers in the Layers panel fly-out menu. Add a new stroke to that group. Repeat the group and stroke application as many times as you wish. Editing the text is as simple as choosing the Type tool and double-clicking in the main window.
This article was last modified on July 29, 2021
This article was first published on January 5, 2013
Commenting is easier and faster when you're logged in!

Recommended for you

Type of All Eras & Nations at the Typographic Hub
Press Release UKType has been working with the Birmingham Institute of Art &...

Working with Live Shapes in Adobe Illustrator
Adobe Illustrator has always been the go-to application for drawing vector-based...

Review : Lightroom Mobile
Review: Lightroom Mobile Pros: Automatic synchronization of edits between Lightr...