
If you’ve been using Photoshop for a while, you’ve probably realised by now you can create just about anything in it, from photo-montages to digital paintings. This tutorial will teach you a very simple technique for creating extraordinary kaleidoscopic patterns from scratch. That’s right, even someone using Photoshop for the first time can do it, and you won’t need anything apart from the software itself and your imagination.
Start by opening a new file as per usual. Set the size and the resolution of the canvas according to your intended use for the pattern. For print, you might want to choose a larger canvas and 300 dpi resolution, for example.

Opening new file
If, however, this is going to be a web banner or a background for your Facebook cover, you won’t need such a large canvas and a resolution of between 72 and 155 dpi will suffice.
Using the Brush Tool draw a random scribble. At this point your art skills really don’t matter; just make sure you’re using a few different colours (or shades of one like I’m using here) and vary the brush thickness. If you’re feeling especially inspired, you can even combine different brushes and hardness options for added texture.

Creating an abstract scribble
Open the Liquify window by selecting Filter > Liquify (Ctrl+Shift+X). This is where you’ll make your scribble a bit more dynamic, fluid, and interesting. Using the Liquify tools on the left, smudge colours and warp different areas.

Developing the scribble further using Liquify filters
This step makes your random scribble a bit more organic looking, which will make the pattern tiles connect in a natural-feeling way. There’s no right or wrong at this stage, although having a couple of areas where several colours meet in thin ‘threads’ as well as places where colour is mainly solid, tends to give the best results and a good visual balance. If you think you’ve made it too complex, just click on Reconstruct All on your right hand side, and start again.
Once you’re happy with what your random scribble has become, click OK on the right hand side to save it. This will bring you back to the main canvas, where you’ll need to cut the scribble into a square. You can do that with the Marquee tool from the tool box on the left (Shortcut M), holding Shift while selecting to keep it square.

Selecting the square shape with the Marquee tool
Right click the selected area and click on the ‘Layer via Cut’ option.
You can delete the layer with the remains of the scribble, or simply paint it a solid colour, as you won’t need those any more. At this stage, all you need to have on your canvas is a square shaped tile, like the one in the photo below.

Square pattern tile
With the tile layer selected go to Edit > Free Transform (or Ctrl+T) and rotate the tile by 45 degrees.

Rotated tile
Press Enter to confirm the transformation, then cut a triangle shape out of the tile with the Marquee tool: select the top part of the square and hit Backspace to delete it, then Cut the remaining half of the triangle.

Cutting out the triangle from the tile
It doesn’t matter which order you do this in, as long as you cut out an isosceles triangle (one with 90-45-45 angles), like in the screenshot below. If there are white areas close to the edges of your triangle, you can add colour to your background to make it more visible. It doesn’t matter what the colour is as it won’t be visible in the final piece.

Triangle example
Now this is where the fun begins. Copy the triangle by right clicking the layer it’s on and selecting Duplicate Layer from the menu. With this new layer selected, go to Edit > Free Transform (at this point you might want to adopt that Ctrl+T shortcut, as you’ll be using this tool repeatedly). Right click the triangle and select Flip Horizontal.

Flipping the triangle horizontally.
Place the mirroring triangles side-by-side so that they form one larger triangle, then merge their layers by selecting both of them (hold Ctrl while clicking on the in the layer window), right-clicking, and choosing Merge Layers from the menu.

Merging layers
Now duplicate this freshly made triangle in the same way as before.

Duplicating the layer

Duplicated large triangle
Press Ctrl + T and rotate the layer by 180 degrees.
After you confirm the transformation by hitting Enter, align the triangles so they create a single square like in the screenshot below. Merge the layers in the same way you merged the previous two.

The square made out of 4 triangles by mirroring
Duplicate this square and place it directly underneath the original one.

Duplicating the square
Duplicate it again, and rotate it by 90 degrees.

Rotating the square
Now place it between the first two.

Placing the third square
Duplicate the third square and place it in the way that will result in a new, larger, and – most importantly – tileable square. Merge all of the layers so you can tile this easily.

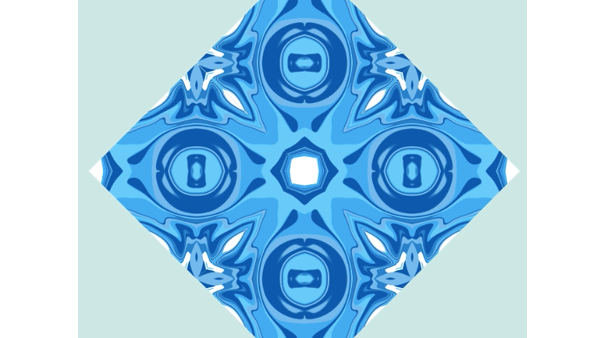
Tileable square
Copy and tile these squares until you cover the whole canvas.

Once you master the technique, try cutting out 90-60-30 triangles and creating patterns using those, or use photos or text as your foundation instead of drawing one yourself.
This article was last modified on October 22, 2014
This article was first published on October 22, 2014
Commenting is easier and faster when you're logged in!

Recommended for you

Accelerate Graphics Production Using Metadata Filters in Adobe Bridge and Lightroom
You’ve got a folder full of images and you need to run some production chores on...

dot-font: Fun with the Push Pin Legacy
dot-font was a collection of short articles written by editor and typographer Jo...
Adobe Paper Textures by Russell Brown
You can completely change the mood evoked by an image by adding textures and ble...