How to Create Trees in Photoshop, Part 2

In part 1 of this tutorial, we saw how to use the new Tree feature in the 14.2 update to Photoshop CC to create trees directly within the program, using an enhancement to the Scripted Fill dialog box.
The trees created in this way are good physical representations of over 20 different types of tree, right down to the arrangement of the trunk and branches and the shape of the leaves. But they never look quite right in a montage, because they don’t have that degree of realism that makes them truly blend into your chosen background.
Here, we’ll see how to take the tree we created earlier and make it look much more like a true part of this urban environment.
Where we left off
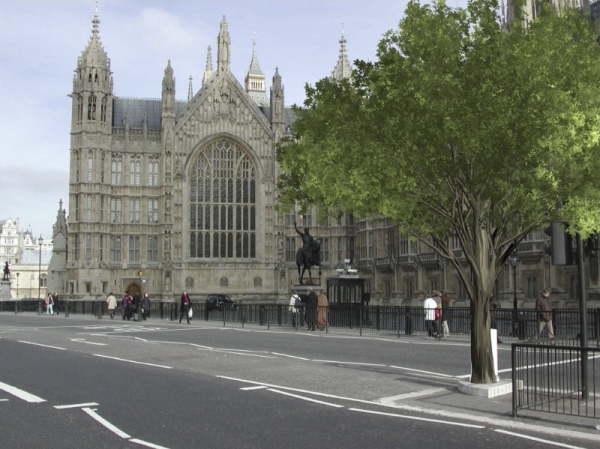
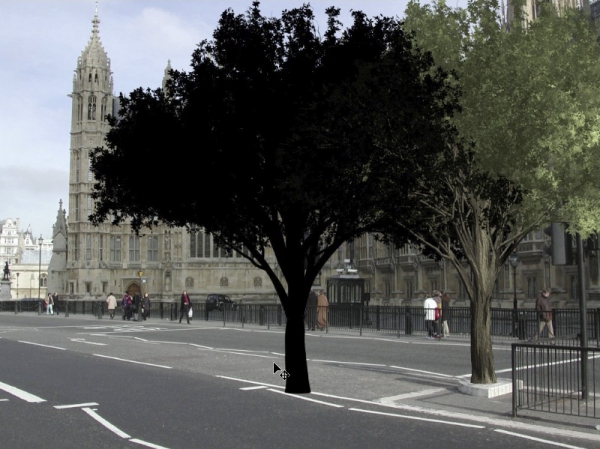
Here’s the tree as we created it in part 1. The size is appropriate for a young tree, and both the angle of view and the lighting are correct; but it doesn’t look enough like a real tree to be a convincing part of the scene.
Select the bark
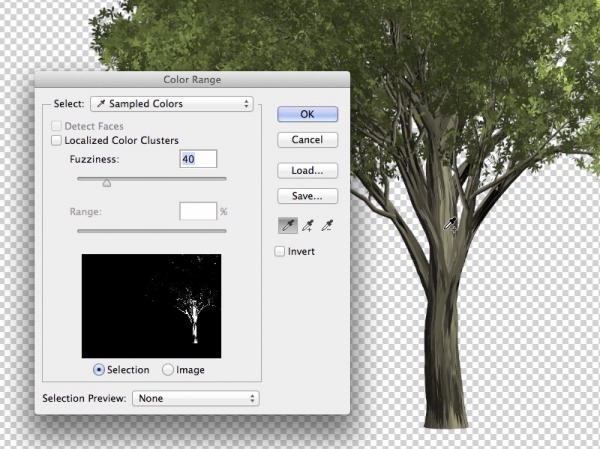
Hide the background layer so that just the tree is visible, and open the Select > Color Range dialog box. Click on the trunk of the tree, and you’ll see the selection area shown in white on the thumbnail. Hold the Shift key and drag over the trunk until all the bark color is selected. Hit OK, then choose Layer > New > Layer via Copy to make a new layer from the selection.
Oil the wood
It may seem surprising, but the Oil Paint filter does a good job here—you’ll find it near the top of the Filter menu. Choose a Cleanliness setting of zero, and a small scale; adjust the Angular Direction so that the bark looks like it’s lit from above. When you’re happy with the result, click OK.
Tone down the leaves
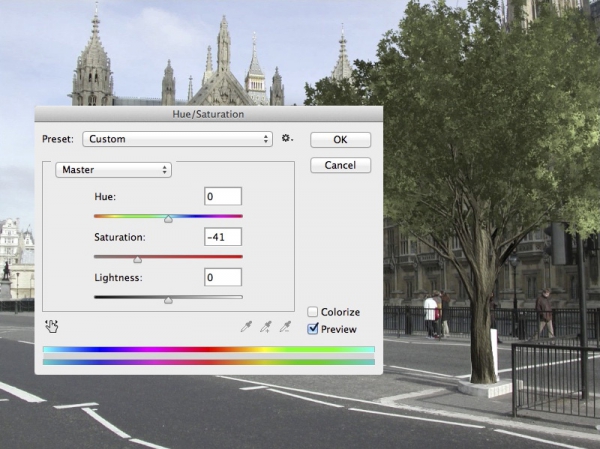
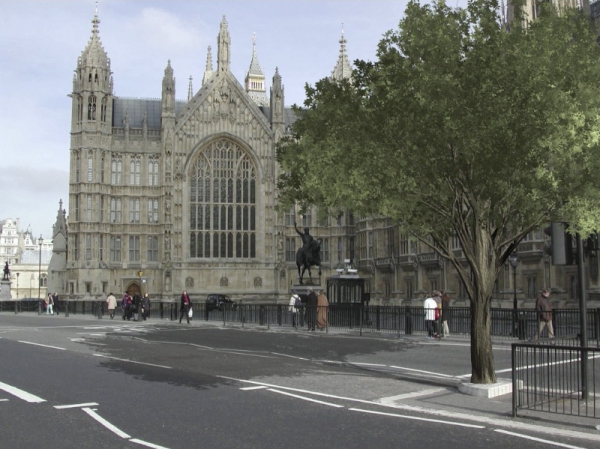
The leaves on our tree are far too brightly lit for this shady scene out of direct sunlight. While it would be possible to change the color when generating the tree, it’s a lot easier to open Adjustments > Hue/Saturation, and then drag the Saturation slider to the left.
Fix the background
There’s a lot of mess behind the trunk of the tree—we can see pieces of the original bollard, and part of a pedestrian. Make a new layer just above the background, and switch to the Clone tool. On the Options Bar, set this tool to sample Current & Below, and then sample small areas of the background with which to clone out the offending objects. Because you’re working on a separate layer, it’s easy to erase and correct any mistakes.
Build the shadow
To make the shadow, first duplicate the tree layer. The easiest way to do this is to hold Option/Alt and (with the Move tool) drag the original tree to the side. Press D to set the foreground color to black, then use Command+Option Backspace (Mac) Ctrl+Alt Backspace (Win) to fill the tree with the foreground color. (Adding the Shift key prevents the black from leaking out of the existing pixels on the layer).
Finish the shadow
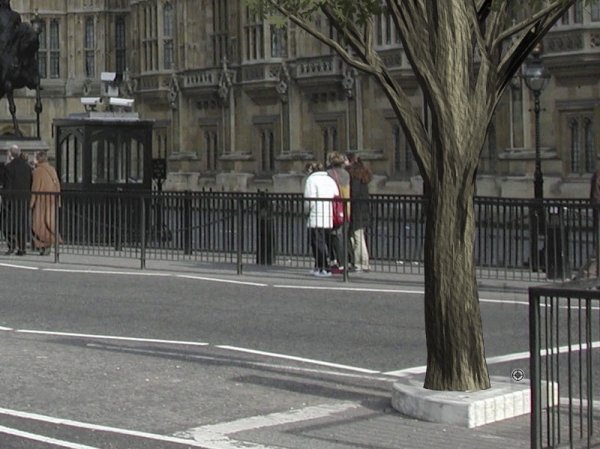
Use Free Transform to distort the shadow so that it appears to lie flat along the ground, and in the Layers panel, reduce its opacity to around 30%. You’ll need to erase the shadow where it appears over the side of the bollard’s plinth, and paint in a little more right in front of the tree.
Add some more trees
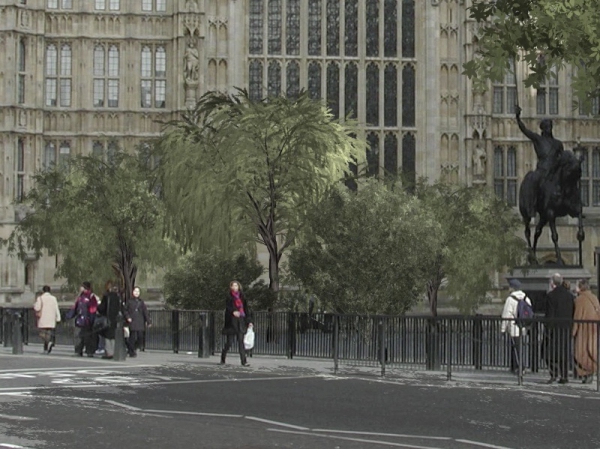
While you’re at it, why not plant a few more trees, using exactly the same technique as before. Here, I’ve added a selection of trees, and masked them so that they appear behind the railings. As we’ve done here, I’ve also desaturated all the trees so that they don’t jump out of the scene.
The finishing touch
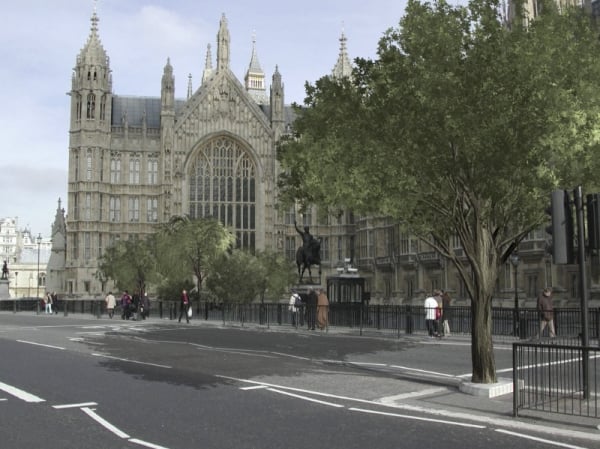
Adding elements to a montage always looks more convincing if part of the background image comes in front of the new layers. Here, it makes sense to tuck the tree behind the traffic light. But the tree is now in two layers—as well as the existing one, there’s now a separate layer for the trunk. So make a new Layer Group from these two layers, and add a Layer Mask to the group. Paint in black with a small, hard-edged brush to hide the group, and paint in white to reveal it again.
 ht=”448″ class=”image-article-full-column-width” />
The finished image
Here’s the completed image. With the shadow in place, with the new bark and toned-down leaves, the trees look far more like they could be a real part of this view; and bringing the traffic light to the front does the job of fixing the main tree more firmly into the scene.
This article was last modified on June 30, 2023
This article was first published on April 8, 2014
Commenting is easier and faster when you're logged in!
Recommended for you

Alien Skin Software Brings the Look of Film to iPhone with Alt Photo
Press Release Raleigh, North Carolina –Alien Skin Software has announced the imm...
Add Grain Effects to Photos and Type in InDesign
Using just six variables in the Effects panel can achieve an almost infinite var...

How to Create Kaleidoscopic Patterns in Photoshop
If you’ve been using Photoshop for a while, you’ve probably realised by now you...


