

Splitting Hairs with Refine Mask
We can only accomplish so much using manual masking techniques. If hair is wispy, tussled or wild, then Refine Mask is a good option. Yet Refine Mask has its limitations, as do all tools, so you’ll often find yourself doing some final clean?up on the mask using a brush. That’s why it’s so important to be comfortable with the manual masking techniques we just discussed. Refine Mask would have helped with the foxes and bear photos, but I wanted you to become familiar with manual masking techniques first.
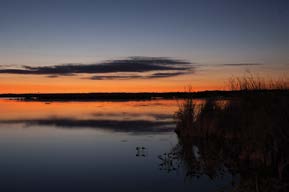
Dina’s Sunset is yet another wonderful photo from Shari Kastner.
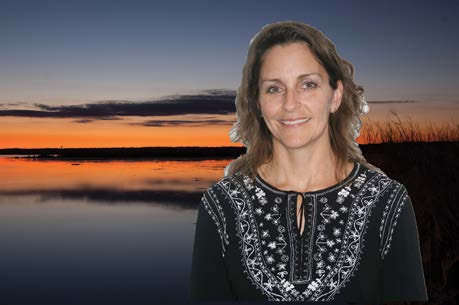
Dina is a colleague of mine, and I took this picture of her in the hallway at WCTC when Refine Mask first came out.

Since then, I’ve sent Dina to countless locations in my virtual Photoshop world. She’s been on mountain peaks, on glaciers, in front of water falls, and numerous other places. Nothing seems to fluster her. No matter where I send her, she always appears comfortable and natural in her surroundings, thanks in part to Refine Mask.
Prepare the images for Refine Mask
Our Refine Mask extraction starts out just as it did when we did manual masking.
- Drag Dina.jpg onto Dina’s Sunset.jpg. In this case, you won’t need to hold Shift to center Dina on the sunset scene. Place her where you like.
- Select Dina using the selection method of your choice. I used the Quick Selection tool. As you make the selection, take care not to include the shadow behind her right arm. I had to Option+Drag/Alt+Drag with the Quick Selection tool to exclude the shadow.
- Add a layer mask.
- Save the file in Photoshop format and name it Dina Final.psd.

Option+Drag/Alt+Drag to deselect the shadow.
Not very good, is it? There’s that cut-with-scissors look that we need to avoid.Can you imagine manually masking around each individual hair to fix that? Fortunately, Refine Mask can isolate those hairs for us.
The problems are pretty obvious. The hair doesn’t blend with the background, and there’s a fine white line along her left sleeve.
Become acquainted with the Masks properties.
Double?click the layer mask to bring up the Properties panel. To the right of the Layer Mask icon are two icons. The first one lets you select the layer mask, and the second lets you add a vector mask, which we don’t need. Below that are two sliders. The Density slider reduces the opacity of the layer mask. Drag it to the left and watch how the mask changes from black to gray. Drag the Feather slider to the right, and Dina begins to look like a holy spirit, surrounded by a white aura. That’s a nice effect, but not one we’re looking for right now.
The Refine section has three buttons: Mask Edge, Color Range and Invert. Color Range invokes the Select>Color Range command, and Invert swaps the black and white portions of the mask. We could do the same thing with the keyboard shortcut Command+I/Control+I. The Mask Edge button sends you to the Refine Mask panel, and that’s where all the magic happens. Click Mask Edge, and let’s see what it can do.
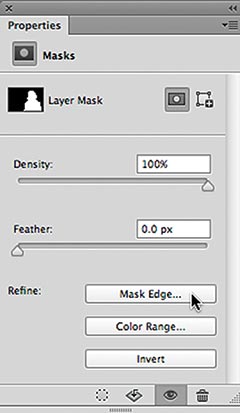
Click Mask Edge to access the Refine Mask panel.
Refine Mask viewing options
The Refine Mask panel is organized into four sections: View Mode, Edge Detection, Adjust Edge and Output. View Mode lets you view your image in various ways. Click the down arrow to the right of the View icon to reveal a selection of backdrops. Choosing the proper backdrop is important, because masking flaws can be profoundly noticeable against some backgrounds, yet all but disappear against others. Notice, for example, how much better Dina looks against the white background compared to the black background. That’s because Dina’s original background was basically white. Whenever you extract an image from one background and place it into a similarly colored background, your job is much easier.
Our best viewing option is On Layers (type L). This is the background that we want Dina to blend with. As I work in Refine Mask, I often switch back and forth between On Layers (the final destination) and Reveal Layers (the original). The two check boxes, Show Radius and Show Original, don’t work yet, because we haven’t done any mask refining yet. We’ll come back to those.

The View pop-up menu lets you see your image on various backgrounds.
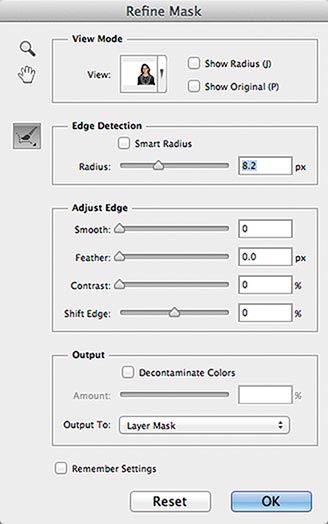
The Refine Mask panel is organized into four sections. Work from top to bottom and click OK to apply the results.
This article was last modified on July 20, 2021
This article was first published on April 5, 2013
Commenting is easier and faster when you're logged in!

Recommended for you

How to Digitize a Film Archive with Adobe Lightroom or Adobe Camera Raw
Digitizing an archive of film images can be a time-consuming process. Instead of...
Photoshop for Beginners
Becoming a Photoshop expert is probably on a lot of folks’ bucket lists. W...

CreativePro Tip of the Week: Locking Objects in Illustrator
This CreativePro Tip of the Week on locking objects in Illustrator was sent to C...