
Adobe Illustrator gives you many of the same compositing features found in Photoshop, such as control over blending modes, opacity, and masking. While Photoshop is a better tool for editing at the pixel level, Illustrator is perfectly suitable for compositing vector and whole bitmap objects. Sharon Steuer (painter and author of many books, including The Illustrator WOW! series) chose to create a Valentine’s Day card design in Illustrator because it’s a mix of type, vector graphics with applied effects, and imported bitmap images (Figure 1).

Figure 1. The completed illustration.
You can download a PDF file of the valentine card from Sharon Steuer’s Web site.
Steuer’s concept for the card was based on the phrase “Money can’t buy me love.” She decided to start from a hand-drawn heart and images of currency and a lace doily.
Steuer’s normal working style involves continuous experimentation with different design ideas, applied to copies of the elements in a document. Illustrator lends itself to this process by making it easy to copy objects or layers, vary their appearance, and hide or show different combinations of objects or layers.
Setting Up the Main Elements
Steuer began by importing an image of currency. In Illustrator, she chose File > Place, selected the scan, and clicked Place. Steuer also placed a scan of a doily and sent it behind the currency (Object > Arrange > Send to Back).
Next, Steuer used the Pen tool to draw the shape of a heart shape and gave it a red outline stroke. With the major components in place (Figure 2), she could step back and decide how she wanted to refine the illustration.

Figure 2. The main elements in Illustrator.
Masking an Image
Steuer used an opacity mask to fade the currency image from top to bottom (Figures 3, 4, and 5). In an opacity mask, black areas are transparent, and white areas are opaque. For the mask, she drew a black-to-white gradient. She positioned it over the currency image, selected both objects, and chose “Make Opacity Mask” from the Transparency palette menu.
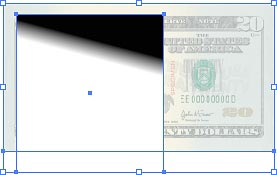
Figure 3. A gradient positioned over the imported currency image.

The gradient after being applied to the current image with an opacity mask.

The Transparency palette after creating the opacity mask.
Varying the Heart Outline
To add texture and visual interest, Steuer created playful variations on the heart outline. She duplicated the heart outline (Edit > Copy, then Edit > Paste in Front). After some experimentation, she decided she liked the look the heart outline after enlarging it and applying a thicker stroke weight, the Scribble effect (Effect > Stylize > Scribble), and a shade of red (Figures 6 and 7).

Figure 6. The original heart outline over the composed elements.

Figure 7. The heart outline after applying the Scribble effect.
Steuer also used the Ellipse tool to draw a circle to echo the doily shape. As with the heart outline, she applied a thick stroke and the Scribble effect to the circle. Instead of applying a red color to the stroke, she applied a bluish gray (Figures 8 and 9).

Figure 8. A blue-gray circle added around the heart.

Figure 9. The circle after applying the Scribble effect.
Experimenting with Blending Modes
With the main elements in place, Steuer experimented with ways to integrate the design elements. She tried different opacity values and blending modes to adjust the color and tone relationships among objects and layers.
Opacity applies an overall level of transparency to a layer or object, while blending modes change the tone and color relationships between areas that overlap. For example, the Overlay mode increases the contrast between light and dark overlapping areas, and the Color mode applies an object’s hue and saturation to underlying areas. You can use the Transparency palette to change the blending mode and opacity for a selected layer or for selected objects. If a blending mode created a stronger effect than Steuer wanted, she adjusted the opacity of the layer or object to lessen the intensity of the blending mode (Figure 10).
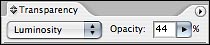
Figure 10. The blending mode pop-up menu and Opacity value in the Transparency palette.
When you apply appearance attributes, the object or layer’s target circle in the Layers palette becomes shaded. This makes it easy to identify layers where attributes like Opacity and Blending Mode have changed; just click an object’s target indicator in the Layers palette (Figure 11), and then look at the Appearance palette to see the object’s appearance settings (Figure 12).

Figure 11. Shaded circles indicate objects or layers with appearance changes such as blending modes, opacity, and effects.

Figure 12. The Appearance palette for a selected heart outline.
Creating Duplicates
At this point, Steuer felt the illustration needed a bit more depth and impact. After exploring different ideas, she settled on duplicating some of the shapes she already had and simply changing their attributes (Figure 13). For example, she duplicated the heart outline, changed the Scribble effect settings (by double-clicking the Scribble effect in the Appearance palette when the heart outline was selected), and changed the blending mode. In the completed piece, one heart outline uses the Multiply blend mode at 59% Opacity, the other heart outline uses the Color Burn blend mode at 100%, and their Scribble settings are different. Similarly, Steuer created multiple copies of the currency and the doily, giving each copy a slightly different position, blending mode, and opacity value, creating subtle layering effects.

Figure 13. The composition after adjusting blending modes and opacity values.
Shading with a Gradient Mesh
To shade the heart in the way Steuer envisioned, she created a gradient mesh. Instead of applying the mesh directly to the heart outline, Steuer chose to draw a rectangle, apply a gradient mesh to that (Object > Create Gradient Mesh), and then shape the rectangle and its mesh to achieve the surface modeling she wanted (Figure 14). To apply the rounded highlights, Steuer used the Direct Selection tool to select a mesh point, and then used the Color palette to change the color at that mesh point. Illustrator smoothly blended that mesh point’s color with the surrounding mesh points (Figure 15). Steuer polished the gradient mesh by both adjusting mesh point colors and using the Direct Selection tool to move mesh points or edit mesh direction lines.

Figure 14. Steuer didn’t apply the mesh directly to the heart outline.
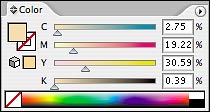
Figure 15. She applied a color to a selected gradient mesh point.
When Steuer was satisfied with the shading, she made sure the outline was in front of the mesh (Object > Arrange > Bring to Front), selected both the outline and the mesh, and chose Object > Clipping Mask > Make. This masked the gradient mesh cleanly inside the heart outline.
Steuer duplicated the shaded heart and used it as a subtle color background for the larger, scribbled hearts. After duplicating the heart, she scaled it up and then used the Transparency palette to apply 49% opacity. The resulting effect was not as strong as she intended, yet increasing opacity didn’t create the right kind of intensity, so she left the Opacity value at 49% and instead applied the Color Burn blending mode (Figure 16).

Figure 16. Except for type, the composition is almost complete.
Finishing Up with Type
To the bottom of the piece, Steuer added the line of text “Money can’t buy me love…” She added a scribbled type shadow by hand with a graphics tablet and stylus, then tried different blending modes and opacity settings for the shadow before settling on the Saturation blending mode at 25% opacity (Figure 17).

Figure 17. Detail of the type and the underlying hand-drawn shadow.
With its blending modes, opacity control, and masks, Adobe Illustrator is a great tool for digital collages when you don’t need to edit components at the pixel level, or when vector graphics and effects are an important part of the piece. You can also create similar pieces in Adobe InDesign, which also supports blending modes, opacity, masking, and some vector effects. Knowing that you can create collages in all of these programs can extend your flexibility. If you’re already working in one of these programs and you need to create a collage, you might avoid having to open another RAM-hungry graphics program.
This article was last modified on July 11, 2023
This article was first published on February 13, 2006
Commenting is easier and faster when you're logged in!

Recommended for you

How to Animate with 3D Models in PowerPoint
Learn how to make presentations pop with animated 3D content.

Stray Points Got You Down? Here’s a Script To Fix It.
Every now and again I’ll attempt to scale something in InDesign and get th...

ICS Introduces Remote Director 3.5
Integrated Color Solutions (ICS), the industry leader in virtual proofing techno...