


Dreamweaver CS4 is much more than a program for designing Web pages; it’s also a complete site management tool that simplifies many of the tasks that keep Web designers busy as they build and maintain Web sites. Dreamweaver’s Templates feature is one of the most powerful productivity boosters. Templates not only streamline the process of adding pages to a Web site, but they also make it very easy to update the look and structure of already created Web pages.
In this three-part series, I’ll take you through the basics of creating and using templates, as well as explore advanced techniques that let you get the most out of Dreamweaver templates. By the end, you’ll know how to create a single template than can manage an entire Web site’s worth of pages, while still allowing the design flexibility required to keep your site from becoming repetitive and boring.
Dreamweaver Template Basics
Most sites have common elements on every page. For example, the layout, banner, footer, and navigation may be identical from page to page, varying only in the main content: information about a particular product, directions to a store, etc. A template is basically a model for the pages of your Web site that contains all of the HTML that defines those elements which repeat throughout your site. The template also has placeholders for the actual content you’ll put in place as you add more pages to a site.
In other words, a template lets you start with a fully formed Web page with most of the elements in place — you just add the unique content for that page and save it to your site. And templates offer a lot more power than simply streamlining the production of pages — after all, if you only wanted to create a page based on another page, you could just save a copy of that original page and update it with new content.
Templates are also valuable when other people are working on the site with you, especially if those people don’t know as much about how to build Web pages. That’s because a template is made up of editable and uneditable regions. In editable regions, you put new content for each page of the site. Uneditable regions contain elements that remain the same from page to page — the nav bar, banner, logo and so on. When creating a page from a template, Dreamweaver won’t let you change an uneditable region, so it’s a great way to safeguard your design from less-experienced Dreamweaver users who might otherwise accidentally select and delete a sidebar, the logo, or another important page element.
Note: You can also use Dreamweaver templates with two programs aimed at letting Web novices update content on Web pages. Adobe’s Contribute application provides a simple interface for making basic Web page edits. TypeRoom, a Web-based content management system, also works with Dreamweaver templates. In both of these programs, users can change only editable regions, thus saving you from those panicked client calls that go something like this: “I didn’t do anything, I swear. The navigation bar just disappeared!”
However, Dreamweaver templates really shine when it’s time to update your site. Normally, when you change the navigation bar, update a copyright notice, rearrange the layout, resize a logo, or make some other change that affects every page on a site, you have to open each Web page file and making the change… over and over again. But when you create a page based on a template, that page remains linked to the template. If you open the original template file, update an uneditable region (for example, add a button to a navigation bar), and then save the template, Dreamweaver updates every page in the site that was built from that template. Now that’s efficiency!
Creating a Template
To follow along as I step you through the Dreamweaver template process, download this compressed folder of files:
dreamweaver_template_site.zip
After you unzip the file, you’ll have a folder named dreamweaver_template_site, containing the files for this tutorial.
- Launch Dreamweaver and choose Site > New Site. Click the Advanced tab in the Site Definition window and enter “Dreamweaver Templates” for the site’s name. Click the folder icon to the right of the “Local Root Folder” field and select the folder you downloaded: dreamweaver_template_site. Click OK to finish defining the new site.
This first step, defining a site, is crucial to effectively using Dreamweaver. Without a site definition, Dreamweaver won’t let you use any of its powerful site-management tools, including the template feature.
- In the Files panel, double-click the file about.html (or choose File > Open, navigate to the dreamweaver_template_site folder, and open about.html). This page has the basic layout, navigation bar, and other page elements. It’s just a regular Web page at this point. In fact, this is the best way to create a template: create a regular old Web page.
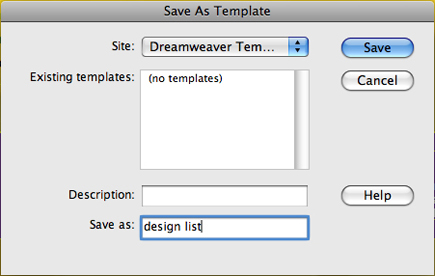
- Once you’ve perfected the page, save it as a template by going to File > Save As Template. The Save As Template window appears (Figure 1). It lists the templates for the current site (there aren’t any yet) and provides a space for a description (less than useful) and a name. Type “design list” in the Save As box and hit the Save button. The Update Links window appears. Because Dreamweaver actually saves this page into a special folder in the site, click Yes — if you didn’t, your links would break, images would disappear, and styles would go away. Notice that at the top of the document window it says “<<Template>> design list.dwt”, indicating that this file is now a special template file.
Figure 1. The “Save As Template” window lets you save a normal Web page into a productivity-boosting template file.
If you look at the Files panel now, you’ll see a Templates folder, and inside it a file named design_list.dwt, which is your newly minted template. (The suffix .dwt stands for “Dreamweaver template.”)
Caution: Never rename the “Templates” folder, don’t move it into another folder, and never create subfolders inside it to organize your template files. Any of those actions will break the template functionality of the site.
Adding Editable Regions
Now it’s time to add an editable region to the template.
- Click inside the main left column (for example, inside “Headline Goes Here”) and choose Edit > Select All. This area of the page, a <div> tag I positioned using CSS, will contain the main content for each page on the site. When you click inside a div and choose Select All, Dreamweaver selects everything inside that div (but not the <div> tag itself). Another way of selecting that text would be to click before the headline and drag down to select the other two paragraphs.
Warning: when using CSS layouts for templates you need to be careful when adding editable regions. Whatever HTML you select and turn into an editable region can be changed (and therefore removed) on template-based pages. If you accidentally select one of the <div> tags used to structure the page (for example, a div used to for a sidebar) instead of just the contents of that div, you’ll make that <div> tag editable as well — meaning you can accidentally, and most likely will, remove the <div> tag when building a template-based page. The result: The page’s layout will fall apart. To be totally sure that you’re selecting only the contents of the <div>, dip into code view after selecting the contents of that <div> and make sure the opening and closing <div> tags are NOT also selected.
- Choose Insert > Template Objects > Editable Region (you can also use the Template menu in the Insert Panel for this option, as shown in Figure 2). When the New Editable Region window appears, enter “main” and click OK. Dreamweaver adds a light-blue tab at the top of that region and a light-blue outline around it to indicate the boundaries of the editable region.
Figure 2. The “Common” category of the Insert panel includes a template menu for creating templates and adding special regions to a template.

- In the right sidebar, triple-click inside the text “Sidebar text goes here” to select the paragraph. Choose Insert > Template Objects> Editable Region. Type “sidebar” in the window that appears and click OK. Another editable region appears on the page (Figure 3).
Figure 3. Editable regions are marked with a blue tab (circled in red in this image) and outlined in light blue. These indicate the areas where unique content is placed as you add pages to the site. Click on the image to see a larger version.

- Choose File > Save and close the template.
You now have a template with two editable regions. You’re ready to start building the site.
Building a Template-Based Page
Now you can build out a site using the template you’ve just created.
- Choose File > New. The New Document window appears (Figure 4). In the far, left column click the “Page from Template” option. The “Site” column lists all of the sites you’ve defined within Dreamweaver — the “Dreamweaver Templates” site should be selected, and the template you just created should be selected in the second column.
Figure 4. The New Document window lets you create new pages based on the templates you create for a site. Click on the image to see a larger version.

Warning: While Dreamweaver does let you create a page from a template in another site (you pick a different site from the site column in the New Document window, as shown in Figure 4), it’s never a good idea. Dreamweaver won’t copy any of the files (such as CSS or images) from that other site, and none of the links will work. Why Adobe, why?
- Click the Create button. A new template-based page appears. To identify which template this page is based on, look at the yellow tab in the top-right of the document window. Choose File > Save and save this page as index.html inside the “about” folder.
- In the files panel, double-click the file text_about.html, which contains the text for this page. Copy the text starting at the top — the “About Us” headline — down to the paragraph just before the “–SIDEBAR TEXT–“.
- Click the index.html tab at the top of the document window to return to the template-based page. Click the blue “Main” tab — this selects everything inside that editable region. Choose Edit > Paste to insert the text.
- Click the text_about.html tab to go back to the text file and copy the last 3 paragraphs (the ones below “–SIDEBAR TEXT–“). Return to the index.html page, click the blue “sidebar” tab and paste the text into place.
- Save this file and close it. Follow the steps above to create two more template-based pages. Save them inside the about folder and name them directions.html and mission.html. Copy the text from the files text_directions.html and text_mission.html and paste it into place in the template-based pages. Save and close all of these files.
By now, you should see how templates can help streamline page production a bit. Still, their real power comes when it’s time to update your site.
Editing a Template and Updating a Site
At this point, you’ve added three template-based pages to the site: the “About Us” page, a driving directions page, and a corporate mission statement. While the “About Us” page is linked to from the main navigation bar, the two other have no links to them. To fix this problem you’ll add links to the right hand nav bar in the template — and in the process, update the new pages you created.
- Open the “design list.dwt” file. You can do this either by double-clicking on the file in the Templates folder of the Files panel, or by choosing File > Open and navigating to the .dwt file.
- In the right nav bar, click just before the “C” in “Contact Us”. Type “Our Mission”; hit the Enter (or Return) key; enter “Driving Directions”; and hit Enter again.
Select the “Our Mission” text you just typed and link it to the “mission.html” file inside the about folder. You can add the link by clicking the folder icon to the right of the link box in the Property Inspector. Or take this cool shortcut: Select the text, then shift-click on it and drag to the file in the Files panel that you wish to link to.
- Repeat the previous step to link the “Driving Directions” text to the directions.html page.
- Now for the moment of truth. Choose File > Save. The Update Template files window appears. Because you changed the template, Dreamweaver is about to change every page built from this template. Click the Update button. After a moment, Dreamweaver will display the Update Pages dialog. Check the “Show Log” box to see how many pages were updated. Click the Close button. Open the index.html, directions.html, and mission.html files in the about folder and notice that the right hand nav bar has been updated. Now imagine that you had 100 pages like this and they all were instantly updated just like this. That’s a time saver.
You’ll find a finished version of this tutorial in the templates_site_finished folder that’s part of the compressed files you downloaded at the beginning of this article.
Even with this brief introduction to templates, you should be able to see how helpful they can be in streamlining the process of building and updating a Web site. But there are even more powerful template features hidden away in Dreamweaver. In the next column, I’ll show you how you can use another template feature — called an “editable tag attribute” — and some clever CSS to create wildly different looking Web pages using just a single template file.
This article was last modified on December 17, 2022
This article was first published on May 21, 2009
Commenting is easier and faster when you're logged in!

Recommended for you

Never More Than a Minute
One of the silent features of InDesign is one of its best: When you work in InDe...

Smartphone vs DSLR: Which Camera is Better?
Smartphone or DSLR camera, which one is better for you? On the surface this ques...

InDesign MVPs: Most Valuable Plug-ins
When InDesign alone won’t cut it, these tools can help you get the job done bett...