

Based on articles originally published in the DesignGeek e-zine.
This article won’t teach you how to design in Word (a shockingly common client request), but it will help you with annoyances that crop up when Word and page-layout applications collide.
Remove Ugly Hyperlinks from Imported Word Files
You know how when you import Word files into InDesign or QuarkXPress, you sometimes get unwanted hyperlinks? Ugly underlined things colored a garish RGB blue (Figure 1)? That’s because Word is set by default to convert email addresses and URLs into live links, and that’s its built-in Character Style for them.
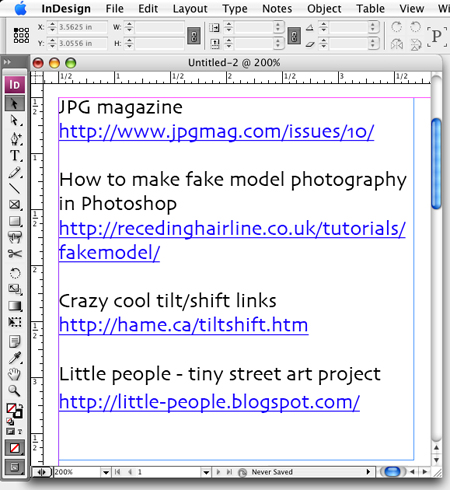
Figure 1. Hideous, yes?
I’m not going to get into the details of how to fix these in the layout program (or turn off the Word default) because I’ve already written them up in a post to my InDesignSecrets.com blog.
What I wanted to call out in this quickie was a tip provided by one of the blog readers in their comment to the story. Since then it’s been one of the most popular tips I’ve mentioned during training sessions.
Kazimierz Kapusniak said you can quickly and easily clear out all the hyperlink formatting in the Word document itself, before you import it. Open the Word doc in Word, select all the text (Command/Control-A), then press Command/Control-6. You have to use the “6” from the top row, not from the number pad.
All the hyperlink formatting disappears, but the linked text remains. No other formatting is removed.
Unbelievable. Why couldn’t I have learned this, like, ten years ago!
Degunkify Word Files
I think messy Word files have some sort of cosmic connection with ragweed. Over the past few weeks I’ve received an inordinate number of e-mails from people pleading for help with Word documents that misbehave when imported into InDesign or QuarkXPress.
And over the same period I’ve had to keep a bottle of Claritin and Windex on my desk because my hay fever is acting up and it’s hard to read my laptop monitor with sneeze droplets all over it.
Or … maybe I’m just developing an allergy to bad Word files? There’s a scary thought.
Here are the Handy-Dandy Tips for Degunkifying Word Files that I’ve sent to these people. You need them only when you’re trying to retain the styling information in the Word file as you import it. (If you’re stripping the formatting, then there’s no gunk to de-anything.)
Tip #1: Maggie The File
Did you know that Word stores all sorts of hidden information in its paragraph returns and section breaks? And in a Word document with no section breaks, the final paragraph return is also the de facto section break? These markers are particularly prone to carrying corrupted information, which can lead to strange effects in the Word document itself.
If you never actually open the Word doc in Word, you won’t see the weird symptoms. That is, until you import the styled file into your layout program and then try to apply different styles.
Sometimes there’s just one particular paragraph that won’t “take” a style. In that case, open the file in Word and select everything in the problem child paragraph except for its final paragraph return. (If you can’t see the paragraph return symbol in the text, click the Paragraph Symbol — the pilcrow — in the toolbar to show them all.)
Then cut the selected text, leaving the empty return sitting by itself in the line. Delete the lone paragraph marker, hit Enter/Return to insert a new one, and paste the paragraph text back in. Do a Save As with a new name and try importing it into your layout again.
If you’re having a problem with lots of text in the file (for example, importing it crashes the layout program… that’s a problem) do the same procedure for all the text in the Word doc in one fell swoop. Open it in Word, choose Edit > Select All, and then deselect the final return by typing Shift-Left Arrow. Cut the selection and paste it into a new, empty Word document. You’ll use this document from now on, though you may need to reapply a style to the final paragraph. Save the new doc with a different name and try placing that one into your layout.
Why is this tip called “Maggie the File?” I’m just passing along a bit of insider Internet lore. On one of the editorial mailing lists I follow — editors are the world’s best Word experts — a long-time list member named Maggie discovered this marker/break factoid buried in a Microsoft web page, along with the fix. Maggie posted about it a long time ago, and ever since, whenever a user on the list posts a problem they’re having with a Word doc, a stock suggestion from long-time subscribers is to “Maggie the file.” Now you know.
Tip #2: Convert and Reconvert
Here’s another method for stripping out document corruption and style confusion that I found on a Word support web site. It sounds eerily like the InDesign troubleshooting technique of exporting an .indd file to InDesign Interchange (.inx) format and then opening that .inx file back in InDesign to reconvert it back to an .indd file.
Apparently, saving a Word document as an HTML Web Page (in Word, choose File > Save As Web Page), and then converting it back to a Word document, does the same thing as the InDesign indd > inx > indd technique. To convert the file back to a Word .doc format, just open the HTML file in Word, and from the Save As dialog box choose Microsoft Word as the format. The trip out to HTML/XML strips out gunk, and because Word understands its own HTML format, it can resurrect all the styles and formatting applied when you re-save the HTML file as a Word file.
For a complete guide to fixing corrupt Word files, read this Microsoft MVP page.
Tip #3: Import/Export/Import
This is the tip I use most often when dealing with Word style bloat (unused styles that come along for the ride) in InDesign or XPress. It’s especially useful when you map Word styles to InDesign styles (a feature not available in QuarkXPress) so you have fewer styles to deal with. I think it’s another way to Maggie a file, too, which would be handy if you don’t own Word.
Here’s how it works. Instead of importing the .doc file into the actual layout, import it into a new, temporary layout file, making sure it imports all the Word styles as well. You don’t need to flow the whole file; just one frame’s worth is fine, even if it has an overset.
Then click inside the text with the Type tool and export the story to Rich Text Format (.rtf), which is like a generic text file that retains all text formatting/style sheets, and if the layout program supports it, footnotes and tables. In InDesign, you do this via File > Export; in Quark, choose File > Save Text. Be sure to choose the Rich Text Format option from either program’s dialog boxes, then name and save the file somewhere handy.
Now you can close your temporary layout file; there’s no need to save it.
In the actual layout file, import the .rtf file instead of the .doc file. In most cases your superfluous paragraph and character styles will disappear, and any problems with the styled text will go away. By the way, don’t bother saving the Word doc as an RTF file; it doesn’t degunk nearly as well as exporting to RTF from within your layout program.
My hypothesis is that even when you set InDesign to ignore unused styles (which you can do in the Place Options dialog box), some are imported anyway because the final paragraph marker has them in its “history.” So, exporting it to RTF clears that out — degunkifies it.
Add Columns of Numbers in ID/QXP
The other day I was laying out a data-heavy table in InDesign. The bottom row was supposed to contain sum totals of the numbers in each column, but I didn’t have those figures. All I had was the client’s Microsoft Word file containing the original columnar data — and no sums there, either.
Sighing, I hauled out my adding machine (translation: I pressed F12 on my Mac to open up the Calculator widget) and was about to start entering each column’s numbers to get totals when I thought, “This is ridiculous! I’m on a computer more powerful than the ones used to send people to the moon! This is not a $2,500 adding machine!” I pressed F12 again to close the widgets and thought about it for a bit.
It’s very aggravating that a program that allows you to create tables doesn’t include even the simplest functions to add up the numbers in one of its columns. Can I get a witness? Yeah, yeah, I know a layout program is not an accounting or spreadsheet program, and designers often use tables to create things without a single number in it.
But. Still. This is a computer! C’mon!
Microsoft Word to the Rescue
After a minute of thinking, I realized that of course, I already had a program that can add up numbers in a column: Microsoft Excel. Unfortunately, I’m one of the three business owners on the planet who doesn’t understand Excel. I mainly use it to open OPS’s (Other People’s Spreadsheets) and wonder how they did that, and why didn’t they just use Filemaker.
I do know Word, though, so I opened up the original Word file the client had sent.
Now, if you’re an experienced Word user, you’re probably already thinking, “Use Word’s AutoSum feature.” It’s the exact feature I want in my layout programs; an “add this up!” button in Word’s Tables and Borders toolbar (View > Toolbars > Tables and Borders).
The AutoSum button is simple to use. You put your cursor in an empty cell below a column of numbers, click the AutoSum button in the toolbar, and Word inserts the sum of the numbers above into the cell. Numbers in parentheses or prefixed with a negative sign (a hyphen) are correctly calculated as negative amounts. Alternatively, you can put your cursor in an empty column at the far right of a table, and click AutoSum to get the total of the numbers in the row.
However, AutoSum works only on tables, which my Word document didn’t have. The user had aligned the columns of numbers with multiple tabs and space runs. To use AutoSum, I’d have to first clean up all the extra spaces and tabs separating the columns, then convert it to a clean table. And that almost defeats the purpose of looking for a fast way to sum up columns of numbers in a layout program.
Then I thought, Aha! I do have a table! I could flip back to InDesign, select the table, copy it, and paste it into a Word document, where it comes in as an editable Word table. I love that you can round-trip tables from Word to InDesign and back, though some formatting may be lost in transit. (Unfortunately, QuarkXPress tables aren’t constructed the same. You’d need to convert a table to text in XPress first, copy the tabular data, paste it into Word, and then convert it back to a table via Word’s Table > Convert > Text to Table feature.)
Anyway, once I had a clean table in Word, I could simply insert an empty row at the bottom of it and do the AutoSum magic for each column, then copy/paste the last row back into the page-layout app. But then I remembered: AutoSum requires that every cell in the added column be filled with a number. The columns in my table were riddled with text entries (for example, “n/a” or “see below”), merged into other cells, or were empty. Argh! I’d still need to do clean-up work just to get the sums.
Secret Word Feature: Calculate
Finally, I remembered that Word has a far more forgiving and flexible AutoSum feature called “Calculate.” It doesn’t require a table, and it’s smart enough to ignore empty paragraphs and text in a selection. Not even Excel can do that.
“Calculate” used to get some respect in Microsoft Word. It was a full-fledged command in the Tools menu back in the day. But about ten years ago, I think with the release of version 52 B.C., Microsoft retired it into a dusty, neglected corner in the Tools > Customize > Commands dialog box.
Luckily you can still retrieve it. Open that dialog box (in either the Mac or Windows versions of Word), click on the Tools category, and scroll down until you see the command “Tools Calculate.” Drag the command and drop it onto a toolbar you use all the time. (I dropped it onto the Standard toolbar.)
Now you can make just about any sort of selection in your Word document — if you don’t have a Word document to begin with, just copy/paste a table or text from your layout program into a new Word file and run it from there — and Tools Calculate will tell you the sum of the numbers contained in the selection.
And that’s the beauty of it. Unlike AutoSum or Excel, the Calculate command ignores everything that’s not a number in the selection when it computes a total. It works with selections of table columns or rows (even if the selection includes text, merged cells, or empty cells). It works with columns of numbers made with tabs and spaces. It even works on sentences and paragraphs!
For example, if you select the sentence, “Mary had 15 apples, Joe had 10, and Jennifer had 3;” and click on the Tools Calculate button, the status bar at the bottom of the document window reports, “The result of the calculation is 28.” If poor Joe had -10 apples (negative 10), the message would say, “The result of the calculation is 8.” Pretty smart!
You don’t have to memorize what the status bar says. Word automatically puts a copy of the calculation in your computer’s Clipboard memory. So after running the Calculate command, you could click a text insertion point in the Word file (or in any document in any program), choose Edit > Paste (Command/Control-V), and the calculation result is pasted into the text flow, matching the current formatting.
And that’s how I ultimately added the columns of numbers in my InDesign table. In the original Microsoft Word document, I selected a single column’s worth of numbers (with some unavoidable text and empty tabs mixed in) by holding down the Option key while dragging with the text cursor. (That’s another little-known Word feature, by the way, that I wish my layout programs had. Option/Alt-dragging in Word lets you make columnar text selections through multiple paragraphs.)
With a column selected, I clicked the Tools Calculate button on my toolbar, flipped over to InDesign and pasted in the result at the bottom of the matching column in the table. Rinse and repeat a few times, and I was done.
Who needs a calculator when you’ve got Word? And it can be used as a word processor, too.
This article was last modified on April 20, 2025
This article was first published on November 12, 2007
Commenting is easier and faster when you're logged in!

Recommended for you
How to Use the Pathfinder Options in Illustrator
Learn what each of Illustrator's Pathfinder feature does and get some tips for b...

FSI FontShop International Announces New FontFont Libraries on CD
FSI FontShop International® announces new FontFont® Libraries on CD including th...

How to Find Literal Instances of GREP Metacharacters in InDesign
Certain characters perform special functions in GREP. So how do you search for t...