
Photoshop’s 3D modelling environment has matured to the stage that with CS6 Extended, it’s capable of building realistic and persuasive images from scratch. I used it to model a proposal for a Bluetooth bracelet, for the inventors’ website Quirky.
In order to look its best, the bracelet had to be shown not only lying flat on a surface, but also held in the user’s hand. Since Photoshop was to be used for the composite image, it made sense to model the entire object in Photoshop. That way, it could be manipulated, lit, and positioned, as well as opened and closed, as required.
In this tutorial we’ll look at the process step by step, starting with nothing more than a Pen outline and ending up with a set of artist’s impressions of the finished product. Note that I’ve worked here with the Ground Plane hidden for clarity, but you may prefer to work with it visible.
1: The initial outline
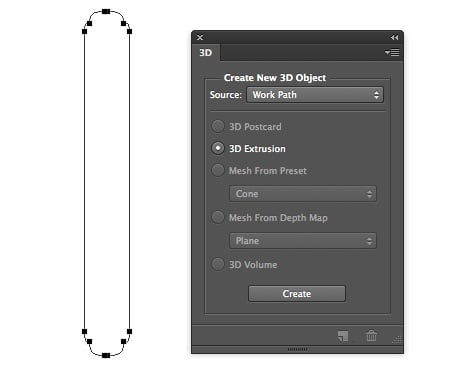
Draw the outline you want with the Pen tool. It’s easiest to draw one quarter of it, then duplicate and flip horizontally and vertically, joining the points to make a closed shape. From the 3D panel, set Work Path as the Source, make sure the 3D Extrusion button is pressed, and click Create.
2: The extruded object
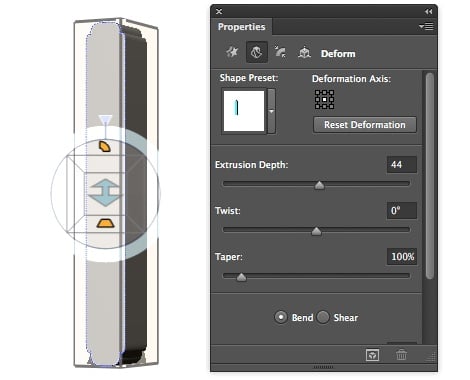
Here’s the result of the extrusion: the outline is converted into a solid 3D object. You can spin it around by dragging outside it with the Move tool. In the Properties panel, you can see it has been extruded to a depth of 44. But in fact, we don’t want to extrude it at all.
3: Revolving the shape
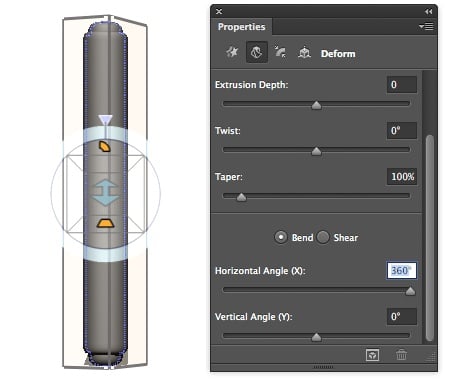
Extrusion is the first step in building the object, but we want it lathed. So set the Extrusion Depth to 0, and set the Bend Angle to 360°. This revolves the object around its midpoint, producing this cylindrical shape.
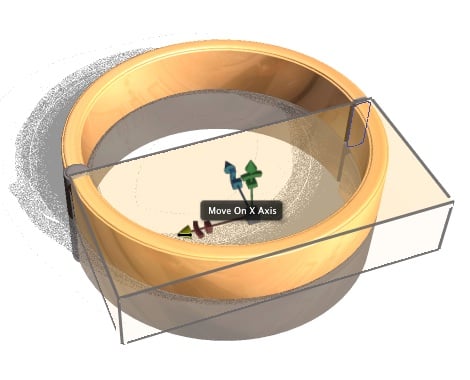
4: Scale it down
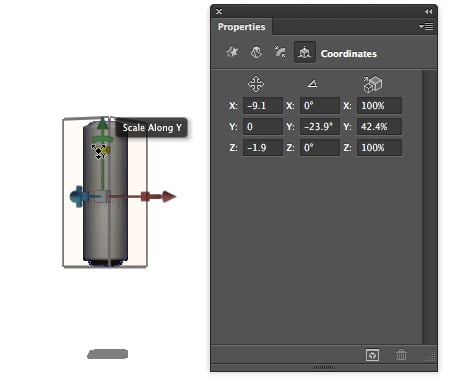
That object is altogether too tall. You could change the pen path, but it’s just as easy to squash it: click on it with the Move tool so the 3D axis appears, and drag the green Y scaling block near the top. If you prefer, you can open the Properties panel and set the Y scale here instead.
5: Make a copy
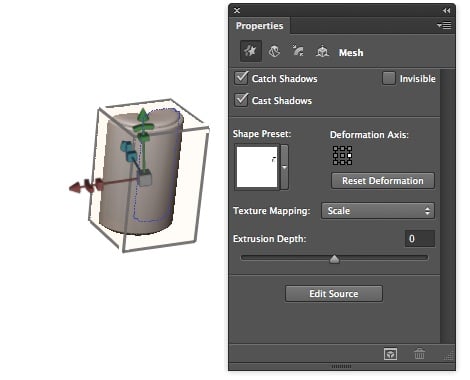
Duplicate the 3D layer – you can use this to build the rest of the bracelet. On the copy, first set the Deformation Axis button in the Properties Panel so it revolves around the right hand side of the object, rather than around its center. Changing the Bend angle from 360° to just 180° produces a half bend, which is perfect for half the bracelet.
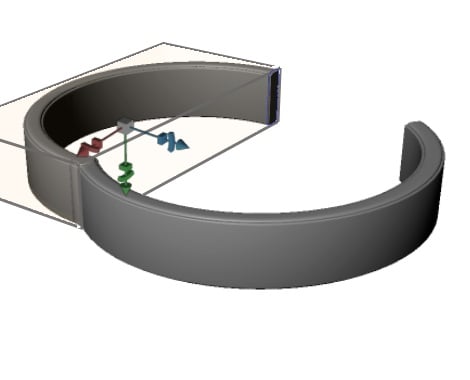
6: Expand the bracelet
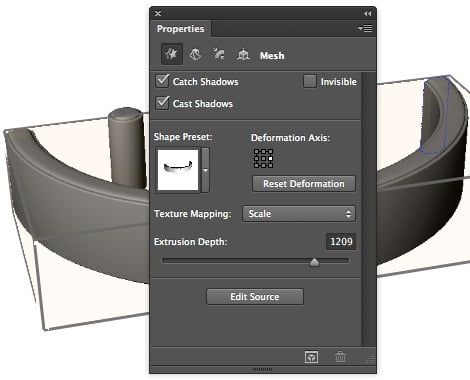
Now that it has been revolved, its internal radius can easily be enlarged by increasing the Extrusion Depth. Here, you can see it has been increased to a value of just over 1200, which produces this chunky, wide bracelet half.
7: Duplicate and merge
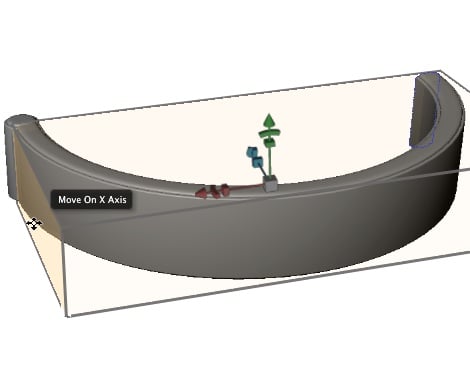
Duplicate the bracelet half layer, then select both the copy and the original extrusion layers and choose Layer > Merge Layers. Although this will merge them into a single layer, they remain separate 3D objects within that layer. Use the Coordinates section of the Properties panel to set them both so they’re sitting flat on the ground plane, then drag the bracelet half so it intersects the original object (which now forms the hinge).
8: Add the second half
Now select the composite layer and the duplicated bracelet half, and use Merge Layers to bring this into the layer as well. You can rotate it by clicking and dragging when the cursor is over one of the vertical edges of the bounding box, and move it around by dragging on one of the vertical faces.
9: Make the microphone
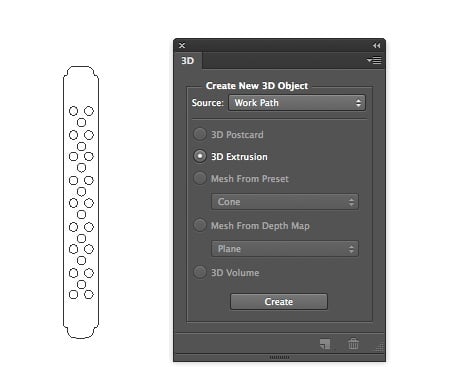
To make the microphone, first Copy the Pen path, then make a new layer and Paste the path. Use the Shapes tool to add a set of circles to it (make sure the tool is set to draw Paths, not Shapes), then use the 3D panel once more to turn that path into an extruded object.
10: The microphone layer
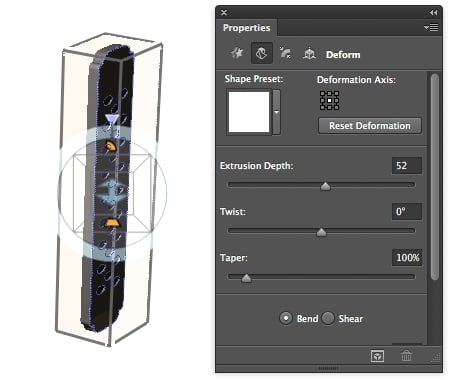
This is the microphone after it has been extruded. It doesn’t need to be very thick, so drag the Extrusion Depth slider until you’re happy with its appearance. Note how the circles in the original path have now become holes in the resulting object.
11: Add the microphone
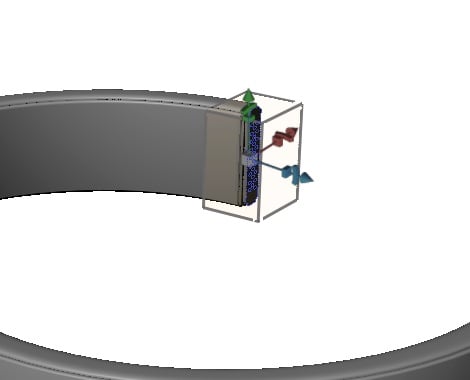
Merge the microphone layer into the composite object layer, and use the Co-ordinates pane of the Properties panel to align it. As before, you can drag on a vertical edge of the bounding box to rotate it, and on a side of the box to move it into place so it butts up against one open end of the bracelet.
12: Append some metal
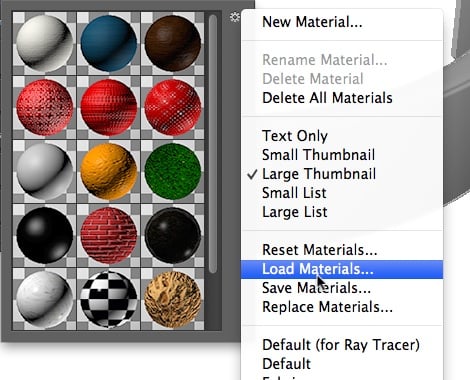
It’s likely your copy of Photoshop will have only the basic materials loaded. Click on the object twice to make the Properties panel display the Materials view. You can download metallic textures using the 3D > Get More Content menu – or, if you’ve already downloaded them, choose Load Materials from the pop-up menu in the Properties panel to append the metallic textures.
13: Add some gold
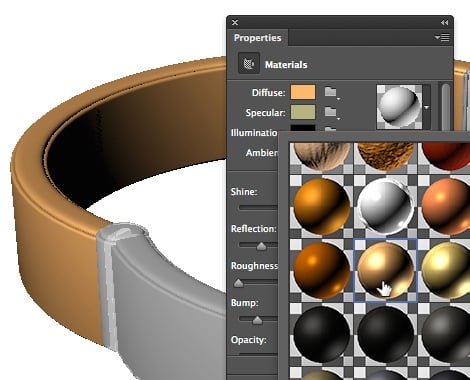
Select the object to which you want to apply the new texture from the 3D panel (each object is listed here individually), and choose a Gold material from the list in the Properties panel. Repeat this for both halves of the bracelet.
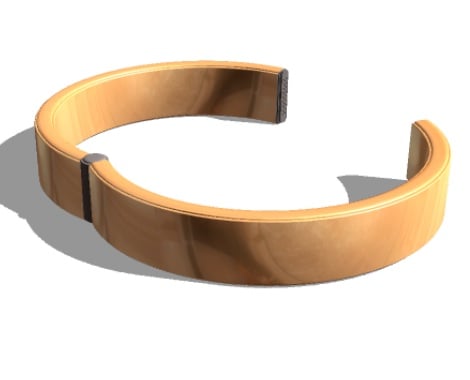
14: The gold appearance
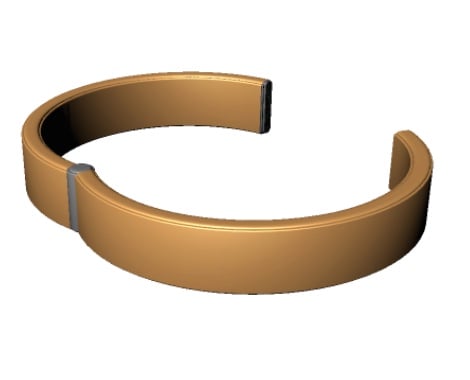
Here’s the bracelet after the gold effect has been added. It looks very dull – more like plastic than gold – and that’s because no reflections have been added yet.
15: Add some ambience

In the 3D panel, click the Environment option right at the top. Now, in the Properties panel, check the IBL box at the top. This turns on Image Based Lighting. Use the pop-up menu next to the preview button to load a new texture. This can be just about any image you want to use. I’ve used a photograph of a room, with a lot of Gaussian Blur added so it isn’t unnaturally sharp when reflected.
16: Adjust the IBL
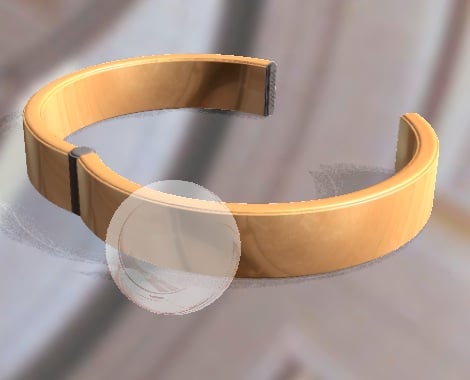
You’ll now see the image reflected in the bracelet, with a pale version of it both wrapped around the virtual sphere in the center of the image and laid over the whole background. As long as you can see this, drag anywhere to move it around until you get a reflective appearance that you like.
17: The reflective view
This is how the bracelet looks with the reflection in place (once you select anything else in the 3D panel, the overlaid image disappears). It now looks much more like gold, but that shadow is still too harsh.
18: A softer shadow

Select the Light in the 3D panel, then drag the Shadow slider in the Properties panel to increase the softness. The more you drag, the softer the shadow becomes.
19: Add a reflection
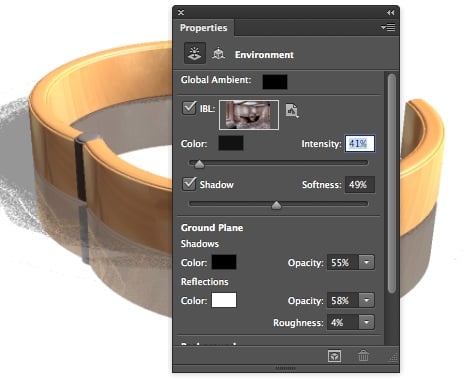
The addition of a ground reflection makes the bracelet look much more appealing. Choose the Environment section of the 3D panel again, then in the Properties panel drag on the word Opacity in the Reflections section near the bottom to increase the strength of the reflection. The Roughness setting makes it fade away with depth; a small percentage (I’ve chosen just 4%) produces a strong reflection.
20: The finished object
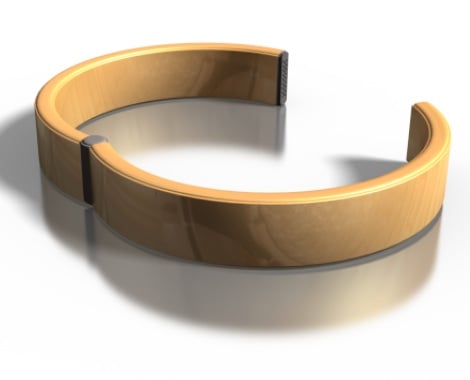
Choose Render from the 3D menu to render the scene. You can see how this softens the shadows and the reflections, producing a crisp, appealing view of the bracelet.
21: The hand-held view
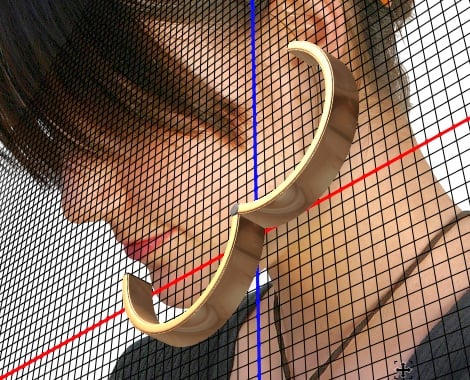
To make the bracelet appear to be held, you need a face. Now, rather than moving any one part of the bracelet, make sure no 3D component is selected and drag outside the bracelet object. This will rotate the whole 3D view. You can use the Rotate, Roll, Slide and Drag tools on the Options bar to manipulate the view so it fits neatly against the face. Here, I’ve turned off the ground shadows and reflections, having first duplicated the bracelet layer.
22: The hand-held bracelet

Once the bracelet has been rendered, bringing a photograph of a hand in front of it completes the montage. A Layer Mask has been added to the hand layer to hide the thumb where it’s supposed to go behind the bracelet.
23: The closed bracelet
Duplicate the original bracelet layer once more (you did remember to duplicate it before adding the head, right?) and rotate half the bracelet, moving it into position so it now appears closed. It’s also worth deselecting the bracelet half and dragging on the ground plane to change the viewpoint of the whole scene.
24: The finished closed bracelet
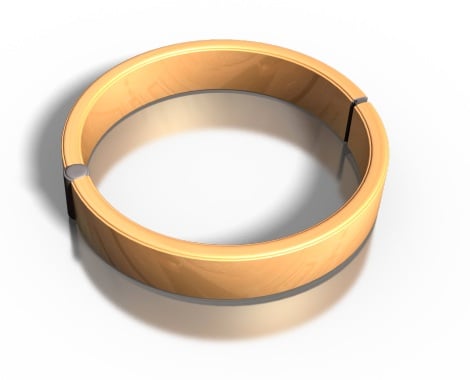
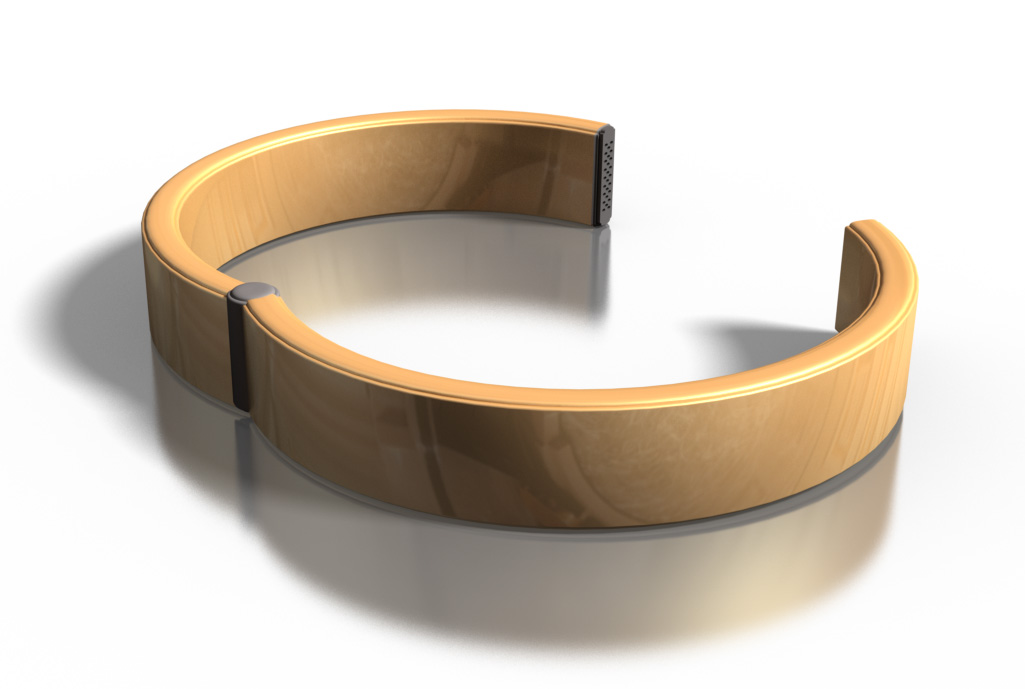
Here’s the bracelet when closed, providing a view of the object in its finished form. Because it’s a true 3D object, it’s now easy to view it from any angle – and relatively easy to open and close it.
This article was last modified on February 15, 2013
This article was first published on February 15, 2013
Commenting is easier and faster when you're logged in!

Recommended for you

ShutterSnitch, the Wireless Photo Assistant for iOS
The iPad offers several advantages for photographers. Compared to a laptop, it t...
Photoshop 10 Essential Tips: Working with Layers
Photoshop users have been enjoying the ability to shuffle around layers since ve...
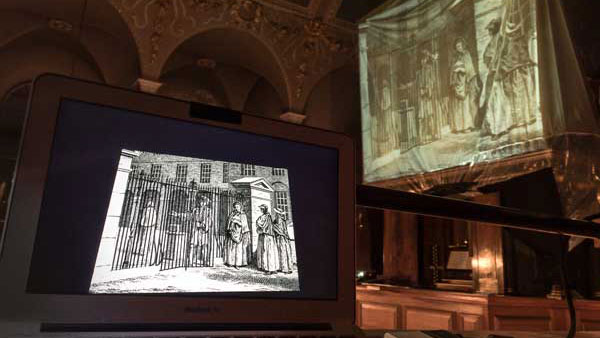
Fixing Slideshow Projection Problems With Photoshop
The church of St Andrew, Holborn, in the heart of London, was built by Christoph...