

Text wrap is the setting that causes text to flow around another object.
In InDesign you apply text wrap using the Text Wrap palette. Select the object you want to have text flow around, and choose Window> Text Wrap to open the palette. With no wrap applied, text flows behind the object (figure 1).
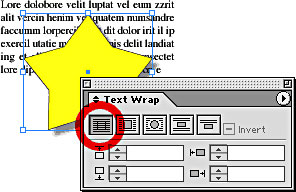
Figure 1
Click the Bounding Box button to force the text to flow around the rectangle that contains the item (figure 2).
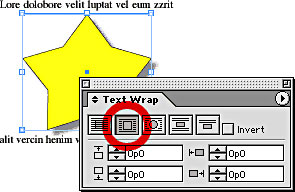
Figure 2
The Shape button allows the text to flow around the contours of the selected object (figure 3)
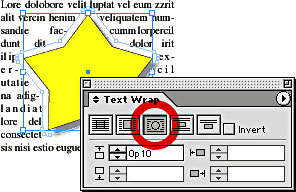
Figure 3
The Jump Object button forces the text to flow to the next available space below the object (figure 4).
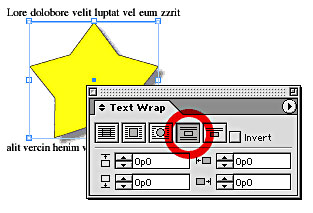
Figure 4
The Next Column button forces the text to start at the next column or page, whichever comes first (figure 5).

Figure 5
These options seem like they would cover all situations until you discover that InDesign applies text wrap differently from QuarkXPress. In XPress, text wrap is applied only to text below the shape that has the wrap applied. If the text is above the object that has a text wrap applied to it, the text does not reflow.
InDesign works slightly differently. If an object has any type of text wrap applied to it then any text–either above or below the object–will be affected by the wrap. This can be an advantage as you don’t have to worry about the stacking order of text that needs to flow around an object.
However, it can also be a problem if you want to put some text inside an object that has a text wrap applied to it. Figure 6 is a good example of this problem. You want the words “A Star is Born” to appear inside the star. However, because that star has a text wrap applied to it, the text is not visible inside the star.
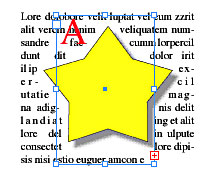
Figure 6
Fortunately, Adobe has a solution for this situation. Select the frame than holds the text that you don’t want to have affected by a text wrap setting. Choose Object> Text Frame Options. Inside the dialog box, check the option to Ignore Text Wrap (figure 7)
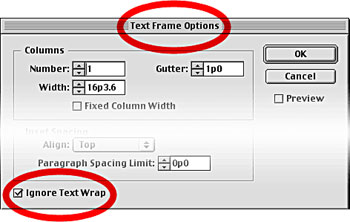
Figure 7
With this option checked, you can position the text near an object with a text wrap applied to it without having the text reflow (figure 8).
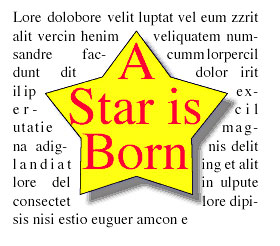
Figure 8
This article was last modified on March 10, 2025
This article was first published on April 17, 2002
Commenting is easier and faster when you're logged in!

Recommended for you
How to Create a Neon Text Effect in PowerPoint
Create a fully-editable glowing neon text effect completely in PowerPoint with S...

This Month in InDesign Articles, Number 139
I had an amazing time at The InDesign Conference last week… the attendees I met...
Master InDesign's Tabs and Tables
Excerpted from InDesign Type: Professional Typography with Adobe InDesign CS2. P...