


Since you’ll all have to wait a few more weeks before you can get your hands on Photoshop 7, I decided against doing a Photoshop 7 story. But here’s the Photoshop 7 hook. A great many people have asked me if Photoshop 7 has more support for high-bit files (that is, files with more than 8-bits per channel) than Photoshop 6. Before I answer that, let’s review the advantages of high-bit editing: It allows you to work in large-gamut spaces with much more editing headroom before you run into posterization or color banding, and it lets you produce a perfect 8-bit image that contains the full 256 levels in each channel. See the sidebar “Why Do High-Bit Editing?” for more. And if the whole idea of high-bit editing is new to you, check out my earlier story, “The High-Bit Advantage.”
But the short answer to the original question is that, besides a few minor tweaks, Photoshop 7 treats high-bit files much the same way as Photoshop 6 did — if you were hoping for 16-bit layers, for example, you’ll have to keep waiting. So instead of torturing you with as-yet-unavailable goodies, let me take this opportunity to show you that Photoshop’s high-bit support may not be as lacking as you think.
Where Are My Selection Tools?
At first glance, it would appear that the only selections you can make in high-bit files are those made with the marquee and the lasso. While these are useful tools, they’re not suited to making complex selections of individual objects, or to making the kinds of graduated selection you might use in a layer mask. QuickMask, color range, the magic wand tool and the various other goodies we use to build complicated selections are unavailable when you’re working on a high-bit file. But if you look at the Select menu, you’ll see that “Load Selection” is enabled in high-bit mode. For some of you, the implications may be obvious, but for those of you who have lives outside of Photoshop, I’ll spell them out.
You can load any selection into a high-bit file. How is that useful? Well, here’s the basic technique. First, choose Image > Duplicate to duplicate your high-bit image, then choose Image > Mode > 8 Bits/Channel to down-sample the duplicate to 8 bits per channel. Now you can use the full arsenal of selection-building techniques to build your selection on the down-sampled duplicate — color range, QuickMask, channel calculations, whatever floats your boat.
Once you’ve arrived at a selection that satisfies you, you can quickly transfer it to the high-bit file by selecting with the marquee tool, clicking inside the selection, then, as soon as you start dragging, hold down the Shift key, and shift-drag the selection into your high-bit file. Shift-dragging pin-registers the selection in the high-bit image so that it lands in the right place. But make sure that you don’t already have a selection in the destination document, because if you do, Photoshop will try to center the dragged selection on the current one, so the pin-registering fails.
A slower but safer method is to save the selection as a channel in the 8-bit duplicate by choosing Select > Save Selection. I’ve learned the hard way that I should always save any selection that takes more than 10 seconds to create, because as soon as it’s gone, I need it. If you save your selection(s) in the 8-bit/channel duplicate, you can load them into the high-bit file by choosing Select > Load Selection. (In fact, you can load selections from any open document that has the same pixel dimensions as the one on which you’re working, but the ones from the down-sampled duplicate will likely be more useful than ones from some other image entirely.)
Where Are My Adjustment Layers?
Loading selections is great, but typically you also want to do something to your selection. Working in the down-sampled duplicate image lets you plan and “rehearse” your edits. With your selection active, create an adjustment layer corresponding to the type of adjustment — Levels, Curves, Hue/Saturation, etc. — that you want to make in the high-bit image, then make your edits. Once you’re satisfied with the edits, you can transfer them to the high-bit file very quickly, as follows:
- Shift-drag the selection from the 8-bit to the high-bit file
- Press the keyboard shortcut for the adjustment type (Command -M for curves, Command -L for Levels, Command -U for Hue/Saturation, etc.), adding the Option key to load the adjustment at the last-used settings. (Windows users, substitute Control for Command, and Alt for Option, throughout.)
You’ve just transferred your adjustment layer to the high-bit file! Here’s an example (see figure 1):
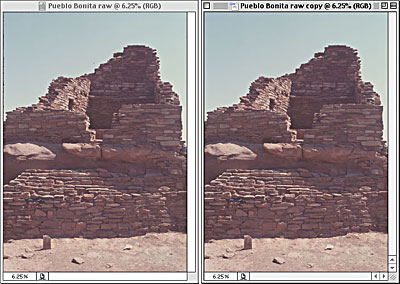
Figure 1: The raw high-bit image (left), and the down-sampled duplicate (right).
The first problem to fix is the sky. The unappetizing greenish shade is actually real, the product of a major forest fire some miles away, but it’s very hard for the eye to accept. Working in the duplicate image, I start out by making a simple marquee selection that includes all the sky, so that the color-range command has less work to do. Next, I choose Select > Color Range, set the Fuzziness slider to around 10, and shift-click in the sky to build up the selection (see figure 2).
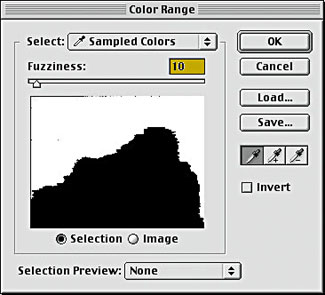
Figure 2: The Color Range selection.
Next, I save the selection using Select > Save Selection, which creates a new alpha channel I name “sky.” Then, I select the sky channel in the Channels palette, hide the other channels, deselect, and clean up the various holes and blobs with the paintbrush. Finally, I run a Gaussian blur of around 2 pixels to soften the edge slightly, producing the result shown (see figure 3).

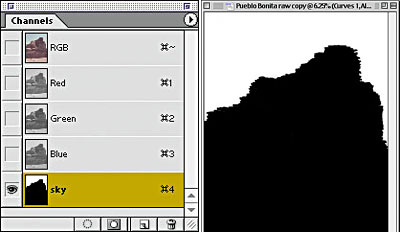
Figure 3: The Save Selection dialog box (top) in which I created a new channel, called “sky” (left) and the sky channel after cleanup (right).
This article was last modified on January 3, 2023
This article was first published on March 26, 2002
Commenting is easier and faster when you're logged in!

Recommended for you

Heavy Metal Madness: A Focus on Hocus Pocus
My favorite type of graphic discovery is one that comes out of nowhere, supplyin...
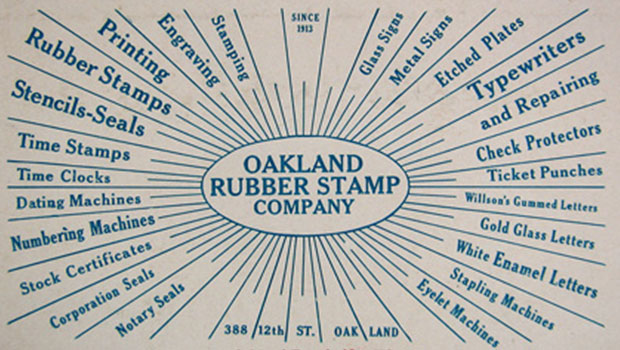
Scanning Around With Gene: 108 Years of Dust
How an industry dies says a lot about how it lived. Some, like coal mining or st...

Creating a Panorama: Photoshop, Camera Raw, or Lightroom?
When a scene is wider than your widest lens, merging images into a panorama is a...