Photoshop Blur Gallery: Path Blur
Editor’s Note: Don’t miss the first article in the Photoshop Blur Gallery series: Spin Blur
Path Blur is one of the most useful of Photoshop’s new Blur filters. Those of you who have attempted to show object movement in the past had to make do with the old Motion Blur filter, which allowed you to control the length and direction of a blur – but in a somewhat crude, hard-to-perfect way.
Path Blur not only allows you to blur along a curve, it also lets you limit the amount of any blur by drawing another blur next to it. And because it works with Smart Objects, you can revisit the effect and edit it at any time.
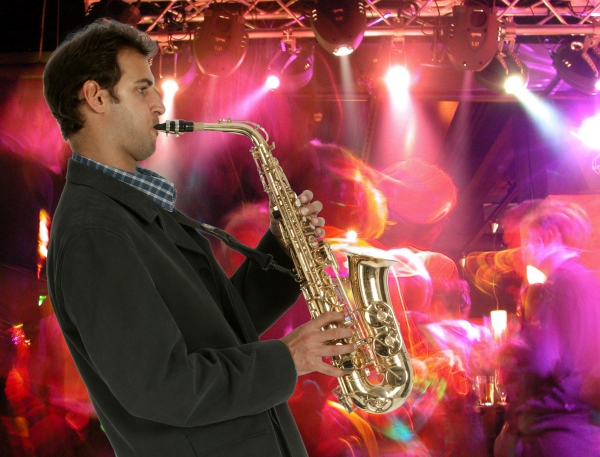
The original image
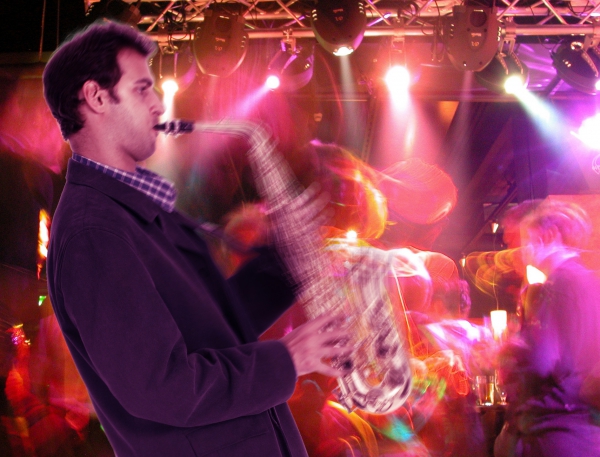
This simple montage shows a saxophone player placed against a chaotic, multicolored background that’s full of life and motion. He couldn’t look more out of place. Let’s fix that. The first step is to use Layer > Smart Objects > Convert to Smart Object, to allow you to make changes later.
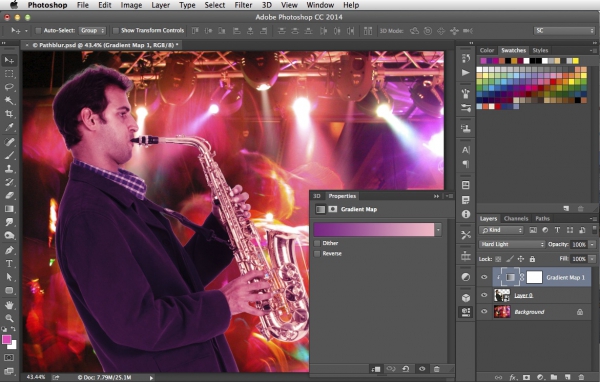
1. Add a gradient map
To make his colors blend in with the background, add a Gradient Map from the pop-up menu at the bottom of the Layers panel – and make sure it uses the sax player layer as a Clipping Mask, so it doesn’t affect the background. Use the eyedropper to sample two colors from the background image, and he’ll look much more in like he belongs in this image.
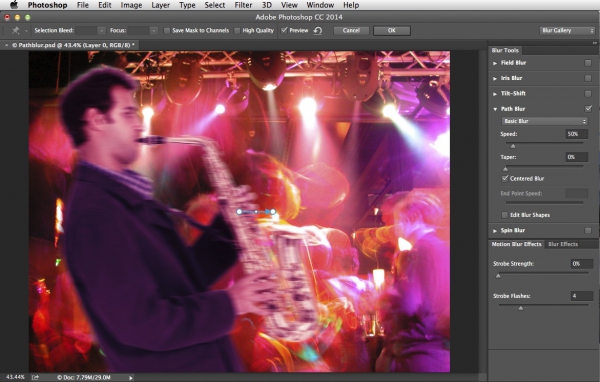
2. Open the Blur Gallery
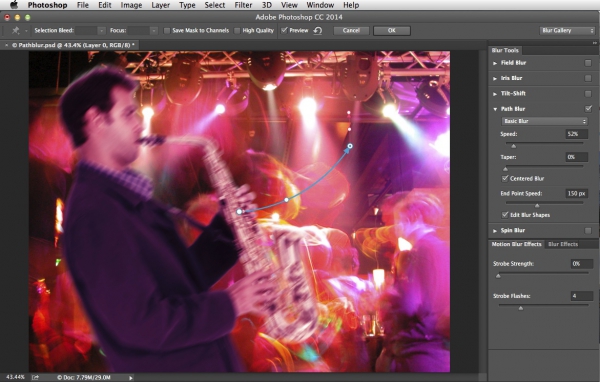
Choose Filter > Blur Gallery > Path Blur and you’ll see this view. You can see how the default position is to apply a short horizontal blur to the layer.
3. Adjust the blur
You can change the direction of the blur, by grabbing the end control handle and moving it to where you want it. But you can also move the control in the middle of the control line, to create a curved blur – something that was never possible before.
4. Change the shape
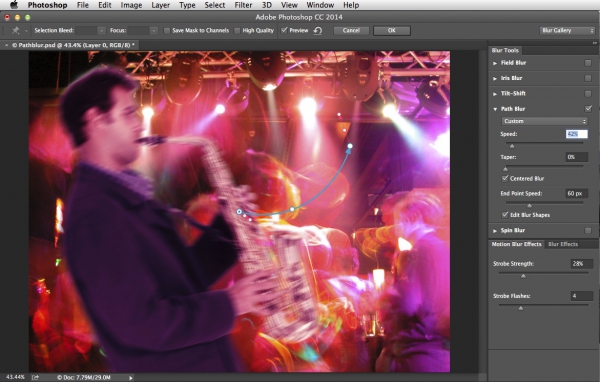
If you click the checkbox in the Blur Tools panel marked Edit Blur Shapes, you can drag within the image to change the way the blur is applied. You can also click on an endpoint and change the speed of just that point, so the strength of the blur can vary over distance.
5. Add a strobe
In the Motion Blur Effects panel, you can apply a Strobe to the blur, which simulates the effect of a strobing camera flash. You can choose both the strength of the strobe and the number of flashes, which should be kept low for a better appearance. Here, four flashes better matches the strobing effect seen on the people in the background.
6. Add a second blur
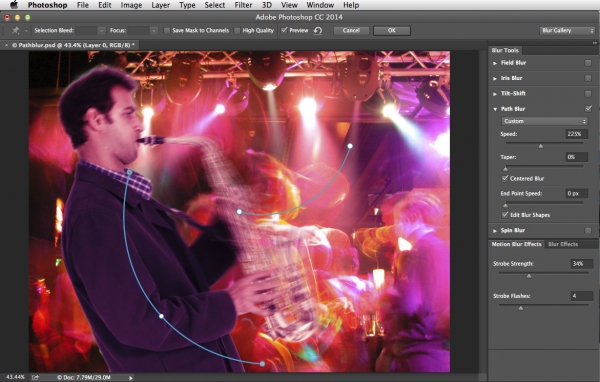
Click and drag elsewhere in the image to add another blur, without leaving this one first. If you add a diagonal line from the man’s neck to his hand, the result is a compound of the two blur effects.
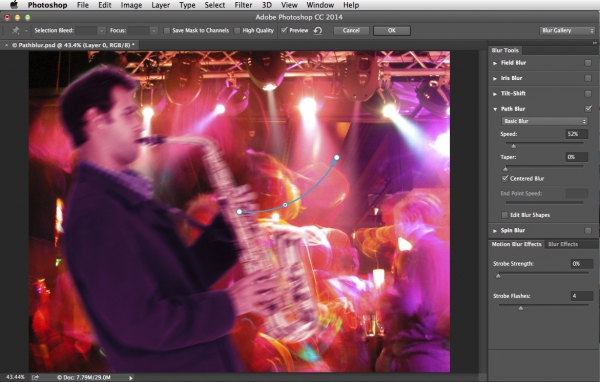
7. Edit the second blur
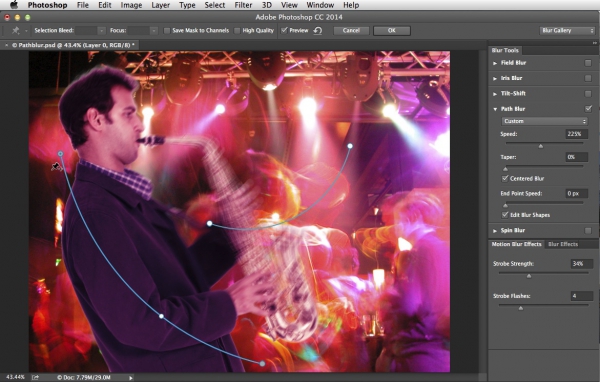
Just as with the original, you can click on the endpoints of the blur control and change the way it’s applied. In this case, I’ve set the endpoints of the new blur to a speed of zero, and bent the shape into a curve. And look what’s happened: the new blur limits the effect of the old one, forming a barrier around it.
8. Change your mind
Even though I’ve used two separate blurs, they can still be edited independently because I haven’t yet left the dialog box. This gives me the opportunity to experiment and to adjust both blurs until the end result is exactly as I want.
9. The final image
Here’s the result of that blur operation. The man’s head and body have a very slight blur to them, but the sax is blurred as if he’s swinging it upwards, which matches the energy of the background. And because his layer is a Smart Object, it’s possible to double-click the filter in the Layers panel and edit its appearance – or even hide it altogether.


