

You can enhance one image by dividing it into separate “photos” and then joining the individual pictures into a collage that resembles a pile of prints:
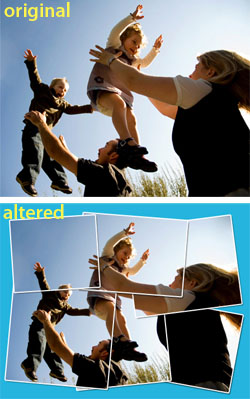
Here’s how to create the look in Adobe Photoshop.
Step 1
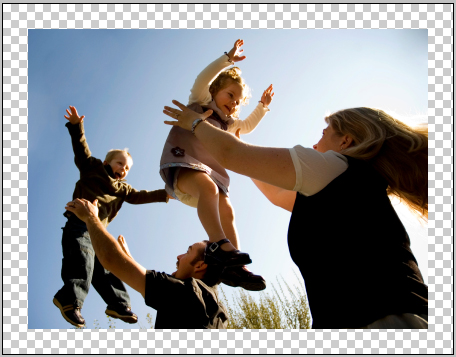
Identify a photo with a lot of interest points. I chose one from iStockPhoto.com.

©ISTOCKPHOTO/RENEE LEE
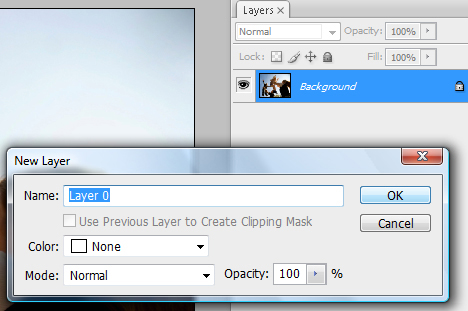
Step 2
Convert the existing layer from Background to a normal editable layer by double-clicking on “Background” in the Layers panel and clicking OK to accept the default “Layer 0” name.
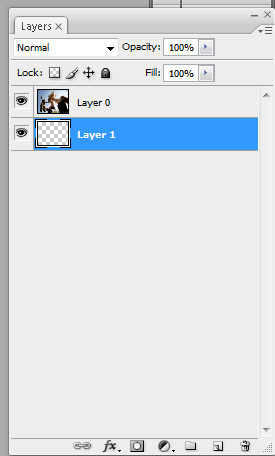
Step 3
Click the Create New Layer icon on the bottom of the Layers panel to create a new layer. Click and drag that new layer (Layer 1) below the original layer (Layer 0).
Step 4
Next, you’ll add a border. Go to Image > Canvas Size and make the image slightly larger, adding the same amount of pixels to the height and width. The image I used is 800×600, so I added 100 pixels to each to make the canvas 900×700.
Make sure the transparent layer (Layer 1) is highlighted in the Layers palette, then click the Foreground Color Picker on the bottom of the Toolbar. Choose a color; mine is #24b4dd. Click OK and press Option-Delete (PC: Alt-Backspace) to fill the transparent layer with the color.

Step 5
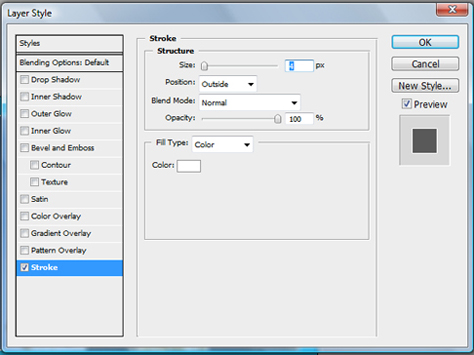
Now it’s time to set the size of the stroke that will surround each of the smaller “photos” you’ll create from the original image. Click on Layer 0 to highlight it and go to Layer > Layer Style > Stroke. Set the stroke to a size that’s noticeable but not too heavy. I set the pixels to 4. Change the color of the stroke to white and check the settings as shown in the figure below.
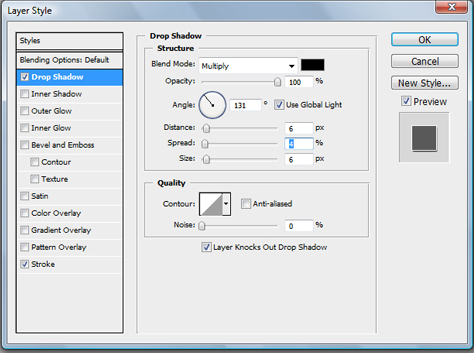
Before clicking OK (it’s okay if you have, just go to Layer>Layer Style again and select Drop Shadow), go to the Drop Shadow settings. Adjust the drop shadow settings so the shadow of the photo looks realistic. I set the Blend Mode to Multiply and color to Black, and I set the Opacity to 100%. I set the Distance to 6 px, Spread to 4%, and Size to 6 px. I set the angle to 131 degrees.
Step 6
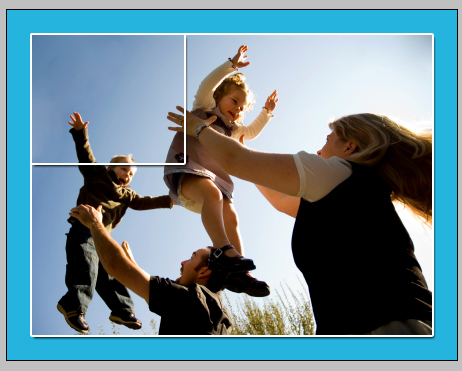
Here’s the fun part! Make sure the photo layer (Layer 0) is still highlighted in the Layers palette. Select the Marquee Selection tool from the Toolbar and click-and-drag an area about the sixth of the original photo. When done, press Cmd-J (PC: Ctrl-J) to duplicate the layer with the selection. The new layer will have the same stroke and drop shadow and will look something like the figure below.
Step 7
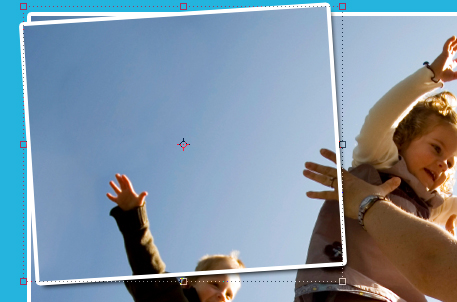
Select the Move tool from the top of the Toolbar and hover near the corner of the new, duplicated layer. The cursor should become a double-sided arrow; click and drag to slightly rotate. Press Return (PC: Enter) to apply the rotate.
Step 8
Repeat steps 5, 6, and 7 for other areas of the photo. Be sure to click on the original photo layer (Layer 0) each time before making a selection and duplicating the layer. Your image should look something like the figure below.

Step 9
Finally, click the Eye icon next to the original photo layer to make it invisible.

You may want to tweak your image a bit. Since the individual “photos” are all on their own layers, you can easily move them around the canvas—just select a layer in the Layers palette and click and drag with the Move tool. You can also add Layer Blending modes to the layer, and of course adjust the background color.
Chad Neuman is an internationally published freelance magazine writer, graphic designer, photographer, and educator from Florida. Subscribers to his mailing list receive very occasional updates and free vector art/graphics.
This article was last modified on December 17, 2022
This article was first published on December 2, 2009
Commenting is easier and faster when you're logged in!

Recommended for you
Meet the Neo SmartPen: A New Way to Draw
As an artist who specializes in combining traditional and digital tools, I’m alw...

Inside the Publishing Revolution: How the LaserWriter and Photoshop Changed the World
Excerpted from “Inside the Publishing Revolution: The Adobe Story” (...
CreativePro Tip of the Week: Photoshop Blend Mode Shortcuts
This CreativePro Tip of the Week for Photoshop blend mode shortcuts was sent to...