
Photoshop How-to: Advanced Techniques with the Art History Brush

Adapted from “Photoshop 7 Magic” (New Riders Publishing).
The Art History Brushes are affected by Photoshop’s Brush controls. Any kind of image can be altered and enhanced with Art History brushwork. My favorite subjects for painting and image manipulation are the human face and figure.
Though not absolutely necessary, a graphics tablet is recommended for this project. =
Making a Face
Take an ordinary vacation snapshot and turn it into a painting. You’ll retain the original shapes and colors but re-create them with the Art History Brush. This section is a warm-up for more expressive effects later.
1. Open Ida_Cafe.tif from the files you just downloaded (see Figure 1).
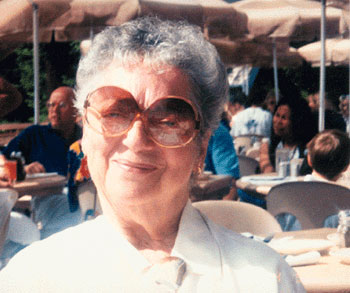
Figure 1: Begin with the close-up photo of Ida.
2. Sample a warm brown from the big umbrellas in the background. You can also type R 154, G 97, and B 80 in the Color Picker.
3. Fill the entire image with brown. The quickest way is with the keyboard shortcut of Alt+Backspace/Option+Delete.
4. Edit > Fade the fill to about 90%, just enough to be able to see the original image as a guide for your brush strokes.
5. Use the Replace Brushes command in the Brush Preset Picker flyout menu. Choose the accompanying file F_X Magic Brushes.abr from the files you just downloaded.
This library provides a manageable number of interesting brush tips.
TIP: I prefer to have a relatively small number of brush presets at my fingertips to avoid spending time scrolling in search of just the right one. If you need to customize settings while you work, use the New Brush command to give each new preset a unique name. Eventually, you will develop a Brushes library that suits the way you like to paint.
6. Choose the Art History Brush. Use the 63-pixel Watercolor Loaded Wet Flat Tip preset. On the Options Bar, accept the default Normal mode, 100% opacity, a 50-pixel area, and 100% tolerance. Set Style to Dab.
7. Scribble over the face and some of the surrounding areas.
Notice that all the brush strokes are at the same angle, regardless of the direction of your brush strokes. That seems a bit too mechanical. In addition, some areas seem resistant to paint. You’ll fix that in the next steps.
8. Reduce Tolerance to 0% and paint again. This time no portion of the image resists paint. The strokes also seem richer and thicker.
9. To create variation in the angle of the brush tip, open the Brushes palette and highlight the Shape Dynamics field. Choose Direction in the Control menu for Angle Jitter (see Figure 2). Repaint some of Ida’s face with the new brush setting.
You will need access to the Brushes palette frequently. Drag it away from the palette well to keep it open while you work.
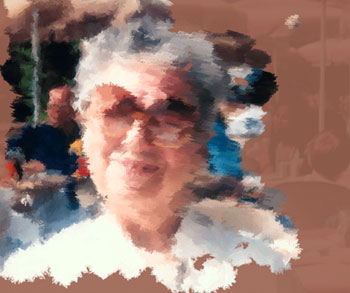
Figure 2: Reduce Tolerance in the Options Bar and set Angle Jitter to Direction control.
10. Switch to the Scattered Leaves brush. There’s no need to change any settings in the Options strip. Paint over the background.
The translucent leaves that compose this brush tip are not intrusive or even apparent. The result is a soft focus background, ideal for this portrait.
Now eliminate the prickly strokes in the face that were caused by angle variation in the flat tip brush.
11. Switch to the Soft Wet 31 brush, and change Style from Dab to Tight Medium. Paint over Ida’s face and neck (see Figure 3).
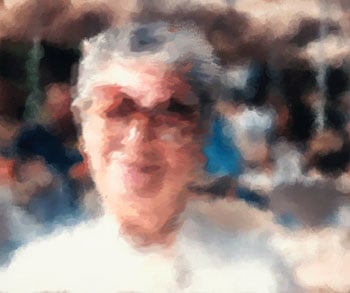
Figure 3: Use the Soft Wet brush with Tight Medium strokes to repaint the face.
12. Each time you brush over an area, the results are slightly different, even with the same settings. Continue working until you are satisfied with the effects.
13. The finished piece is still true to the original. Close this warm-up image. You can save it if you wish.
This article was last modified on January 3, 2023
This article was first published on February 26, 2003
Commenting is easier and faster when you're logged in!

Recommended for you

Free Lightroom 5 QuickStart Guide
For anyone looking to get a solid grasp on how to use Adobe Photoshop Lightroom,...

Scanning Around with Gene: When Sparks Fly
I suspect every American kid, especially every boy, has vivid memories of Fourth...

How to Make a Rippling Flag in Photoshop
How to make a realistic flag on any background with the design of your choice.