Photoshop How-To: It's All There In Black and White
“I love the smell of hypo in the morning!”
That may not be the best paraphrase from “Apocalypse Now” but, for the film photographer accustomed to developing his or her own black and white photos, it does convey the point. It’s been forty years since my first venture into a darkroom; the sounds (or lack of them), the smells, and the results are all wonderful memories. And that seems to be just what they’ll remain, memories, because of the rapid changes brought about by digital photography.
Few photographers spend much time in the darkroom anymore. Even for those who do, black and white printing is an endangered species: Eastman Kodak announced it will no longer manufacture black and white photographic papers, and there are rumors concerning the financial stability of the remaining companies selling that material. And can the continued production of some black and white films be considered safe?
It’s time for photographers to take the “development” and printing of black-and-white images into our own hands. In this, part one of a two-part series, I’ll show you the best ways to convert digital color images to black and white. Part two will cover printing methods and equipment.
Clean Up Your File
As a black and white aficionado in the digital world, Adobe Photoshop is my conversion tool of choice. As with many features of this bottomless well of a program, there are several ways to convert digital color images to black and white.
However, before you try even one of those methods, you should clean up the image in its original RGB color space. I color-correct my images using the color sample tool, measuring what I perceive to be the blackest black and the whitest white in the image. With those data points displayed in the Info palette, I open the Levels dialog box and enter the two data points into the respective R, G, and B channel’s input level data fields. Next, I open the Curves dialog box and make any appropriate adjustments.
After completing these steps, I convert the image from RGB space to Lab space. If the image calls for it, I go to the a and b channels to enter “x” amount of Gaussian blur to correct for any noise problems. Next, I go to the Lightness channel and perform sharpening, if necessary. I then convert back to RGB space and am ready to make the image black and white.
Color Conversion
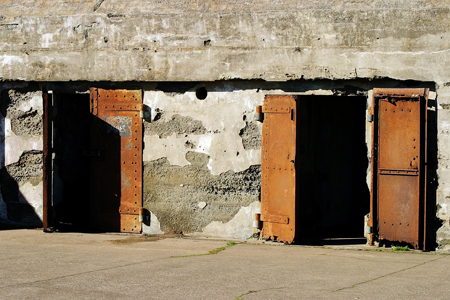
I captured Figure 1 below with a Canon EOS-1Ds, Mk II at Battery Mendel in California’s Golden Gate National Recreation Area.

Although I captured this image in color, I pre-visualized it printed out in black and white. For a larger version of this image, click on the image above.
The simplest way is often the best, but that’s not true for color conversion. To create Figure 2, I opened the original file and went to Image>Mode>Grayscale. The resulting image lacks the tonality I prefer; what’s more, this procedure is destructive. It throws away valuable information I could use elsewhere.

Converting the image using Image>Mode>Grayscale gave me unsatisfactory results. For a larger version of this image, click on the image above.
I tried another method. To produce Figure 3, I stepped through the R, G, and B channels. I determined which channel was closest to what I wanted the black and white image to look like. Once in that channel, I Selected All and copied that selection to the clipboard. Then I went to File>New, which automatically sized a new file to the dimensions of the original image. I then pasted the previously selected channel into the new file. This option gave me more latitude in contrast. As you can see in Figure 3, the R channel is almost blinding in its brightness when compared to the B channel.

The results of using channels to create a black and white image are also disappointing, and you still lose a significant amount of information. For a larger version of this image, click on the image above.
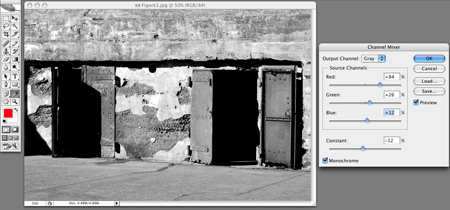
The critical demands of the serious black and white photographer are better served by Photoshop’s Channel Mixer. For this option, I opened my original image, went to Image > Adjustments > Channel Mixer. I checked off Monochrome in the dialog box and adjusted the sliders to suit my taste.

Channel Mixer offers more pleasing tonal quality than what you saw in the previous two methods. For a larger version of this image, click on the image above.
I picked up my favorite method from Photoshop guru Russell Brown’s Web site. To watch a 7.3MB movie that explains the method in detail, go to www.russellbrown.com/tips_tech.html and download the QuickTime movie next to the “Seeing in Black and White” tip.
The basic points of this technique consist of having the Layers palette open for the image you are working with. Create a new Adjustment layer, selecting Hue/Saturation, and set the Mode to Color. Rename this layer Filter. Next, create another Adjustment layer, again selecting Hue/Saturation, and set a value of -100 in Saturation. Rename this layer Film.
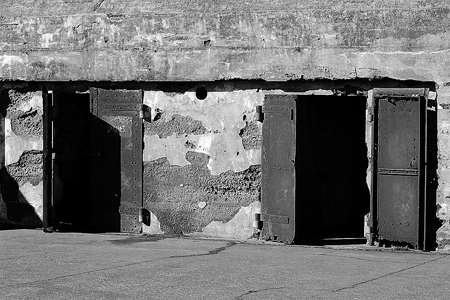
Return to the Filter layer and bring up the Hue/Saturation dialog box. By adjusting the Hue slider, you can generate an almost infinite series of appearances to your black and white image. You can also go to the extent of selecting the various channels in the pull-down menu, such as Red and Green, to fine-tune you image. When you’ve finished with your adjustments, save the file as is, create a copy, and then flatten the copy’s layers.

Russell Brown’s technique is my favorite way to make a color image black and white. For a larger version of this image, click on the image above.
Part Two of this series will look into options for black and white output.


No biggie, just want to pat myself on the back for noticing =)