
Photoshop How-To: Recording Actions for One-click Production


Some tasks are meant to be automated. Anyone who’s had to rotate, resize, and convert modes on 20 images knows the truth in that. Instead of opening each image individually then trekking to Edit > Transform (to rotate), Image > Image Size (to resize), and then again Image > Mode, before finally hitting File > Save, wouldn’t it be nice to click a button and have all those edits done at once?
That’s what Photoshop Actions do. Actions are far less intimidating than other modes of automation like scripting. Instead of writing code, you simply record your edits in the sequence you want them performed. You can even designate that a different folder be used to store your edited images.
Photoshop ships with a series of pre-recorded Actions, but it’s not difficult to record your own, as this video tutorial shows.
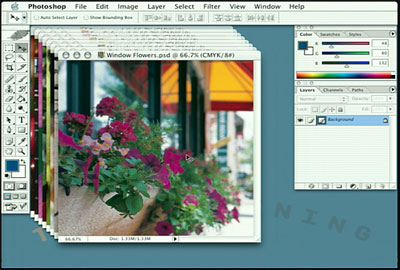
In this video clip (4 minutes 38 seconds as a 6.8 MB download), Steve Holmes first shows how to use the Match Zoom Command to change all open images to the same zoom level. The he shows how to record actions, and use batch automation to resize, save and close them.
In the full “Total Training presents: Adobe Creative Suite — From Design to Delivery” training series, you will learn techniques for page layout, text wrapping, preflighting, web design, and more
This video tutorial is a QuickTime movie. Click the link “Photoshop CS Record Action” to play the movie. Or you can downlod the file by option- or right-clicking on the link.
If you do not have QuickTime installed, you can get it here:
Excerpted from “Total Training Adobe Creative Suite — From Design to Delivery” © 2004 Total Training ALL RIGHTS RESERVED.
This article was last modified on January 3, 2023
This article was first published on October 8, 2004
Commenting is easier and faster when you're logged in!

Recommended for you

How to Digitize a Film Archive with Adobe Lightroom or Adobe Camera Raw
Digitizing an archive of film images can be a time-consuming process. Instead of...
Turning Grayscale to Color in Photoshop
When it comes to creating multitone images, it’s common to think of using the Du...

Organizing Illustrator Files With Layers
We’ve all done it. We’ve all been so involved in the creative process that we do...