
Photoshop How-To: Recreating Polaroid Image Transfers

Making Polaroid transfers is typically a photographic process done by transferring an image onto a wet or dry receptor surface. The process offers an endless amount of creative possibilities, often resulting in beautiful, unique artwork. Normally, you’d create a Polaroid transfer using Polaroid film, but with a little help from Photoshop, you can create the same results visually right on the computer (don’t tell Polaroid).
Digital Transference
In this article, we’ll show you how to digitally create three different types of image transfers. First, we’ll go over how to replicate the look of dry image transfers; then we’ll show you how to create an emulsion transfer, which is a wet transfer. And, last we’ll explain how to re-create the appearance of SX-70 Manipulations. All of these produce unique results.
Note: To see actual examples of Polaroid image transfers, go to www.polaroid.com. Then, select the Polaroid Education Program link. In the resulting window, choose the Create menu then click on Creative Imaging Techniques. There you can select from the various processes and see how each method is done traditionally.
Dry Transfers
To create the look of a dry Polaroid transfer, you’ll need an image that you want to digitally transfer as well as paper to place it on. So, select your image, scan it in if necessary, and open it in Photoshop. Also, make sure that the image is RGB because we’ll be applying filters to it. Then, scan in a piece of watercolor paper or rice paper at the same resolution and color mode.
Once you have both images open, make a new document in Photoshop and drag the paper image onto it. Then, drag your photographic image onto the new document as well. Each image will automatically be placed in its own layer in the Layers palette, as displayed in figure 1. Now, select the layer containing the paper image and reposition it so that it covers the entire document. Next, select the layer with your image and center it on the page, leaving about an inch border around it, as shown in figure 2. Now it’s time to make it look more like an image transfer.

Figure 1: Scan in a piece of textured paper to combine with a photographic image. Each one is placed automatically on a separate layer.

Figure 2: Resize and position your photo in the center of the document, leaving a paper border around it.
Transparency and grain. Since we went through the trouble of scanning paper for the background, it would make sense to allow it to show through our image. So, select the layer with your image (we’ll call this Layer 2 from now on), and change its blending mode to Multiply. This allows the paper grain to show through, as displayed in figure 3.

Figure 3: Change the photo layer’s blending mode to Multiply to make it semitransparent.
Next, we’ll add some grain to the image to create a more naturalistic look. To do so, choose Filter > Artistic > Film Grain. In the resulting dialog box, set the Grain slider to 4, the Highlight Area to 0, and the Intensity to 6. Then, click OK to apply the effects. Your image should now resemble that shown in figure 4.

Figure 4: Add a film grain to your photo to make it resemble an actual Polaroid transfer.
Make a frame. One of the most recognizable aspects of dry Polaroid image transfers is the rough frame that’s formed around the image. To create something similar, we’ll use a Quick Mask and a painterly brush. To begin, [command]-click ([Alt]-click in Windows) on Layer 2 to select your image. Then, press Q on the keyboard so you can edit your image in Quick Mask mode. Upon doing so, the selected area will be filled in with a reddish colored mask.
Now, select a brush tool from the Toolbox. Go to the Brushes palette and select a medium-size Spatter brush. Then, using white, paint around the outside edges of your mask, as we did for figure 5, making the bottom section a bit rougher than the top and sides. Once you finish your trim work, press Q again to return to Standard mode. Your mask will then be converted into a selection. Select the inverse of your active selection and press [delete] to remove your original edges and deselect the selection, as displayed in figure 6. This will give you the base shape for the frame.

Figure 5: In Quick Mask mode, paint around the edges of your image to make a rough frame.
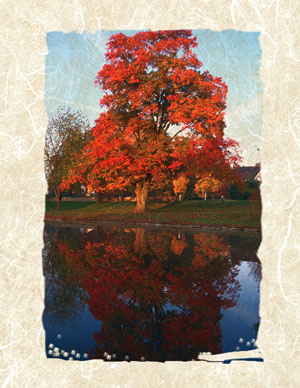
Figure 6: Exit Quick Mask mode and delete the outside edges of your image to reveal your freeform frame.
Next, we’ll intensify the frame by adding black to it. Again, [command]-click ([Alt]-click in Windows) on Layer 2 in the Layers palette to select the image. Make a new layer in the Layers palette. Then, fill the selection with black. Now, using the Eraser tool erase the middle area framing in your picture, as shown in figure 7. Then, set the Layer’s blending mode to Overlay to tone it down a bit, as displayed in figure 8. At this point, your frame should be complete.
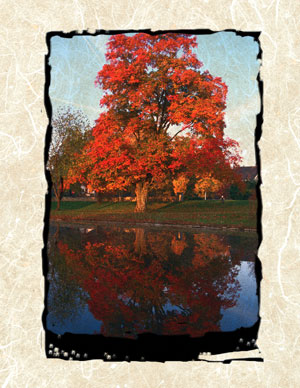
Figure 7: Add a rich black border to your photo.
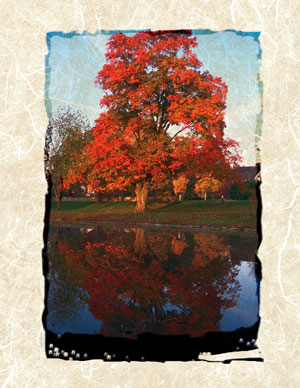
Figure 8: Blend in the border a bit by changing the layer’s blending mode to Overlay.
Soften the background paper. The last step in this process isn’t mandatory, but it does add to the entire piece. Rather than leave the paper background the way it is, we’ll soften up the edges so that they blend into the white background. To do so, select the layer containing your paper and then make a selection that’s about halfway between the edge of your image and the edge of the document itself. Then, feather the selection by 25 pixels. Select the inverse and press the [delete] key. That’s all there is to it.
Now let’s make an emulsion transfer.
This article was last modified on January 3, 2023
This article was first published on January 31, 2003
Commenting is easier and faster when you're logged in!

Recommended for you

Easy 3D with Photoshop and Adobe Dimension: Part 1
If you’re not experienced with 3D software, you’ve probably had to pass on the i...

Digital Camera How-To: Shooting Snowy Scenes
Winter is a great time to get out and take some pictures with your digital camer...
CreativePro Tip of the Week: Drawing Instant Abstract Art in Illustrator
This CreativePro Tip of the Week on creating instant abstract art in Illustrator...