Review: Adobe InDesign CS5

Rating: 
Body: 

Pros: Span- and split-column paragraphs, multiple page sizes, Illustrator-style Layers panel, numerous simplified transformation options, dynamic metadata captions, text track changes, and an expansive new set of animation and interactivity features.

Cons: SWF export doesn't include scalable animations, no split columns in table cells, longstanding rotation behavior removed, Document-installed Fonts feature on Mac platform supports OpenType and TrueType only.

Rating: 95

InDesign CS4 had the misfortune to hit the streets during a downward economic spiral. Making a business argument for upgrades in a severe recession was not an easy thing to do. Bean counters were unlikely to see the R.O.I. in GREP Styles or Cross-references, so many people skipped CS4.

Even with the recession allegedly behind us, the pressure is on Adobe to deliver must-get upgrades. InDesign CS5 meets that challenge, delivering far more than its predecessor. It improves and rethinks much of how we deal with objects on the page, and it offers additional automation options, dramatic productivity enhancements, and new workflow solutions. InDesign CS5 delivers some long-requested features and many little things that add up to a lot. The new version also introduces impressive new features that let print designers stretch themselves into the new paradigm of document creation, which now includes interactivity, animation, and video.

There's so much to cover in this review that I've broken it into seven pages. You'll get the most out of the information if you read it all, but I've also provided a table of contents with links that take you directly to particular sections of the overall review:

1. Multiple Page Sizes; Span, Split, and Balance Columns
2. Simplified Transformations and Selections
3. The Gap Tool; Gridified Frames and Super Step-and-Repeat; Layers Rebuilt
4. Metadata Captions; Mini Bridge
5. Interactive Documents
6. Workflow and Collaboration; (Not Quite) All The Little Things
7. Buying Advice

Multiple Page Sizes
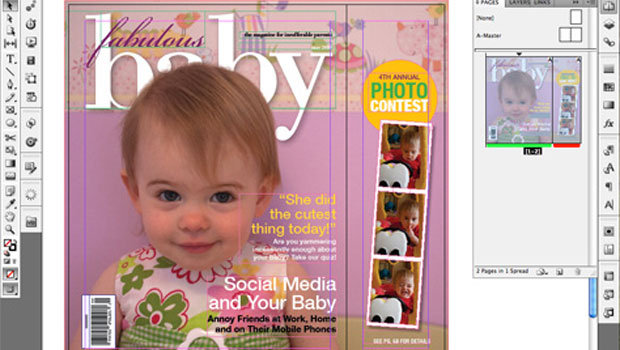
InDesign CS5 finally adds powerful support for multiple page and master page sizes (Figure 1) to deal with everything from gatefolds to varying ad page sizes to managing any multi-piece project.


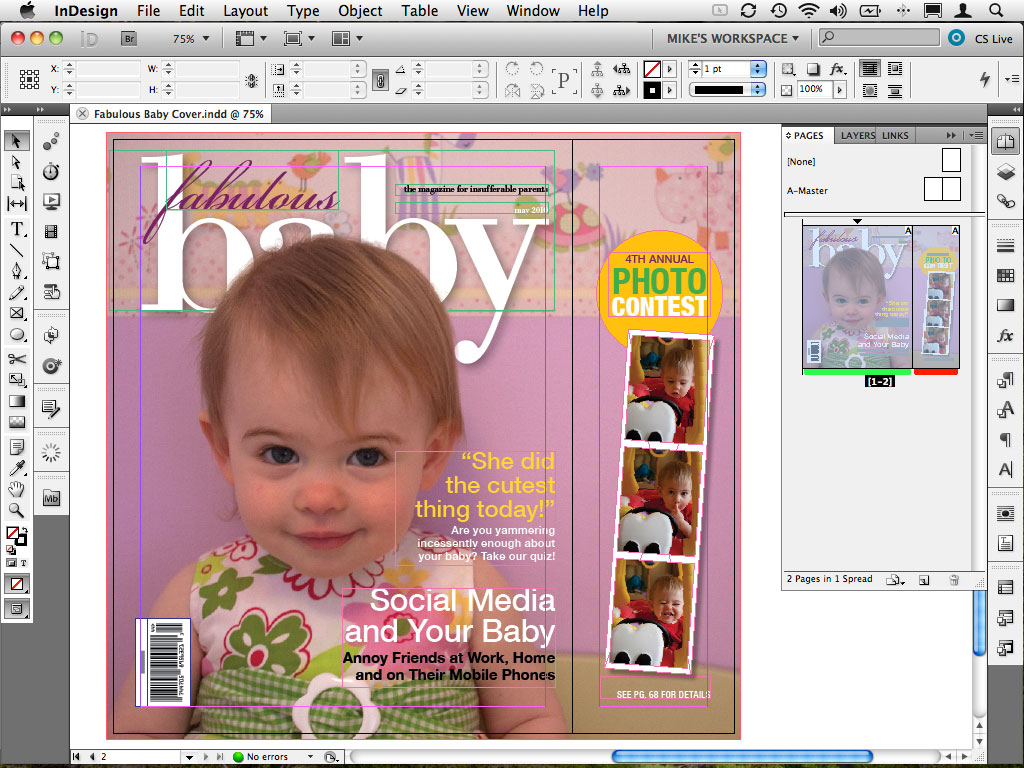
Figure 1. In this layout, different-sized pages use the same master so the gatefold flap and full cover share the same margins. Also note the jumbo-sized thumbnails in the Pages panel, and the color-coded labels on each page thumbnail -- both new features. Click this image to see a larger version.

Part of this feature is the new Page tool, with which pages themselves become selectable items. When a page is selected with the Page tool, new options in the Control panel allow for page re-sizing right on the document page, without a dialog box (Figure 2). You can also view an overlay of the master page applied to the selected page(s) and reposition that master page without affecting the master itself, or having to override items on the page.


Figure 2. The Control panel in its new Page mode. Page re-sizing can occur from any of the usual 9 page points (top left, bottom right, center, etc.). Objects can be set to move with the page when it's changed, or not, and the feature works in combination with any existing Layout Adjustment settings. Click this image to see a larger version.

Span, Split, And Balance Columns
This is a feature that's long been on the wish list of anyone designing newspapers, newsletters, magazines, and the like: paragraphs that can span multiple columns in a multi-column frame, or split one column into multiple columns (Figure 3). This is a fantastic feature. It's faster, easier and more efficient than creating additional frames in the text flow, or using tricks like anchored text frames to achieve similar results. The only disappointment is that it doesn't also work in table cells.


Figure 3. This text exists in a single, three-column text frame. The headline and deck span all three columns, and the intro spans two. I used Split Columns to flow the bulleted list into two columns.

At the text frame level, another new option is Balance columns, which distributes lines of text in even amounts (vertically) across all columns, regardless of the depth of the frame. The feature is completely dynamic, so as you increase or decrease the number of columns in the frame, they're automatically rebalanced. Note that frame re-sizing and basic text edits will be slower when spanning and column balancing are both applied.

To jump to specific sections in this review, click any of the following links:

1. Multiple Page Sizes; Span, Split, and Balance Columns
2. Simplified Transformations and Selections
3. The Gap Tool; Gridified Frames and Super Step-and-Repeat; Layers Rebuilt
4. Metadata Captions; Mini Bridge
5. Interactive Documents
6. Workflow and Collaboration; (Not Quite) All The Little Things
7. Buying Advice

Simplified Transformations and Selections
Adobe added a number of new features that are all geared toward simplifying how you work on page items, eliminating a lot of tool switching and multiple object selecting.

Content Indicator. Switching between the selection tool to modify a frame, and the direct selection tool to work with the content in that frame, is a common repetitive task. CS5's new content indicator ring -- a semi-transparent "donut" that appears in the center of graphic frames when you hover over them -- eliminates that tool switch. Just click and hold on the content indicator and start dragging the image around in the frame. Release, and immediately resume working with the frame. There's no need to practice "patient user mode," either. Live previews of objects and images as you move them are now instantaneous.

Live Corner Effects. Rectangular frames also sport another new element: a small yellow square on their upper right edge. Click that, and each corner of the frame becomes a yellow diamond. Drag any diamond inward to round all corners, or shift-drag to round only the selected corner (Figure 4). More precise settings are available from the Control panel and the Corner Options dialog, which now includes separate settings for each corner.


Figure 4. You create simplified corner effects by clicking the yellow square on any rectangular frame (top), then dragging the yellow diamond (second from top) to apply the default rounded corner effect (third from top). Opt/Alt-clicking the yellow diamond cycles through the other corner types (bottom row).

Dynamic Rotation Cursor. Speaking of tool switching, you can forever eliminate trips to the Tools panel to choose the Rotate tool. Hover just beyond any object's corner with the Selection tool, and the cursor switches to a rotate icon. If you've selected multiple objects, they all rotate together without the need to group them.

Modify Multiple Frames. Re-sizing multiple objects simultaneously no longer requires grouping, either. Select the objects to be re-sized, then click and drag a handle on the selection to re-size them all at once. Hold down the Shift key to make that transformation proportional, or click Shift-Cmd/Ctrl to proportionally re-size the objects and their content (text or graphics).

Auto-Fit. The new frame-level Auto-Fit feature enables semi-intelligent scaling based on the position of the image in the frame without the scale tool or modifier keys. Depending on whether the image is cropped within the frame, and which handle of the frame you select to re-size it (top/bottom, left/right or any corner), Auto-fit fixes on the current position of the image within the frame and works to maintain that position as you re-size the frame (Figure 5). Auto-Fit adapts as you extend the frame drastically in one direction or another, switching the points (top and bottom left or top left and right) from which it re-sizes.


Figure 5. Click to open a YouTube video demonstrating how the Auto-Fit feature in InDesign CS5 works.

Simpler selection. Accessing and then moving an object that's behind one or more overlapping objects has always been a frustrating exercise. A key combination would get you to the object, but the additional click needed to move it instead deselected it and selected an object above it. Not anymore. If an object is selected and your mouse is over it, InDesign CS5 assumes that's what you want to work with and favors that object over any in front of it.

Double-click Into Groups. One of my absolute favorite improvements is how easily you can now access objects in -- and easily navigate back out of -- groups. Prior to CS5, the only way to get to a single object in a group without un-grouping everything first was to use the puzzling Select Container or Select Content buttons in the Control panel. Now, just double-click on an object that's in a group to select it. Once you're in the group, you can click to select any other single object within it, or double-click to select an object's content (image or text). The Escape key backs you out the way you came, one step at a time.

Live Distribute. Once objects are on a page, adjusting the spacing between them use to involve drawing a lot of guides, repeatedly selecting and moving individual objects, using the Align panel, and any number of other tedious steps. The new Live Distribute feature in CS5 lets you simultaneously -- and evenly -- adjust the spacing between multiple objects. Simply select one or more objects that are in a row, click a handle on the left or right side of the selection (or the top and bottom sides for vertical spacing changes), press and hold the space bar, and start dragging away from the selection to increase the space between objects or toward the selection to decrease it. Performing the same action from the bottom right corner of the selection redistributes the objects diagonally and can transform a horizontal row of objects into a vertical row, and vice-versa.

One transformation has, regrettably, been made more difficult in CS5. When rotating the "old-fashioned" way with the rotate tool, you could set the rotation point crosshair with a click before rotating. That no longer works. Instead, you must first find the little crosshair (not always easy to do), then drag it to establish a rotation point. It's either that, or mouse up to the Control panel and click one of the 9 points on the proxy icon. I hope this changes gets reversed in a mid-cycle update.

To jump to specific sections in this review, click any of the following links:

1. Multiple Page Sizes; Span, Split, and Balance Columns
2. Simplified Transformations and Selections
3. The Gap Tool; Gridified Frames and Super Step-and-Repeat; Layers Rebuilt
4. Metadata Captions; Mini Bridge
5. Interactive Documents
6. Workflow and Collaboration; (Not Quite) All The Little Things
7. Buying Advice

The Gap Tool
Moving and re-sizing objects on a page is an established concept, but now designers can approach layout changes a whole new way: by modifying and re-sizing the white space on the page with InDesign CS5's new Gap Tool. You can move the white space (the gap) between two or more items on the page, re-sizing all of the objects around it simultaneously. Like the other simplified transformations, this tool eliminates selecting individual objects one at a time, drawing guides and changing tools. The "gap" can be:

• the space between frames and objects (but not the gutter in multi-column text frames), or
• any part of the page where one or more items share a common alignment, including the space between the object and a page edge.

Using the Gap Tool, hover over any gap and a pale gray highlight appears with two directional arrows. Click and drag to reposition the gap, and the objects on either side of it are re-sized according to its new position (Figure 6).


Figure 6. Click to open a YouTube video demonstrating InDesign CS5's new Gap Tool in action.

The Gap Tool is also hands-down the fastest way to measure the gap between any two objects. Hover over any gap with the tool active, click and hold, and the Smart Dimensions feature (added in CS4) displays the gap's height or width.

Gridified Frames and Super Step-and-Repeat
InDesign CS5 makes multiple object creation incredibly easy with its new "gridified" tools. As you draw any rectangle, ellipse, polygon or text frame, hit the right arrow key while dragging to create a duplicate object in horizontal alignment with each tap of that key. The up arrow key adds duplicates vertically. The left arrow and down arrow keys reduce the number of horizontal or vertical duplicates, respectively.

This multi-frame creation feature is especially useful when placing multiple images. If your place gun is loaded with five images, you can create the five frames needed to place them all in one step, in perfect alignment, and at a consistent size. When drawing out a new text frame, the right/up arrow keys create additional frames that are pre-threaded. Unfortunately, this pre-threaded, multi-frame creation option is not available when importing a single text file. For that, you have to fall back on InDesign's long-standing text threading options.

To extend this gridification out to existing objects on the page, InDesign CS5 adds a new keyboard-based Super Step-and-Repeat capability. If you Opt/Alt-drag an object to duplicate it, hitting the up or left arrow key before releasing the mouse creates duplicate objects distributed between the original and the dragged copy with each tap of that key. Moving around the duplicated object before releasing the mouse redistributes all the objects in perfect alignment -- vertically, horizontally and diagonally -- while allowing you to continue adding or removing duplicates with the arrow keys until you release the mouse (Figure 7).


Figure 7. Click to open a YouTube video demonstrating the new super step-and-repeat feature.

Layers Rebuilt
CS4 saw the tearing-down and reinvention of the Links panel. This version's extreme makeover subject was the Layers panel, which is now very much like Illustrator's. Each layer now has a complete hierarchy of objects on it, revealed by clicking the triangle next to the Layer name (Figure 8). Grouped objects have their own hierarchy within that layer, accessible the same way.


Figure 8. InDesign CS5's rebuilt layers panel assigns every object a name. Defaults like "group" and "rectangle" are automatic, placed images bear the original file's name, and text frames are named with their first 32 characters. You can change any of these object names by triple-clicking its name in the panel.

The advantages of this object-level specificity are the ability to:

• select any object by Opt/Alt-clicking its name in the pane
• hide or show individual objects instead of entire layers, and
• add objects to or remove objects from a group via the Layers panel.

To jump to specific sections in this review, click any of the following links:

1. Multiple Page Sizes; Span, Split, and Balance Columns
2. Simplified Transformations and Selections
3. The Gap Tool; Gridified Frames and Super Step-and-Repeat; Layers Rebuilt
4. Metadata Captions; Mini Bridge
5. Interactive Documents
6. Workflow and Collaboration; (Not Quite) All The Little Things
7. Buying Advice

Metadata Captions
Graphic frames can now use the metadata built into the images within them to generate captions. The process is as simple as right-clicking an image, choosing Caption Setup and designating the desired metadata field(s) you want to use (Figure 9). Once all options have been set, you need to exit the dialog, right-click the image and choose either Generate Live Caption or Generate Static Caption.


Figure 9. In the Caption Setup dialog, static text can be appended before and after the metadata, and you can assign the caption's paragraph style, position relative to the image frame, offset value, and its destination layer.

Live captions have the advantage of dynamically adapting to changes to the file's metadata. If the metadata is updated, the Links panel shows the image as modified, and updating the image updates the caption. Unfortunately, live captions have the same disadvantage as Text Variables -- they can't wrap, so they have to fit entirely on one line or the text is crushed together to fit. This is because live captions are, in fact, a new kind of Text Variable added to support this feature.

One way around the text wrapping limitation is to generate a static caption, which populates a text frame with a caption produced from the current metadata. That text will wrap and behave like any normal text, but it's not dynamic. If the metadata changes, the caption won't.

The Caption Setup dialog and the caption generation options make this a full-featured text variable, but some of its other behaviors make it more limited. Changes made in the Caption Setup dialog will not automatically update the "live" caption. Unlike every other type of text variable, metadata captions do not auto-update when their parameters are changed. You must generate a new caption.

Limitations aside, the live option is ideal for short captions that don't need to wrap (think product names, catalog item numbers, etc.), and even the static caption option should encourage designers who aren't already doing so to start building metadata into their images so information and images don't become separated from project to project.

Mini Bridge
InDesign, Illustrator, and Photoshop CS5 each include a new Mini Bridge panel that offers a subset of Bridge features within each application. The options are limited to Bridge's browsing, sorting, filtering, placing, and ranking features. You can't use Mini Bridge to add file metadata, and none of Bridge's more sophisticated features are available, but Mini Bridge is a much more efficient and visual way to access and place images than using File > Place, dragging from Finder or Explorer windows, or switching back and forth from "big" Bridge (Figure 10).


Figure 10. Any InDesign file with placed images appears in both Mini Bridge and "big" Bridge with a small link icon. Right-clicking the file's thumbnail and choosing Show Linked Files from the context menu builds an instant temporary collection of all linked files in that document. Also, a new InDesign file-handling preference enables the full Bridge application to preview the first page; first 2, 5, or 10 pages; or all pages in the document.

Mini Bridge options include thumbnail, filmstrip, detail and list views, and full-size previews for selected images in Mini Bridge are shown or hidden just by hitting the spacebar. A Review Mode presents the current files in a carousel-style presentation that allows access to the Loupe function, and a Slideshow mode offers full-screen previews of certain documents (including video and SWF files).

To jump to specific sections in this review, click any of the following links:

1. Multiple Page Sizes; Span, Split, and Balance Columns
2. Simplified Transformations and Selections
3. The Gap Tool; Gridified Frames and Super Step-and-Repeat; Layers Rebuilt
4. Metadata Captions; Mini Bridge
5. Interactive Documents
6. Workflow and Collaboration; (Not Quite) All The Little Things
7. Buying Advice

Interactive Documents
If you believe what you hear, the end is nigh for print design. We've been hearing this for more than a decade, of course, but many print designers who managed to survive the recession only to face the dawn of the electronic tablet may be reevaluating their skill sets and thinking very differently about the future. With InDesign CS5, Adobe may have built a narrow, but traversable, bridge toward the company's vision of that future.

Adobe lauds Flash Catalyst as its "interactivity without code" standard-bearer, but the true cross-media hub of the Creative Suite is InDesign. From InDesign CS5, you can:

• create complete Flash animations and interactive documents
• export interactive layouts as SWF files, or in native Flash format for further development and Actionscripting in Flash Professional
• export a rich media PDF with sound, video, buttons, and navigation
• produce a document you can print at high resolution.

Find me another application in the Creative Suite with that kind of reach.

The new cross-media direction is evident as soon as you create a document. A new "intent" option offers a Print or Web choice. The Web option changes the measurement system to pixels, the default page orientation to landscape, and the document's swatches and transparency blend space to RGB.

Animation. Unlike Flash Professional, InDesign's animation and interactivity options are not timeline-based. The related tasks are distributed across six separate panels (Figure 11), five of which -- Animation, Timing, Preview, Media, and Object States -- are completely new. The sixth is the updated Button panel that debuted in CS4.


Figure 11. The Animation panel comes pre-loaded with many of the same motion presets in Flash Professional. You can load motion presets created in Flash directly into InDesign, and vice-versa. A butterfly proxy image at the top of the panel gives you a rough preview of the preset you choose, and any motion paths used can be modified using InDesign's existing path editing tools.

An object can have only one animation attached to it, but if you group that animated object with any other object, the group can be animated on top of that. This grouping and re-animating trick, combined with the sequencing options in the Timing panel, can produce surprisingly complex animations without Flash (Figures 12, 13, and 14).


Figure 12. In the layout above -- originally designed for print -- the illustration, headline, deck, and by-line were animated directly on the InDesign spread. I applied multiple animations to certain objects by grouping already-animated frames. The results can be seen in Figure 13 below. Click this image to see a larger version.


Figure 13. You establish the sequence of multiple animations in the Timing panel by dragging one named animation above or below another. Animations play from top to bottom. The lines next to the first seven animations indicate that they're linked to play together.

Figure 14. Using the Animation and Timing panels, I generated this animated SWF from the same high-resolution artwork and type in the same file that produced the print layout in Figure 12. You'll need the Flash Player 10 to view this Flash movie properly.

CS5 eliminates the step of fully exporting to SWF, then loading that SWF file in a browser just to test your results. Animations render in the background, then play within the new Preview panel. You can preview an entire document or, for better performance, preview just the current spread or current selection.

Multi-state Objects. Also part of this arsenal of interactive tools is a States panel for creating multi-state objects. Any object can be made into a multi-state object allowing, for example, a single graphic frame to contain different images in each of its states, or have a different appearance. InDesign buttons can call on a specific state of the multi-state object, or just to its next or previous state for fast, easy slide shows (Figure 15). Ideally, these multi-state objects could be exported to and supported in a PDF, but they're not. Multi-state object functionality is tied exclusively to the SWF or FLA format.

Figure 15. Except for the buttons, I created this SWF slide show with a single graphic frame and a single text frame, each of which was set up as a Multi-state Object. I placed different images in each state of the graphic frame, and keyed different text into each state of the text frame. The buttons call upon the next (or previous) state of each frame simultaneously. You'll need the Flash Player 10 to view this Flash movie properly.

Improved Flash Export. InDesign's SWF and Flash Professional (FLA) export options are also greatly expanded from CS4. You can export a SWF or FLA of just the current selection, a specific spread, or the entire document. SWF export now includes options for image resolution and preferred image format, frame rate, background color, and page transitions from the INDD file. FLA export includes new type handling capabilities that preserve much more of the good-looking type we demand from InDesign without needing to rasterize it.

In-document Rich Media. InDesign CS5 supports more rich media file formats than prior versions, including SWF, MP3, FLV and F4V. You can preview these file types in the new Media panel, eliminating the need to export the layout to its destination format (FLA, SWF or PDF) to see its rich media content. You can also use the Media panel to add navigation points to placed video files that can be referred to by button actions.

A major flaw. Together, these new features should position InDesign as the ultimate next-generation document creation tool, able to easily produce both the old and new media content that makes up what we now consider a "document." Ideally, we should be able to create interactivity and animations in InDesign, export them to SWF, then re-import them into an InDesign layout and export that to PDF (which has the Flash player built in). This would make PDF the ultimate rich media document platform and InDesign the application from which those PDFs are produced.

But Adobe fell short of making this a reality. InDesign's export options don't allow for scalable SWFs. Any SWF you export from -- then place back into -- InDesign will not re-size when the document is exported to PDF. As you zoom in or out on the PDF page, the animation's size remains fixed. It's either cropped by its smaller container, or it floats within a larger one while page items around it get smaller or larger. To work around this requires exporting to Flash Professional, where you can publish a scalable SWF. However, while InDesign's animations are preserved in Flash, their timing needs to be re-established via Actionscript. At that point, you're dealing with Flash in exactly the way that these features were intended to avoid.

The scaling limitation does not apply to placed FLV or other video files, but this is a profound gap in functionality that I hope gets fixed by an update within CS5's lifespan. With interactive document technology racing forward and new platforms for displaying them coming to market, Adobe would be doing a great disservice to its customers by waiting until CS6.

Limitations aside, these features still represent a huge step toward helping print designers move into new media from the application with which they have the highest comfort level. The good news is that this new functionality begins in InDesign. The bad news is that all roads lead to either Flash or the Flash Player. As I write this review, Apple's very public anti-Flash position has many people wondering how they'll publish to the company's established iPhone and emerging iPad platforms. With CS5, Adobe's telling a Flash-centric story (Illustrator- and Photoshop-to-Flash Catalyst workflows, Flash Builder, and major InDesign-to-SWF/FLA features), but that story begs questions about the Apple/Adobe rift, and Flash vs. HTML5. No one can say for sure how this will all shake out or which way the market will push Apple or Adobe.

To jump to specific sections in this review, click any of the following links:

1. Multiple Page Sizes; Span, Split, and Balance Columns
2. Simplified Transformations and Selections
3. The Gap Tool; Gridified Frames and Super Step-and-Repeat; Layers Rebuilt
4. Metadata Captions; Mini Bridge
5. Interactive Documents
6. Workflow and Collaboration; (Not Quite) All The Little Things
7. Buying Advice

Workflow and Collaboration
Text Track Changes. Do you love the idea of tracking changes but don't want to set up an InCopy workflow to do it? InDesign CS5 solves that dilemma by building in track changes. This is a text-only feature, however. It won't track that someone re-sized an image or deleted a Master Page item, nor will it show you the change activity in the layout. You only see marked-up changes and details about who made them in the Story Editor (Figure 16).


Figure 16. Tracked changes are highlighted and identified by user in the Story Editor, where the options in the new Track Changes panel become available. Click this image to see a larger version.

You can enable Text Track Changes on a story-by-story basis or turn it on for all current stories in a document. Sadly, there's no preference or option available that auto-enables Track Changes for all new text frames.

Track Changes is helpful even if you just want to preserve for yourself a history of changes you've made. It's also a good way to build in a non-linear level of un-do functionality for all the text in your document.

CS Review. If your workflow doesn't involve sharing native InDesign files among users, but still requires distribution of proofs for comment and review, CS5 includes free access to several new online services that Adobe has collectively named CS Live. The services -- hosted on Acrobat.com -- include InDesign integration with Adobe's online word processing tool, Buzzword, and a new collaboration and commenting service called CS Review.

The start-to-finish online workflow path Adobe envisions for InDesign is that "source" documents begin on Acrobat.com through Buzzword, are shared and collaborated on "in the cloud," and are then placed into InDesign (File > Place from Buzzword…) for layout. Work-in-progress layouts are then shared -- again online -- with CS Review, available directly within InDesign from the new CS Review panel. One or more pages of a layout can be added to a review, and authorized reviewers can be invited to participate in the review without needing any of the CS5 software. All they need is a free Acrobat.com account.

The CS Review commenting interface is deliberately simple, allowing for call-outs and text comments which are immediately recorded to the online review and available instantly in InDesign's CS Review panel (provided you're online, of course). You can select any comment in the review and, from the CS Review panel menu, jump right to where the content in question appears in the InDesign document (Figure 17).


Figure 17. The CS Review panel tracks and updates comments made to an online review and displays them right in your InDesign document.

Online review of PDFs has been a part of Acrobat.com for some time, but the subject of that review process always had to be a PDF, regardless of the native application from which it was produced. That step is no longer necessary. The review process is integrated directly into InDesign, eliminating the need for a side-by-side comparison of the native file and one (or more) commented PDFs.

The services are described as "complimentary for a limited time," and it's not yet known whether Adobe plans to ultimately charge for them.

Document-installed Fonts. Because of licensing restrictions and subtle differences between fonts with the same name, font management has been a long-standing problem when documents are shared between users, or released to a printer or service bureau. The new Document-installed Fonts feature aims to combat this but only succeeds in a limited way.

When you package a job for output, InDesign gathers fonts into a Document Fonts folder that's in the same folder as the InDesign file. When someone else opens the document in InDesign CS5, InDesign automatically loads the fonts in that folder for that document only. No other document or application can use the fonts, and when the document's closed, InDesign immediately unloads the fonts. When active, Document-installed Fonts appear at the top of InDesign's Font menu.

You can do this without using the Package feature just by creating a folder named "Document Fonts" in the same directory as the InDesign file. It's a welcome way to avoid copying, installing and un-installing fonts needed only for a limited time, but the feature disappoints in its lack of support for anything other than OpenType fonts on the Mac platform. Older PostScript Type 1 and TrueType fonts are not activated automatically.

Background Tasks. Did you ever wonder how much of your time is wasted waiting for a PDF to finish processing before you can get back to work in InDesign? That's all over. PDFs now process in the background, letting you get immediately back to work -- even in the same document that you're exporting.

(Not Quite) All the Little Things
At the release of any new version, the little things tend to get overshadowed by the big features, but they're often what makes some users positively giddy. The biggest "little thing" in InDesign CS5 is that the ubiquitous "Preview" checkbox in the application's modal dialog boxes is finally sticky. Whatever state it was in last is the state it stays in until you change it, even after you quit and re-launch application. Also cause for celebration: Times Roman is no longer the default font used by No Paragraph Style and Basic Paragraph. It's been replaced by Minion Pro, which ships and installs with InDesign.

The Control panel now includes a pop-up iteration of the Swatches panel. More than just a selectable list (like style menus in the Control panel), it has all the options for applying color to the fill or stroke of text or an object; specifying a tint percentage; and all Swatches panel menu items. And it's expandable, so you can get a full look at very lengthy swatch lists.

In previous versions you couldn't move a locked object, but you could change its proportions, fill or stroke, edit a text frame's text, or reposition a graphic frame's content. Now, you can't modify the object in any way until you unlock it. Gone, too, are the days of the "hover and hunt" method of determining which objects are locked. There's now a honking big lock icon on the edge of any locked object.

Among the other notable little touches:

• You can now vertically justify text in non-rectanguar frames and frames affected by a text wrap object.
• A new Convert URLs to Hyperlinks feature searches for URLs, converting them to InDesign hyperlinks and applying the Character Style of your choice.
• A new Delete All Guides on Spread option does just that, and similar options include Unlock All on Spread and Clear Frame Fitting Options.
• A new view option -- Presentation Mode -- puts InDesign in full-screen mode, hides all UI elements and allows you to move through a document using the forward and back arrow keys.

To jump to specific sections in this review, click any of the following links:

1. Multiple Page Sizes; Span, Split, and Balance Columns
2. Simplified Transformations and Selections
3. The Gap Tool; Gridified Frames and Super Step-and-Repeat; Layers Rebuilt
4. Metadata Captions; Mini Bridge
5. Interactive Documents
6. Workflow and Collaboration; (Not Quite) All The Little Things
7. Buying Advice

Buying Advice
InDesign CS5 is a well-balanced blend of old and new. With it, Adobe answered long-standing wish list items (multiple page sizes), made existing features exponentially more useful (the Layers panel), dramatically improved layout efficiency (simplified transformations), introduced new workflow solutions (track changes and CS Review), and expanded InDesign's influence beyond the printed page (animation and interactivity). All together, it makes InDesign CS5 a must-have upgrade, especially for anyone who sat out CS4.

As a standalone product, InDesign CS5 retails for $699 ($199 upgrade from CS4, CS3 or CS2) and is included in the Design Premium edition of the Creative Suite along with Photoshop, Illustrator, Flash Professional, Flash Catalyst, Acrobat 9 and Dreamweaver for $1899 ($599 upgrade from Design Premium CS4; $799 upgrade from Design Premium CS3 or CS2). It's also part of the Creative Suite Master Collection ($2,599 new; $899 upgrade from CS4; $1199 upgrade from CS3), which also includes every product in the Design Premium, Web Premium and Production Premium suite packages.