


Score: 90
Pros: Truly useful filters; excellent interface; great customization capabilities.
Cons: No way to output masking information.
Long-time photographers will recognize the name Tiffen. As one of the leading manufacturers of filters for still and video cameras, it makes sense that Tiffen would eventually make a suite of image-editing filters. After all, to the latest generation of photographers, “filter” usually means “software plug-in,” not “screw-on piece of glass.” So Tiffen created the Dfx Suite, now at version 2, as a set of plug-ins for Photoshop-compatible editors and Apple’s Aperture. Video versions are also available for Avid, Final Cut, Premiere, and more. Finally, for users who don’t have a compatible host application, Dfx is also available as a stand-alone application. Whichever version you choose, you’ll find this to be an excellent addition to your image-editing arsenal.
Dfx Suite Version 2’s base collection of 110 filters are aimed at photographers and simulate the types of effects you’d create with glass lens filters. There are no graphic design-oriented filters here and no goofy effects, just basic tone, color, optical, and lighting effects.
Because each filter has customizable parameters (and some filters have lots of parameters), you can define different preset configurations for each filter. The parameters provide a lot of latitude for filter customization, so in some cases, different presets feel like very different filters. The package ships with more than 1,000 presets spread across its 110 different filters. In other words: Dfx provides a huge collection of filter options.
This kind of effect glut could render the package unusable if there weren’t an easy way to identify and find filters. To that end, the Dfx suite includes an entire editing environment that you use inside your host application. With it, you can find the filter you want; select presets; tweak, adjust, and save presets; see before/after previews; stack multiple presets to create complex effects; and even create masks to constrain the effects of specific filters.
The Dfx Suite Version 2 comes in three flavors: as a plug-in for Photoshop and Aperture ($299) and as a standalone application ($99). The three versions have identical capabilities, with the exception of a few more tools in the less-expensive standalone application, such as cropping, resizing, and batch-processing. For my take on which flavor to choose, see the final section, “Worth the Money?”
Easy-to-Use Interface
I looked at the Photoshop plug-inversion of Dfx, but you’ll find the same interface within Aperture and the stand-alone version.
In Photoshop, Dfx applies its effects to the currently selected layer. Choose the Dfx suite from Photoshop’s Filter menu and you’ll be taken to the Dfx editing environment.
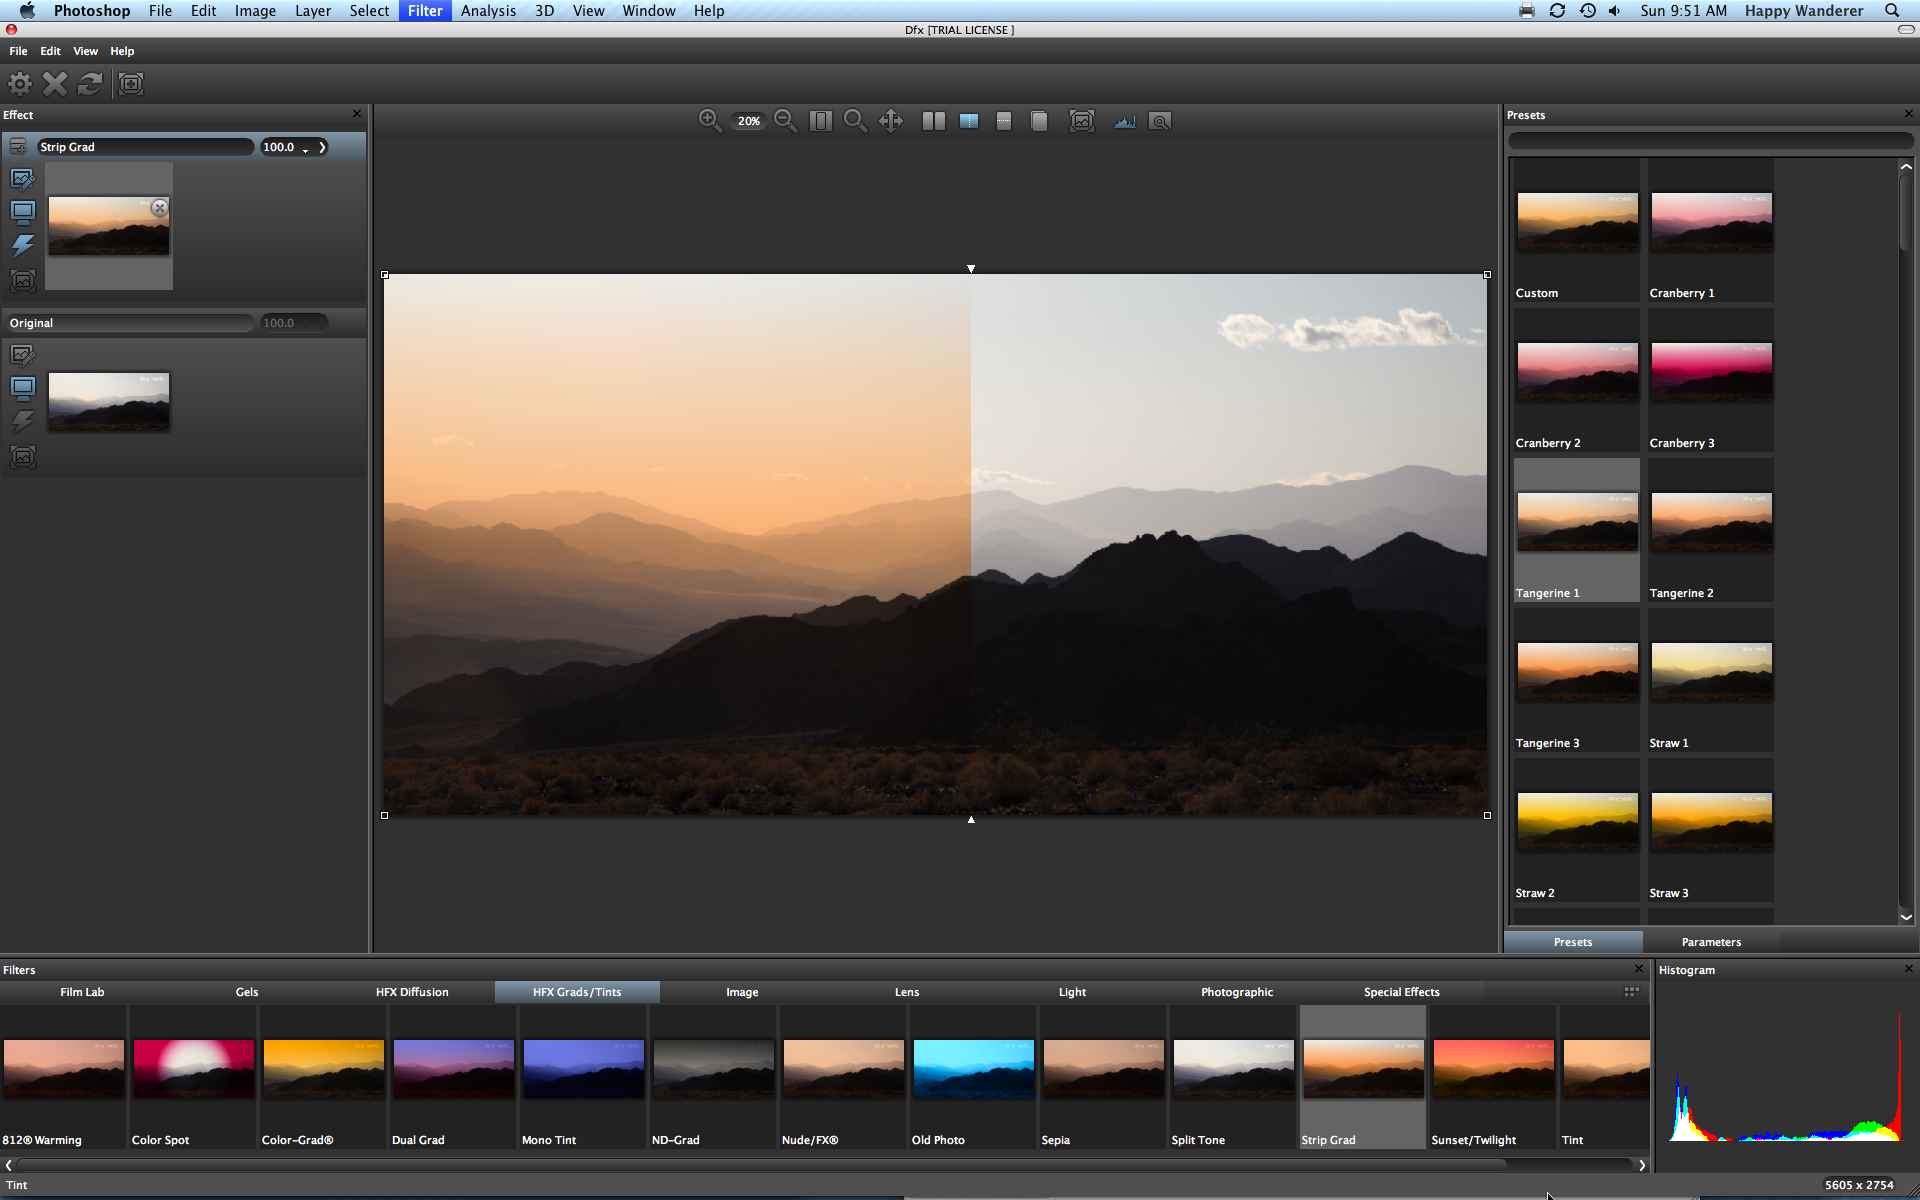
Figure 1. Dfx includes a complete image-editing environment that makes it easy to find and customize the filter you want, as well as to stack multiple filters to create complex effects. Click the image below to see a larger version.

You’ll see a large preview window along with controls for viewing split “before/after” views of your image, as well as side-by-side before/after views.
On the left side is the equivalent of a layer control, which shows your original image, with any filters stacked on top of it as separate layers. Along the bottom of the window are tabs for each category of filter. Note that the previews for each filter show a thumbnail of the filter applied to your actual image. This is a crucial feature, given the suite’s huge number of filters. With these accurate previews, you can easily zero in on the filter you want to use.
Wherever possible, Tiffen has named filters using the same names as the company’s glass filters. If you regularly shoot with a Pro-Mist filter, for example, then you’ll have a good idea of what the suite’s Pro-Mist and Black Pro-Mist filters do.
Click on a filter to select it, and it will be immediately applied to your image. All of that filter’s presets are then shown in a panel to the right.
Figure 2. After selecting a filter, all of its presets appear in the Preset panel. Click the image below to see a larger version.

As with the filters, presets are displayed as thumbnails of your image with each preset applied. Again, this makes it much easier to wade through the suite’s 1,000 options to find an effect that you want.
As long as you’re in the suite, you can click on different presets or change to different filters, and the new effect will be applied and your image preview updated. For the image below, I changed to a less-aggressive preset and activated a split-screen preview to see the filter’s effects.
Figure 3. The same filer as in Figure 2, but now with a less saturated preset, shown using one of the many before/after displays. Click the image below to see a larger version.
If none of the presets for a particular filter are quite right, you can click on the Parameter tab to access a set of parameter controls for that filter. Each filter has its own set of controls, and some filters have a tremendous number of parameters that provide an incredibly granular level of customization.
Figure 4. The editable parameters for the effect used in the previous examples. Each filter provides a different set of parameters.
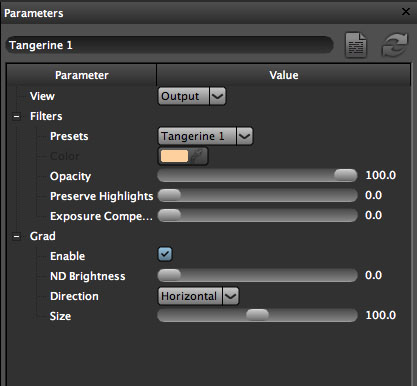
In addition to altering the parameters of a filter to customize its effect, you can also adjust the filter’s opacity to apply less of an adjustment.
It’s impossible to call out all of the cool filters in this collection — there are just too many. Also, in a package like this, it’s difficult to know which filters are useful until you need them. As you browse through the library, some filters seem garish or silly, but when the right image problem comes along, those same filters will suddenly be invaluable.
In general, you can describe these filters as simulations of real-world filter, lens, lighting, and processing effects. Among other things, the filters simulate color, contrast, and gradient filters on a lens. You get filers that simulate development processes, such as cross processing. Other filters simulate the effects of using a gold reflector to bounce warm light into your scene. And on and on. Tiffen provides a complete gallery of filter examples.
Stacking Filters a Big Plus
If Tiffen had shipped with nothing more than the ability to select filters and presets with preview thumbnails, Dx would have been a very good package. But it also includes a set of compositing tools for adding multiple effects to a single image.
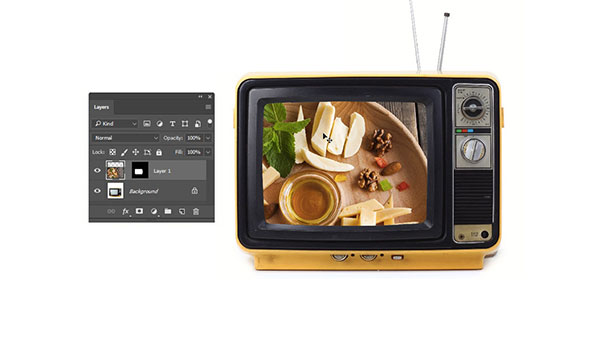
For example, consider this original image:
Figure 5. I’ll process this image with multiple filters. Click the image below to see a larger version.

Say you want this to be a high-key black and white image. A look through the Dfx library results in several filters that might achieve the look you want.
You start with the Bleach Bypass filter, which simulates a traditional film Bleach Bypass effect and immediately results in more contrast.
Figure 6. The Bleach Bypass figure gets you on your way toward a more high-key image. Click the image below to see a larger version.

To make the image grayscale, click the New Effect button in the layers control. This gives you a new layer, which you can load with any filter. The Infrared filter gives you a black and white conversion and moves you farther along the way toward high-key.
Figure 7. Now there are two filters applied, and the image is getting closer to what you had in mind. Click the image below to see a larger version.

With some diffusion, this image will take on a dreamier, more abstract look. That can be important when the subject matter is somewhat abstract to begin with, as it is here.
Figure 8. A Pro-Mist filter gives a nice level of diffusion. Click the image below to see a larger version.

With these four filters, the image is complete. You can now save this collection of filters as a Setup file and re-load it any time you want. This makes it easy to apply the same effect to multiple images.
More Layering Control
Of course, you don’t always want to apply an effect uniformly. Because some filters work better when constrained to only one part of an image, Dfx includes a full set of masking utilities.
The seven masking tools include simple gradient and spot masks, painting masks, and automatic masking tools that can generate masking information à la Photoshop’s Magic Wand tool.
Some filters are designed to be masked, such as the Gobo filter, which simulates a real-world gobo. (A gobo is a metal stencil that you place in front of a light to cast a particular kind of shadow into a scene.)
For example, consider this headshot, which is a little flat and boring.
Figure 9. I’m going to spruce up this simple headshot by using the Gobo filter to place an interesting lighting effect behind the woman.

I begin by adding a Gobo filter to the image, which immediately renders a simulated gobo effect into the scene.
Figure 10. The Gobo filter throws a gobo onto the image, but the default isn’t quite right. Click the image below to see a larger version.
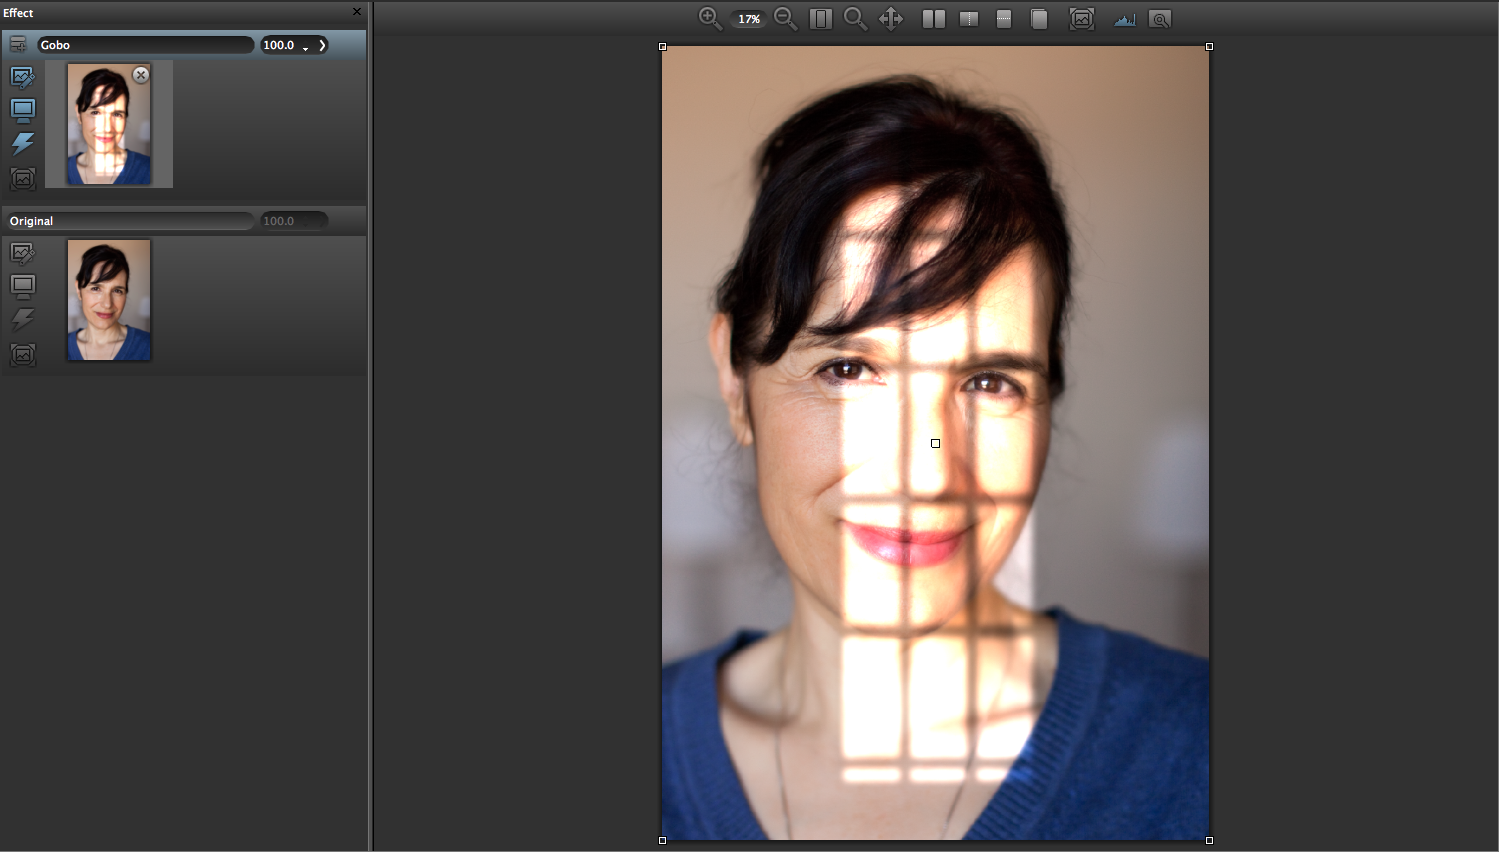
Obviously, this isn’t quite the effect I was looking for, as the gobo is projected over the entire scene. It’s also a little small. I can either select a different preset or choose a different gobo shape from the extensive parameter listing.
Figure 11. The Gobo filter provides a huge assortment of parameters, including a tremendous number of gobo shapes. I’m choosing a window shape that’s a little wider than the default.

But even with a different shape, the effect is still not there.
Figure 12. The new shape is better, but it’s still projected onto the top of the image. Click the image below to see a larger version.

Using the built-in masking tools, I can create a mask that will protect the subject’s face from the effects of the gobo and effectively make it look like it’s being cast behind her.
There are many mask options to choose from. I’ll opt for the Snap mask, which lets me create a mask by simply indicating which elements are inside the mask and which are outside.
Figure 13. Green lines indicate areas inside the mask, red lines indicate areas outside. The Dfx suite automatically generated the selection around her face after I drew the lines. Click the image below to see a larger version.

After the selection is created, I can convert it into an editable vector path and refine it by dragging control points. The gobo effect is already being applied through the mask, though as you can see, it’s still not quite right.
Figure 14. The effect applied through the initial mask. Click the image below to see a larger version.

One click of the Inverse Mask button will swap the colors of the mask, leaving her face masked, and the background open to the effect.
Figure 15. After inversing the mask, the gobo sits behind the subject. Click the image below to see a larger version.

The transition along the edge of the mask is pretty rough. Happily, Dfx has blurring tools that will blur the edge to create a smoother change.
Figure 16. With the gobo in place and its edge blurred, more attention is brought to the subject’s face, making a more compelling image. Click the image below to see a larger version.

Dfx’s masking tools are very well-implemented. While Photoshop has masking tools of its own, if you’re using the stand-alone version of Dfx in conjunction with a program that doesn’t have masking tools (such as iPhoto), the built-in tools are essential.
My only complaint with the program’s masking tools is that there’s no way to output the masks as normal Layer masks or alpha channels in Photoshop. Dfx always applies your effect to the currently selected layer. It would be nice to have the option to automatically create a duplicate of that layer. Even better would be the option to output separate layers with each filter applied to each, and each with its own Layer Mask. This would allow you to refine and alter your masks using Photoshop’s masking tools.
Worth the Money?
There are a lot of plug-in collections around right now, and while some of them provide unique plug-ins that are essential for achieving certain types of specialized effects, there are few that provide as many useful everyday filters. Landscape photographers, portrait and wedding shooters, and event shooters will all find filters to jazz up otherwise mundane images, and with the Dfx interface, they’ll have an easy time using them.
At $99 and with the same capabilities as the $299 plug-in, the standalone version of Dfx seems like a good deal. However, if staying within your primary application (be that Photoshop or Aperture) is important to a smooth workflow, spending the extra cash may be worth it to you.
This article was last modified on December 14, 2022
This article was first published on July 13, 2009
Commenting is easier and faster when you're logged in!

Recommended for you
Photoshop Tip: Pasting into a Selection in Photoshop
Learn how to create layers with layer masks with Photoshop's Paste Into command.

How to Create Kaleidoscopic Patterns in Photoshop
If you’ve been using Photoshop for a while, you’ve probably realised by now you...

CreativePro Tip of the Week: Creating Dotted Lines in Photoshop
This CreativePro Tip of the Week on creating dotted lines in Photoshop was sent...