
Take Picture-Perfect Outdoor Portraits

This tutorial is courtesy of the Photoflex Lighting School.
![]()
One of the difficulties in shooting portraits outdoors is that the available light is not always ideal for photographs. In fact, it’s usually the opposite. With LitePanels, however, you can effectively modify existing light to make it more visually compelling for your portraits.
This lesson explores the use of Photoflex LitePanels in modifying natural light while shooting bridal portraits on location. As you’ll see here, LitePanels are great at providing elegant lighting, quickly and easily.
Lighting Equipment:
* LitePanel 39″x72″ kit
* MultiDisc: 42″ kit
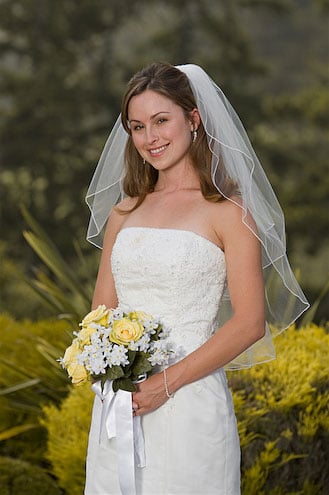
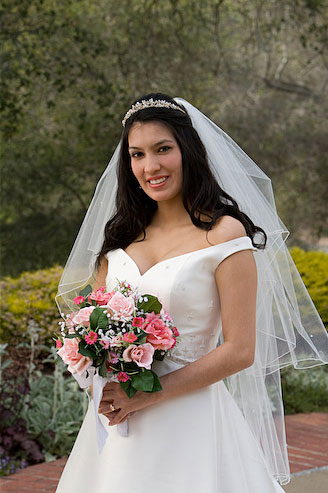
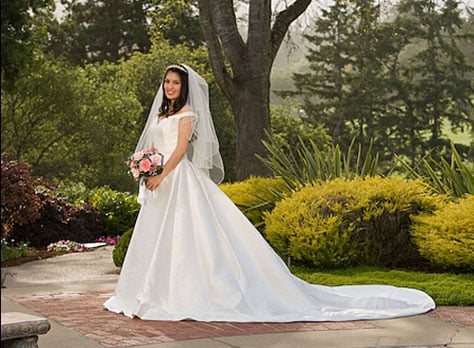
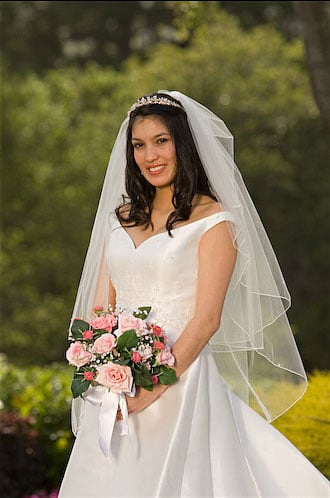
For this lesson, we photographed two different brides, one with dark features and the other with relatively light features. Keep in mind that different skin tones and eye color can require slightly different lighting treatments (Figures 1 and 2).

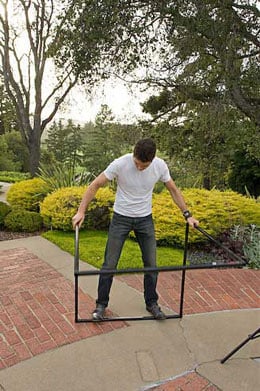
LitePanel Set-Up
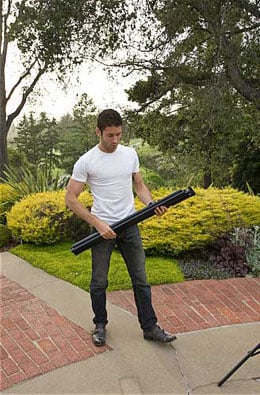
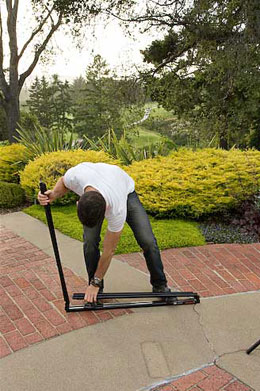
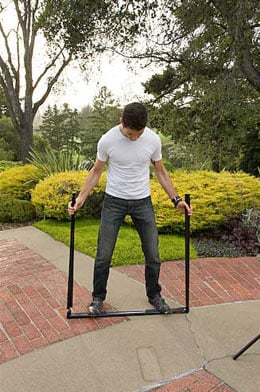
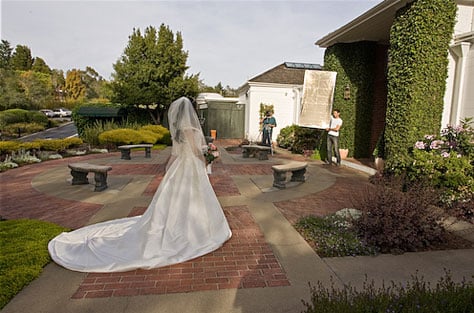
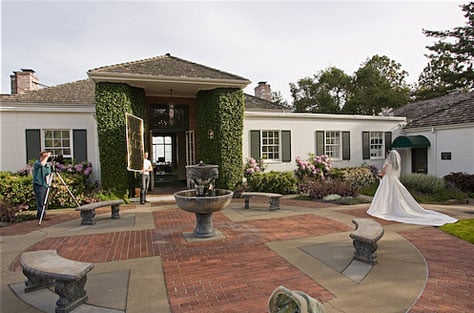
Photoflex LitePanels are lightweight reflectors that are easy to set-up. The series of photos below show how the panel frame unfolds and sets up (Figures 3 through 8).


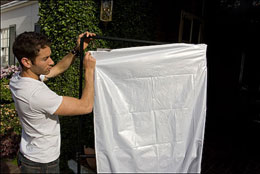
Here, we see the White Translucent fabric being attached (Figure 9).
Diffusing Sunlight
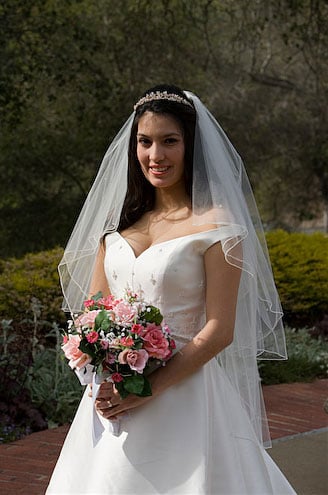
With our first bride in position, we first wanted to show how to diffuse sunlight using a single LitePanel with White Translucent fabric.
In this first result shot, the bride is placed in direct, high-contrast sunlight. Notice how she is turned at an angle to the light? Once the LitePanel is in position, you’ll see how it will soften the contrast, yet maintain the three-dimensional quality (Figure 10).
Next, our assistant held the LitePanel between the sun and the bride. You can use a LiteStand to hold the LitePanel, but many wedding photographers prefer to use an assistant on a wedding shoot, since the pace is usually fast. The quicker you can move your gear around, the better (Figure 11).
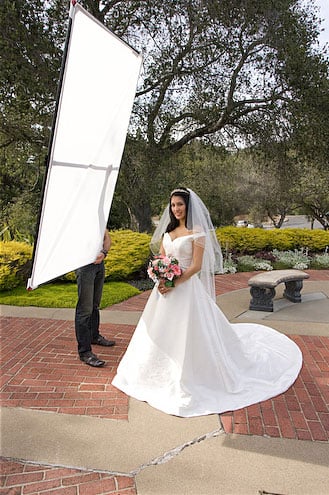
In the result shot, we see a soft light quality that wraps around the bride’s face and body (Figure 12).
Reflecting Sunlight
Next, we decided to use reflective fabric – rather than translucent fabric – to bounce sunlight into that shadow areas of the brides.
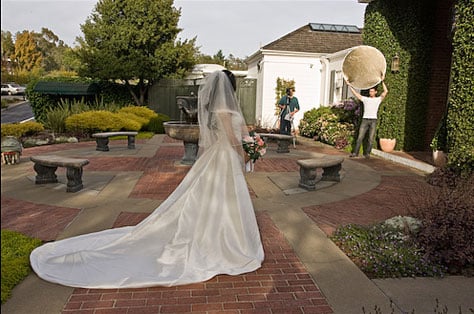
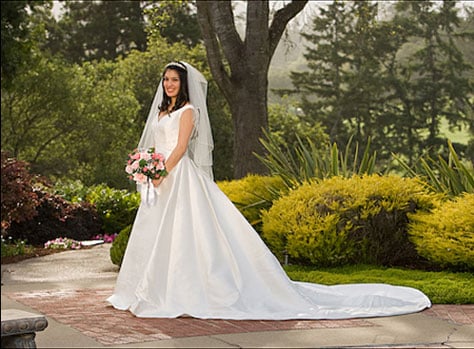
For the full-length bridal portrait, the bride was placed in a shady spot where the sun illuminated the patio a few feet in front of her. If you’re going to use a reflector as the main light on your subject, it’s usually best to choose a backlit setting. This allows you to reflect sunlight or skylight back into the shadow areas of your subject. Here, we chose an uncluttered natural background for the first bride (Figure 13).
This set-up shows the assistant holding the Soft Gold LitePanel. Notice that the Panel is off to one side defining the direction of light and the panel is slightly tilted. The other advantage with having an assistant is that they can see the light hitting the subject and can adjust the angle as needed. Here, we chose the Soft Gold fabric to provide a warm glow light for the bride (Figure 14).
This second perspective shows the distance and angle of the LitePanel to the bride (Figure 15).
Next, we took some shots with the second bride. For comparison sake, we first took a shot without the LitePanel fill (only indirect sunlight captured here) and then used the LitePanel with Soft Gold fabric as a fill (Figures 16 and 17).
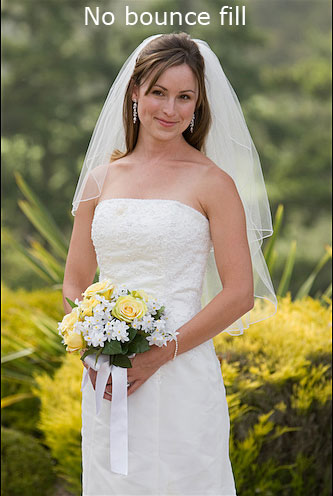
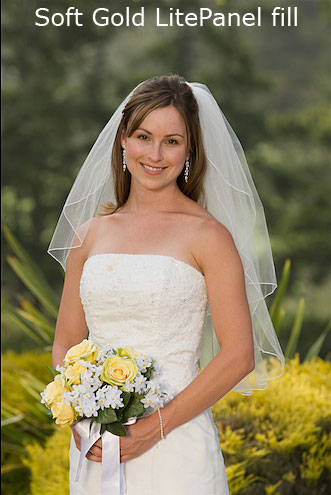
The light in figure 16 is relatively flat compared to the light in figure 17, which looks more directional. Another benefit is that the bride’s eyes and facial features stand out more with the LitePanel bounce fill.
The 5’n1 Reflector
When you need to travel with less equipment, you can substitute your LitePanel system with the Photoflex 42″ MultiDisc 5’n1 Kit, which features 5 collapsible reflectors.
Below, you can see the set-up and results of using the more compact MultiDisc gold reflector (Figures 18, 19, and 20).
One of the primary advantages to using both the LitePanel Kit and the 5’n1 MultiDisc Kit is that you have the ability to use different reflective fabrics. The series below shows the results with the White, Silver, and Gold fabrics (Figure 21).

Conclusion
As we’ve seen in this lesson, managing outdoor lighting situations can be easy if you have the right tools. Remember to experiment with your lighting, and above all, have fun!
This article was last modified on January 6, 2023
This article was first published on January 27, 2011
Commenting is easier and faster when you're logged in!

Recommended for you

Thoughts on the Sony A6000 Mirrorless Camera
Mirrorless cameras have been both a hot topic and a subject of some debate. Duri...

All Photos Are Manipulated
“Has that been Photoshopped a lot?” I sometimes hear that question w...

Lightbox Photography Cards
In the past, we’ve seen plenty of cool Kickstarter projects to create deck...