
WordPress’s early claim to fame was as a tool that made it easy to create and maintain simple blogs. If that were all it did, it would still be useful for creative pros, since a blog can be a good way to promote yourself. (I use WordPress for my portfolio and tutorial sites.) But thousands of institutions also rely on sites that were built at least in part with WordPress: WSJ.Magazine, Eye-Fi, College Crunch, and others.
In this how-to, I’ll go over the basics of setting up a WordPress blog, with useful tips and tricks you won’t find in the official documentation. Then I’ll get into how to add text and images, set up categories and tags, and publish your first post.
Step 1
You can set up a WordPress blog for free at WordPress.com. However, your server space would be smaller than what you get at many hosting companies, and your site’s URL would be https://[yourblognamehere].wordpress.com. If those limitations don’t work for you, I recommend that you set up your blog with its own .com registration via a hosting company.
If you already have a .com Web site, it’s best to install the WordPress software onto a directory on your site. For example, instead of setting up my blog at blog.chadneuman.com, I set it up in a directory, www.chadneuman.com/blog/.
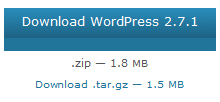
To install the software, go to WordPress.org, not WordPress.com. Click the download link, uncompress the folder, and upload its contents via FTP to a directory of your choosing. If your hosting server has a one-click-install set-up (mine does), this process is even easier. Either way, the software will be uploaded to your web site.
Step 2
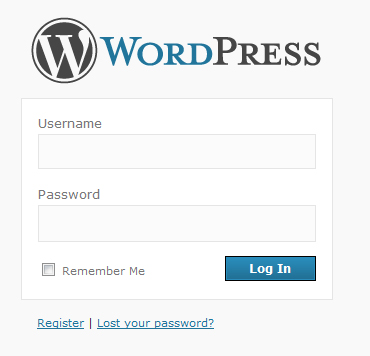
WordPress will e-mail you a link to install your blog on your server and generate a random password for you. Be sure to write this down; I copy it to the clipboard, as well. The username will be “admin.”
After the blog is installed — and anytime you want to log in — type “wp-login.php” or “wp-admin” after the directory or site URL in which your blog is installed; for example, “/blog/wp-login.php.” Log in using the admin username and your password.
Step 3
Once you’ve signed in, you’ll see the Dashboard. From here, you can see how many posts, pages, categories, and tags your blog has. You can also find other options, such as link list, media library, plug-ins, appearance themes, and other settings.

Change your password immediately by clicking on “admin” in the upper right hand corner. If you’d like, you can change your display name from admin to whatever name you want associated with your blog posts.
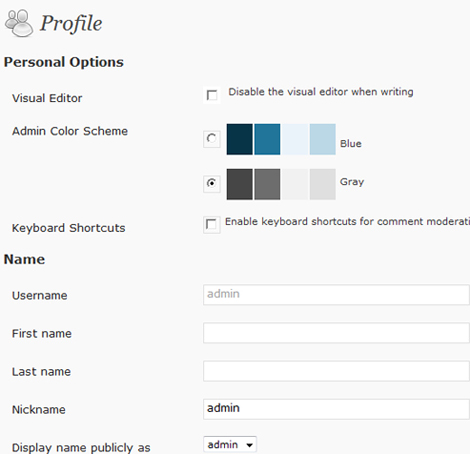
Be sure to click Update Profile if you change any of the settings, including your password.
Step 4
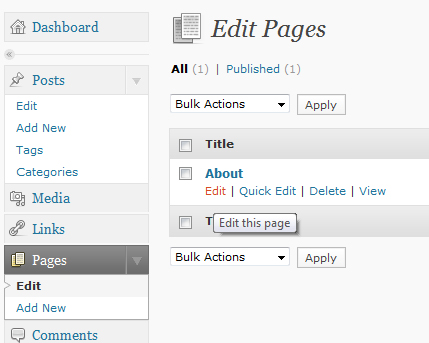
Now’s a good time to add an About page. Note that I said “page,” not “post.” Posts are actual blog posts, while pages are usually static and contain information not found on a blog post, such as contacts, FAQs, and, in this case, details about you.
To create this page, click Pages in the Dashboard’s left navigation column and then click Add New. To change an existing page, hover the mouse over it, then edit it, delete, or view the page.
Step 5
After clicking Edit, open the About page.
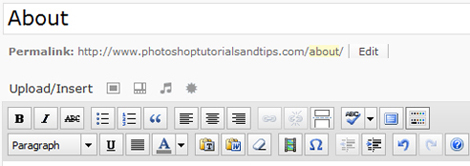
Near the top of the text area is the title and the permalink. The permalink is the permanent link of the URL, whether it’s a page or post.

Type in some text to describe the site.
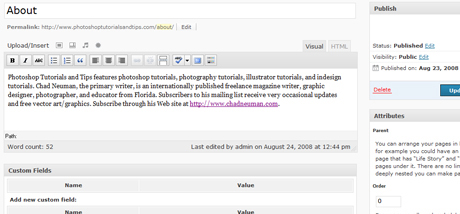
Immediately above the text area are options for such word-processing functions as bold, italics, strikethrough, bullet points, and block quotes. The block quotes are helpful for quoting large sections of text. You can also justify text (left, center, and right), add or remove links, and spell check.
Click the icon on the far right, which looks like a color palette. That’s the Kitchen Sink, and it brings up a second set of options: paragraph font formatting, underline, full justify, text color, paste as plain text, paste from Microsoft Word, remove formatting, insert/edit embedded media, insert custom character, outdent and indent, undo, redo, and help.
Wondering why you’d want to remove formatting? Often when you paste text from Microsoft Word, it comes in with hidden formatting that may affect the blog theme’s formatting. Removing the hidden Word formatting can help.
WordPress’s default is the Visual editor, which won’t show you hidden formatting. To see hidden formatting, or the source code of a blog page or post, click the HTML tab above the text area.

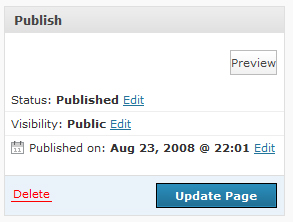
On the right-hand side of the editor, you can set the attributes of the page (or post) to pending review, draft, or published. You can set the visibility to private, password-protected, or public. If it’s private, only people signed in as the blog administrator can see the posts.
After typing in a description of your blog, click Update Page to save changes.
Step 6
Let’s create a blog post. When you install a new WordPress blog, it automatically includes a blog post entitled “Hello World!” To edit that post, click on Edit under Posts on the left-hand side of the Dashboard. To create a new blog post, click Add New.

Step 7
You may notice that the blog post editor is the one you used to create and edit pages. Type in a title at the top and some text in the editor area.

Tip: In the Visual mode, press Shift-Enter to insert a single line break, and press Enter to drop a double line break between paragraphs. In HTML mode, you can insert the code </br> to insert a single-line break, or <p> to insert a larger line break.
Step 8
To insert an image, click the icon just to the right of the words “Upload/Insert.”

Upload an image from your computer, then add a caption and description. Choose whether the image will link to another page or image. Set the alignment in relation to the surrounding text and the size and click Insert into Post.
You can also insert images that are online by entering their URLs. Once you’ve uploaded an image, whether from your computer or the Internet, it’s in your site’s Media Library, and you can insert it again at any time.

Note that it’s better to resize an image in Photoshop or a similar photo-editing program than to resize it in WordPress. Not only will the Photoshop-resized image look better, but inserting a large image and resizing it to be smaller in WordPress still loads a large file, potentially slowing down your site.
Step 9
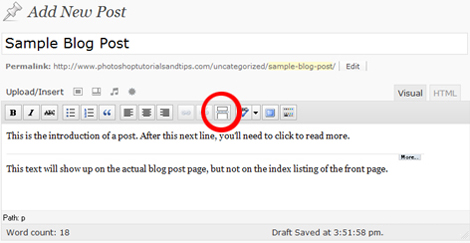
If your blog post is on the long side, you may not want it all to display on the blog’s front or index page. Instead, you may want to have readers click through to a specific post page to see the entire post.
To set the spot where the text will end on the front page, click the More tag (circled in red in the screenshot below). Now when this post is displayed on the front page, or in the monthly archive of posts, or the category index, it will display only the content before the More tag until visitors click the Read More link.
Almost done! Go to page 2 for the last few steps.
This article was last modified on January 8, 2023
This article was first published on April 23, 2009
Commenting is easier and faster when you're logged in!

Recommended for you

10 Find/Change Tips
Want to learn more about Find/Change? Check out these 10 Find/Change tips!

Zevrix Solutions Releases InPreflight 2 for Adobe InDesign
Zevrix Solutions is proud to announce the release of version 2.0 of InPreflight,...
Type Posters, Prints, and Notecards
You don’t have to be a full-on type nerd to appreciate the artwork for sal...